
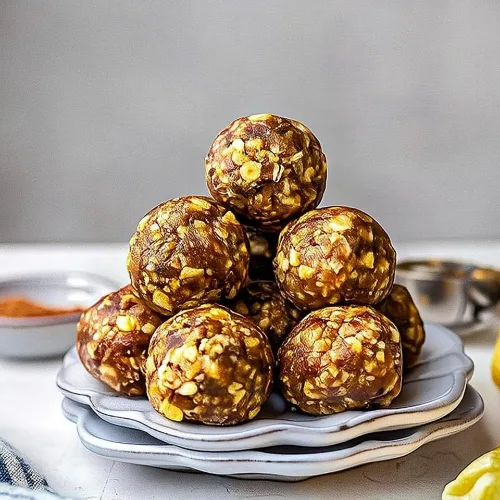
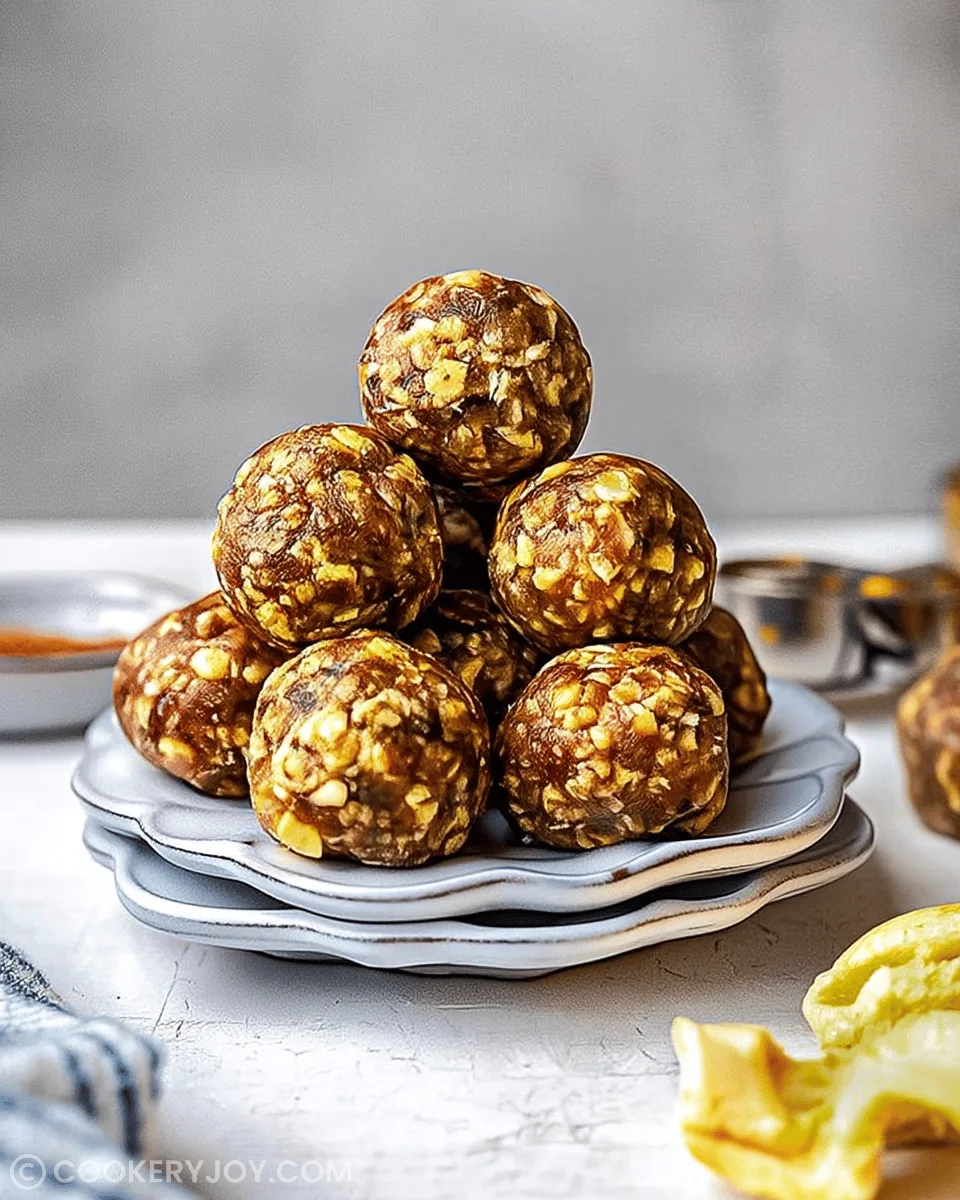
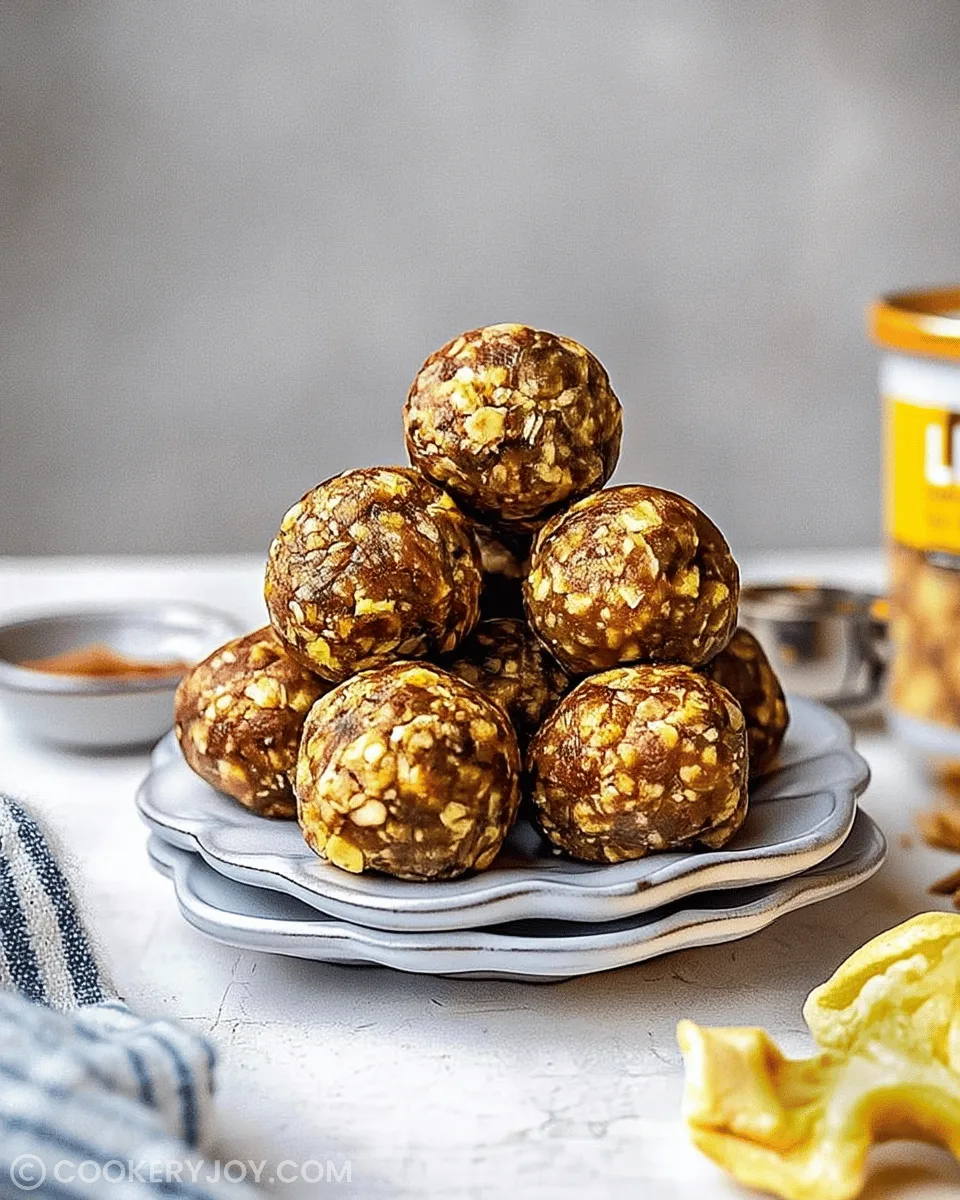
The soft, creamy texture of ripe banana blends seamlessly with the nutty richness of peanut butter in these banana protein balls, creating a snack that’s both satisfying and energizing without any baking required. Rolled oats and protein powder add heartiness and a boost of nutrition. Thus, they suit on-the-go moments perfectly.
I often reach for these when I’m juggling a busy day. They come together in just minutes. Plus, they keep me fueled through afternoon slumps. They’re versatile enough to enjoy straight from the fridge. Or, freeze them for longer storage. My family appreciates the subtle cinnamon warmth. It makes them feel like a treat, not just healthy fuel.
Why You’ll Love This Recipe
- Quick No-Bake Prep: These banana protein balls come together in under 30 minutes with minimal cleanup. Thus, they’re ideal for busy schedules.
- Nutrient-Packed Snack: Each ball delivers protein and fiber from oats and powder. So, they keep you full without added sugars.
- Customizable Sweetness: Adjust with optional honey or flavored protein. This creates a personalized treat that suits your taste.
- Family-Friendly Appeal: The soft, chewy texture and banana flavor make them a hit with kids and adults alike.
- Make-Ahead Convenience: Store them in the fridge or freezer. Grab-and-go energy lasts throughout the week.
Banana Protein Balls Ingredients
These ingredients combine the natural sweetness of banana with the creaminess of peanut butter. They also use the wholesome base of oats. As a result, banana protein balls become nutritious yet indulgent. Opting for fresh, high-quality items like natural peanut butter elevates the flavor. It ensures a better texture every time.
- Overripe banana: Provides natural moisture and sweetness to bind the mixture without added sugars.
- Old-fashioned rolled oats: Adds hearty texture and fiber for a chewy, satisfying bite.
- Natural peanut butter: Brings creamy richness and healthy fats to hold everything together.
- Vanilla protein powder: Boosts protein content for a filling snack that supports energy needs.
- Ground cinnamon: Infuses warm spice to enhance the banana flavor subtly.
- Honey: Offers optional extra sweetness if you prefer a touch more indulgence.
Note: The complete list of ingredients and exact measurements can be found in the printable recipe card at the bottom of the post.
How to Make Banana Protein Balls
Step 1: Mash the Banana
In a large mixing bowl, mash the overripe banana until it becomes smooth and almost liquid-like. This helps it blend easily with the other components. Therefore, this step ensures the mixture binds well. It avoids any chunks disrupting the texture.
Step 2: Combine Wet Ingredients
Add the peanut butter and optional honey to the mashed banana. Then, stir vigorously until fully incorporated and creamy. The warmth from stirring helps everything emulsify smoothly. So, you get a cohesive base.
Step 3: Mix in Dry Ingredients
Incorporate the rolled oats, protein powder, and cinnamon into the wet mixture using a sturdy spoon. Stir until a thick, sticky dough forms that holds together when pressed. If the dough feels too wet and hard to handle, cover the bowl. Then, refrigerate it for about 20 minutes to firm up slightly.
Step 4: Roll into Balls
Scoop out tablespoon-sized portions of the dough. Gently roll them between your palms to create uniform spheres. Aim for about 20 balls total. Work quickly to avoid the dough warming and sticking too much.
Pro Tips for Success
- Use Overripe Bananas: Choose spotted ones for maximum sweetness. They make mashing easier. Thus, you achieve the right sticky consistency.
- Stir Thoroughly: Mix wet ingredients first. This ensures even distribution before adding dry ones. So, you prevent powdery lumps.
- Chill if Needed: Refrigerate the dough briefly if it’s too soft. As a result, rolling becomes easier. It also helps maintain shape.
- Adjust for Sweetness: Taste the dough and add a bit more honey if desired. Or, opt for sweetened protein powder for balance.
- Check Oats for Gluten-Free: Use certified gluten-free rolled oats. This keeps the banana protein balls suitable for dietary needs.
How to Serve Banana Protein Balls
Garnishes
I like to sprinkle a few crushed nuts or shredded coconut on top of my banana protein balls right before serving. This adds a subtle crunch that contrasts the soft interior. A light dusting of extra cinnamon adds a warm, aromatic finish. It avoids overpowering the natural banana flavor. These simple touches make them feel more special during snack time.
Side Dishes
Pair these banana protein balls with fresh fruit like apple slices. This creates a balanced, hydrating snack that keeps energy steady. Greek yogurt on the side complements the peanut butter notes with its tanginess and creaminess. I find this combo perfect for a quick breakfast boost on rushed mornings.
Creative Ways to Present
For a fun twist, I arrange the banana protein balls on a platter with toothpicks. This allows easy grabbing at gatherings. It turns them into bite-sized party favors. Layer them in a jar with yogurt and berries for an overnight snack parfait. This reveals cozy layers. Such presentation makes them versatile for meal prep or sharing with friends.
Make Ahead and Storage
Storing Leftovers
I store my banana protein balls in an airtight container in the refrigerator. There, they stay fresh and firm for up to one week. This keeps their chewy texture intact without drying out. Just grab one whenever you need a quick energy hit.
Freezing
For longer storage, I place the balls in a single layer on a baking sheet to freeze initially. Then, transfer them to a freezer-safe bag for up to a month. This method prevents them from sticking together. They’re great as a pre-workout snack straight from the freezer.
Reheating
Since these are no-bake, I simply let the banana protein balls thaw at room temperature for a few minutes. Or, do it in the fridge overnight to restore their soft texture. If you’re in a hurry, a quick 10-second microwave zap works. But, cover them loosely to avoid any toughness. I prefer the fridge method to keep them tasting fresh.
Print
Banana Protein Balls for Healthy Snacking
- Prep Time: 10 minutes
- Cook Time: 0 minutes
- Total Time: 30 minutes
- Yield: 20 balls
- Category: Snacks
- Method: No-Bake
- Cuisine: American
- Diet: Vegetarian
Description
Healthy no-bake banana protein balls made with mashed banana, oats, peanut butter, and protein powder for a quick, nutritious snack.
Ingredients
- 1 medium overripe banana, mashed
- 2 cups old-fashioned rolled oats
- 1/2 cup natural peanut butter
- 2 scoops vanilla protein powder
- 1 teaspoon ground cinnamon
- 1 tablespoon honey (optional, for extra sweetness)
Instructions
- In a large mixing bowl, mash the banana until it reaches a smooth, liquid-like consistency.
- Add the peanut butter and honey to the banana and stir until well combined.
- Incorporate the rolled oats, protein powder, and cinnamon. Mix with a sturdy spoon until a thick, sticky dough forms.
- If the mixture feels too wet to handle, refrigerate the dough for 20 minutes to firm up.
- Scoop out tablespoon-sized portions and roll them between your palms to form uniform spheres.
- Store the bites in an airtight container in the refrigerator for up to one week or freeze them for a quick pre-workout snack.
Notes
- Honey is optional; omit for a fully vegan version if using plant-based protein powder.
- Adjust sweetness by adding more honey or using sweetened protein powder.
- These protein balls are gluten-free if using certified gluten-free oats.


