
That unmistakable aroma of savory beef and onions simmering slowly on the stovetop always transports me back to my grandmother’s kitchen on a chilly Sunday afternoon. The anticipation of those tender, melt-in-your-mouth morsels smothered in a rich, velvety gravy was, and still is, pure bliss. It wasn’t just a meal; it was a hug in a bowl, a testament to how simple ingredients, treated with a little love and patience, can create something truly extraordinary.
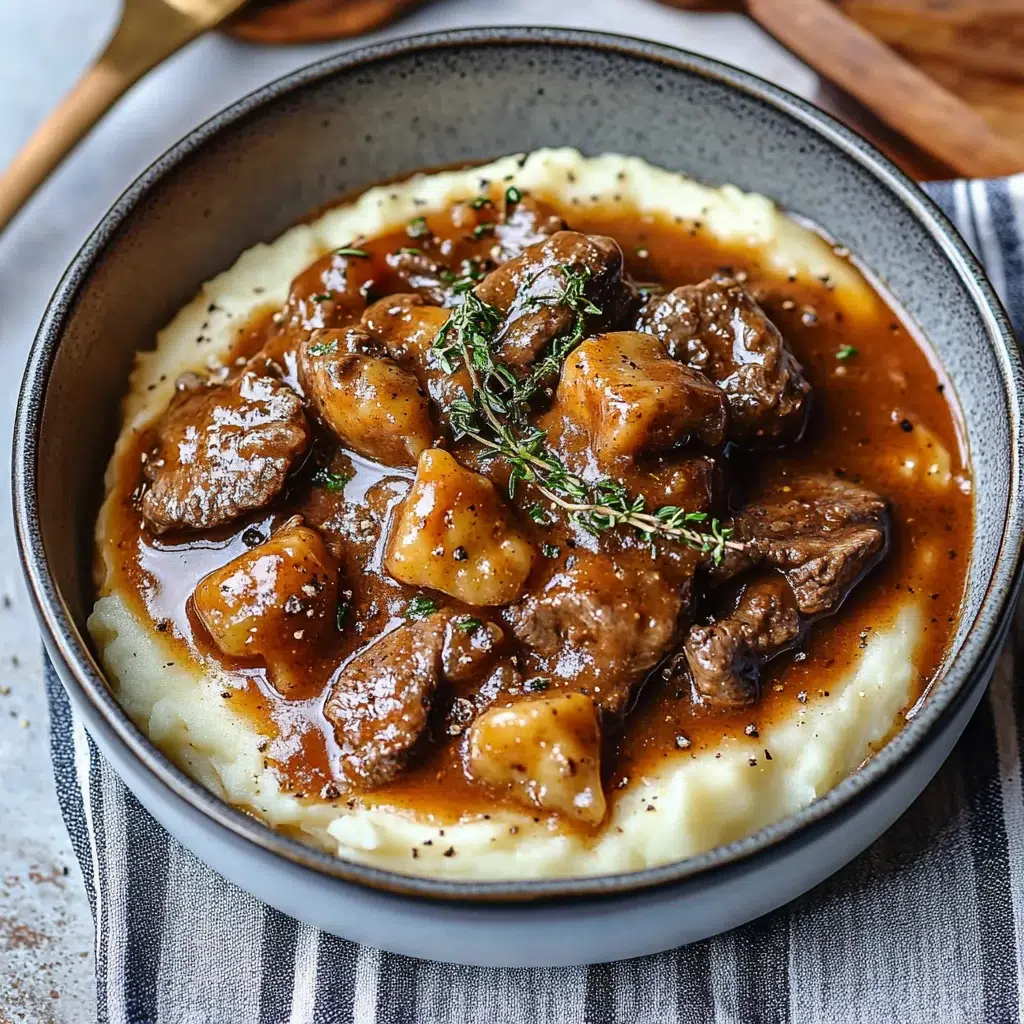
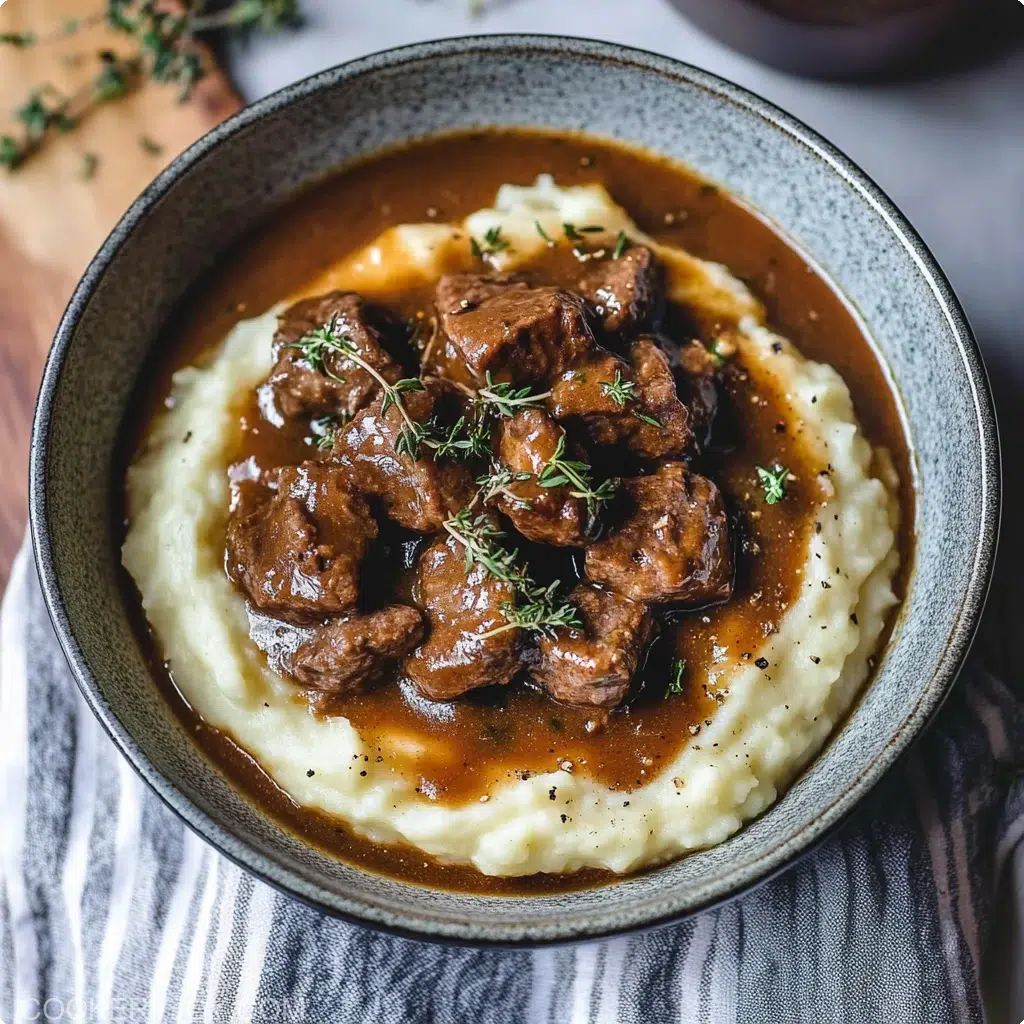
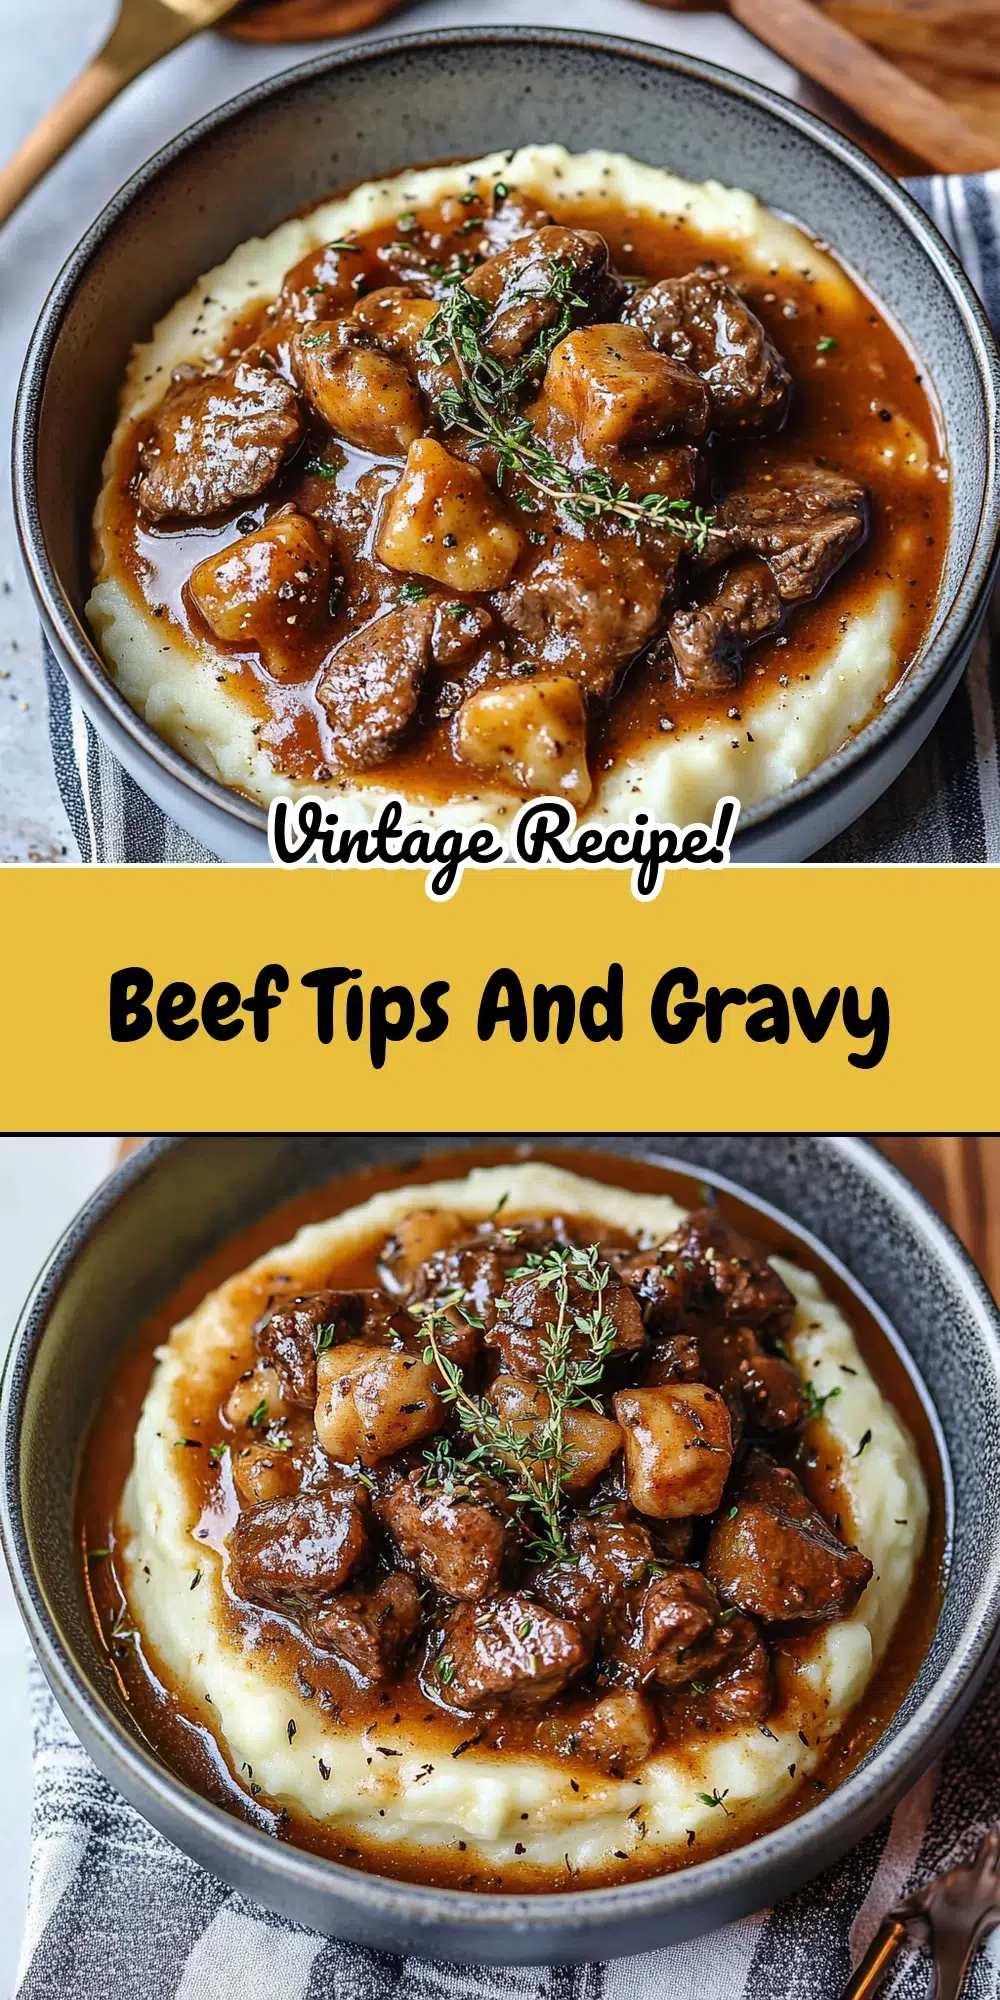
Beef Tips and Gravy is a classic comfort food dish beloved for its hearty flavors and incredibly tender beef. Cubes of beef are seared to perfection, then simmered slowly in a deeply flavorful gravy, creating a dish that’s both rustic and wonderfully satisfying. It’s the kind of meal that’s perfect for a cozy weeknight dinner when you need something to warm you from the inside out, but it’s also impressive enough for a Sunday supper with family or a casual gathering with friends. This recipe for beef tips is one you’ll turn to again and again.
Why You’ll Love This Recipe
- Incredibly Flavorful: The combination of seared beef, aromatic vegetables, rich beef broth, and savory seasonings creates a depth of flavor that is simply irresistible. Each bite of these beef tips is a taste of home.
- Melt-in-Your-Mouth Tender: Slow simmering is the secret to achieving exceptionally tender beef tips. Even tougher cuts of beef transform into succulent, fork-tender pieces that practically dissolve in your mouth.
- Versatile and Customizable: This beef tips recipe is wonderful served over mashed potatoes, egg noodles, rice, or even biscuits. You can also easily adjust the seasonings to suit your personal taste preferences.
- Perfect for Meal Prep: Beef Tips and Gravy reheats beautifully, making it an excellent option for meal prepping. Prepare a batch on the weekend and enjoy delicious, home-cooked meals throughout the week.
- Crowd-Pleaser: This is a dish that appeals to all ages. Its hearty, comforting nature makes it a guaranteed hit with both kids and adults, making it ideal for family dinners.
Ingredients for Beef Tips And Gravy

Core Ingredients
- 2 pounds stew meat, cubed: Look for well-marbled beef, as the fat will render down during cooking, adding flavor and tenderness to the beef tips. Chuck roast, cut into 1 to 1.5-inch cubes, is ideal.
- 1 teaspoon salt: Essential for seasoning the beef and enhancing the overall flavor.
- 1 teaspoon black pepper: Adds a gentle warmth and classic flavor.
- 3 tablespoons all-purpose flour: Used to coat the beef, which helps with browning and also acts as a thickener for the gravy.
- 1 tablespoon brown sugar: Adds a subtle sweetness that balances the savory notes and helps with caramelization.
- 3 tablespoons olive oil: For searing the beef tips and sautéing the vegetables.
- 2 tablespoons butter: Adds richness and flavor to the searing process and the gravy.
- 1 onion, diced: Provides an aromatic base and sweetness to the gravy. Yellow or white onions work well.
- 3 cloves garlic, minced: Adds a pungent, savory aroma and flavor. Fresh garlic is always best.
- 3 cups beef broth: The primary liquid for the gravy. Choose a good quality, low-sodium broth if possible, so you can control the saltiness.
- 2 tablespoons Worcestershire sauce: Adds a complex, umami depth to the gravy.
- 2 tablespoons soy sauce: Enhances the savory flavor and adds a touch of saltiness. Use low-sodium if preferred.
- 1/4 teaspoon paprika: Contributes a mild, sweet pepper flavor and a lovely color to the dish. Smoked paprika can also be used for a smokier taste.
- 1/2 teaspoon red pepper flakes (optional): For a hint of warmth and spice. Adjust to your preference or omit entirely.
- 2 bay leaves: Infuse the gravy with a subtle herbal aroma during simmering. Remember to remove them before serving.
- 2 sprigs fresh thyme: Adds a classic, earthy flavor that complements beef beautifully. You can substitute with 1/2 teaspoon dried thyme.
- 3 tablespoons cornstarch: Used to create a slurry to further thicken the gravy to the perfect consistency.
- 1/4 cup water: Mixed with the cornstarch to create the slurry. Cold water works best to prevent clumping.
Substitutions and Tips
- Flour Substitute: For a gluten-free version, you can use a gluten-free all-purpose flour blend or cornstarch to coat the beef tips. You may need slightly less cornstarch.
- Beef Broth Alternative: If you don’t have beef broth, you can use vegetable broth or even chicken broth, though beef broth provides the richest flavor for this dish. A good quality beef bouillon dissolved in water also works in a pinch.
- Herb Variations: Feel free to add other herbs like fresh rosemary or marjoram. If using dried herbs, generally use about one-third the amount of fresh.
- Spice Level: Chef’s Insight: For a spicier kick, add a pinch more red pepper flakes or a dash of your favorite hot sauce to the gravy.
- Vegetable Additions: While not traditional, you could add sliced mushrooms, carrots, or celery along with the onions for extra vegetables and flavor. Sauté them until softened.
- Wine for Deglazing: Chef’s Insight: For an even richer flavor, deglaze the pot with 1/4 to 1/2 cup of dry red wine (like Merlot or Cabernet Sauvignon) after searing the beef and before adding the broth. Let the wine reduce by half before proceeding.
Best Type of Beef to Use
For the most succulent and flavorful beef tips, choosing the right cut of beef is crucial. You’re looking for a cut that benefits from slow, moist-heat cooking, which allows tough connective tissues to break down, resulting in that desirable melt-in-your-mouth texture.
Chuck roast is widely considered the gold standard for stew meat and, consequently, for beef tips. It comes from the shoulder of the cow and has a good amount of marbling (intramuscular fat) and connective tissue. This marbling bastes the meat as it cooks, keeping it moist, while the connective tissue (collagen) melts into rich gelatin, contributing to both the tenderness of the beef and the body of the gravy. When buying chuck roast, look for a piece with visible streaks of fat. You can buy it as a whole roast and cube it yourself (about 1 to 1.5-inch pieces are ideal) or purchase pre-cut stew meat, which is often from the chuck.
Viable Alternatives:
- Round Roast (Bottom Round or Top Round): These cuts are leaner than chuck but can still become tender if cooked slowly for a sufficient amount of time. They might not be quite as unctuous as chuck due to less marbling and collagen, but they are a more budget-friendly option. Ensure you don’t overcook them, as they can dry out more easily than chuck.
- Brisket: The flat cut of brisket, when trimmed and cubed, can also be used. It’s rich in flavor and becomes very tender with long, slow cooking. It has a distinctly beefy taste that works wonderfully in this dish.
- Sirloin Tip Roast: This cut is leaner than chuck but can still yield tender beef tips if cooked properly. It has a good beefy flavor. Like round roasts, be careful not to overcook it.
Avoid using naturally tender, more expensive cuts like tenderloin or ribeye for this recipe. While delicious for grilling or pan-searing, they don’t benefit from long, slow cooking and can become tough or dry when prepared this way. The magic of beef tips lies in transforming tougher, more flavorful cuts into something incredibly tender and delicious.
Kitchen Tools You’ll Need
Having the right tools makes preparing these beef tips and gravy a breeze. Here’s what I recommend:
Must-Have Tools
- Large Heavy-Bottomed Pot or Dutch Oven: This is essential for even searing and gentle simmering. A Dutch oven (enameled cast iron is fantastic) retains and distributes heat exceptionally well, preventing hot spots and ensuring your beef tips cook evenly without scorching. A sturdy stockpot will also work. Aim for one that’s at least 5-6 quarts in size.
- Sharp Chef’s Knife: For cubing the beef (if not buying pre-cut stew meat) and dicing the onion. A sharp knife makes prep work safer and more efficient.
- Cutting Board: A large, stable cutting board is necessary for preparing your ingredients. Use a separate one for meat if possible, or wash thoroughly after cutting meat.
- Wooden Spoon or Heat-Resistant Spatula: For stirring the ingredients, scraping up any browned bits from the bottom of the pot (that’s flavor!), and preventing sticking.
- Measuring Spoons and Cups: For accurately measuring all your ingredients, which is key to consistent results.
- Small Bowl: For making the cornstarch slurry.
Nice-to-Have Extras
- Tongs: Useful for turning the beef tips individually during searing to ensure all sides are nicely browned.
- Whisk: Helpful for incorporating the cornstarch slurry smoothly into the gravy to avoid lumps.
- Meat Thermometer: While slow cooking typically ensures tenderness, a meat thermometer can confirm the beef is cooked through if you’re unsure, though for beef tips, “fork-tender” is the best indicator.
- Fat Separator: If you prefer a less fatty gravy, a fat separator can be used to remove excess fat from the cooking liquid before thickening. However, much of the fat contributes to the flavor of these beef tips.
How to Make Beef Tips And Gravy
This recipe breaks down into a few simple stages: searing the beef, building the aromatic base, simmering to tender perfection, and finally, thickening the gravy. Follow these steps for delicious beef tips every time.
Step 1: Prepare and Sear the Beef
Pat the cubed stew meat dry with paper towels; this helps achieve a better sear. In a medium bowl, combine the beef cubes with the salt, black pepper, all-purpose flour, and brown sugar. Toss well to ensure each piece of beef is lightly coated. The flour helps create a nice crust, and the brown sugar aids in caramelization.
Heat the olive oil and butter in your large heavy-bottomed pot or Dutch oven over medium-high heat. Once the butter is melted and the oil is shimmering, add half of the seasoned beef tips to the pot in a single layer. Pro-Chef Tip: Don’t overcrowd the pot! Searing in batches ensures the beef browns nicely rather than steams. Cook for 2-3 minutes per side, until nicely browned. You’re looking for a deep, golden-brown crust – this is where a lot of the flavor comes from. Remove the browned beef tips with a slotted spoon and set them aside on a plate. Repeat with the remaining beef.
Step 2: Sauté Aromatics
To the same pot (don’t clean it!), add the diced onion. There should be enough residual fat from searing the beef; if not, add another teaspoon of olive oil. Sauté the onion over medium heat for about 5-7 minutes, stirring occasionally, until softened and translucent. Add the minced garlic and cook for another minute until fragrant. Be careful not to burn the garlic, as it can become bitter.
Step 3: Deglaze and Build the Gravy Base
Pour in about 1/2 cup of the beef broth to deglaze the pot. Use your wooden spoon or spatula to scrape up any browned bits (fond) stuck to the bottom of the pot. These bits are packed with flavor and will enrich your gravy.
Once the bottom of the pot is scraped clean, add the remaining beef broth, Worcestershire sauce, soy sauce, paprika, and optional red pepper flakes. Stir well to combine.
Step 4: Simmer the Beef Tips
Return the seared beef tips (and any accumulated juices from the plate) to the pot. Add the bay leaves and fresh thyme sprigs. Bring the liquid to a gentle simmer. Once simmering, reduce the heat to low, cover the pot, and let it cook for 1.5 to 2 hours, or until the beef tips are fork-tender. Sensory Cue: The beef is ready when it can be easily pierced and shredded with a fork. The aroma filling your kitchen will be absolutely irresistible! Stir occasionally during simmering to prevent sticking, adding a little more broth or water if the liquid reduces too much.
Step 5: Thicken the Gravy
Once the beef tips are tender, remove the bay leaves and thyme sprigs. In a small bowl, whisk together the cornstarch and cold water until smooth, creating a slurry. Slowly pour the cornstarch slurry into the simmering gravy while stirring constantly. Continue to cook and stir for another 2-3 minutes, or until the gravy has thickened to your desired consistency. Pro-Chef Tip: Bring the gravy back to a gentle boil after adding the slurry to fully activate the cornstarch and cook out any starchy taste.
Step 6: Serve and Enjoy
Taste the gravy and adjust seasonings if necessary. You might want to add a little more salt, pepper, or even a splash more Worcestershire sauce. Serve your delicious beef tips and gravy hot over creamy mashed potatoes, fluffy rice, egg noodles, or alongside crusty bread to soak up every last bit of that wonderful gravy.
Tips for Success
- Don’t Skip the Sear: Searing the beef tips properly is crucial for developing a deep, rich flavor. Common Mistake: Overcrowding the pan during searing leads to steaming instead of browning. Work in batches to ensure each piece gets good contact with the hot surface.
- Low and Slow is Key: Patience is your friend when making tender beef tips. Simmering the beef gently over low heat for an extended period allows the tough connective tissues to break down, resulting in incredibly tender meat. Rushing this process will lead to tough beef.
- Deglaze for Maximum Flavor: Those browned bits stuck to the bottom of the pot after searing are flavor gold. Important Reminder: Don’t let these bits burn, but do scrape them up when you add the broth. They will dissolve into the gravy and add incredible depth.
- Taste and Adjust Seasoning: Always taste your dish before serving. The flavor can change during the cooking process. Adjust salt, pepper, or other seasonings as needed to perfectly balance the flavors of your beef tips.
- Properly Thicken the Gravy: Ensure your cornstarch is fully dissolved in cold water before adding it to the hot liquid to prevent lumps. Chef’s Insight: Bring the gravy to a gentle boil for a minute or two after adding the slurry to cook out the raw starch taste and achieve maximum thickness.
How to Store Beef Tips And Gravy
Proper storage ensures your delicious beef tips remain safe and tasty for later enjoyment.
- Room Temperature: Cooked beef tips and gravy should not be left at room temperature for more than 2 hours (or 1 hour if the ambient temperature is above 90°F or 32°C). Bacteria can grow rapidly in the “danger zone” between 40°F (4°C) and 140°F (60°C).
- In the Refrigerator: Allow the beef tips and gravy to cool slightly before transferring to an airtight container. Store in the refrigerator for up to 3-4 days. To reheat, gently warm on the stovetop over medium-low heat, stirring occasionally, until heated through. You can also reheat portions in the microwave. You may need to add a splash of beef broth or water if the gravy has thickened too much upon cooling.
- Freezing Tips: Beef Tips and Gravy freeze quite well, making it a fantastic freezer meal.
- Cool Completely: Allow the dish to cool completely before freezing. This prevents ice crystals from forming and helps maintain texture.
- Portioning: Consider freezing in individual or family-sized portions for easier thawing and reheating.
- Freezer-Safe Containers: Use airtight, freezer-safe containers or heavy-duty freezer bags. If using bags, try to remove as much air as possible to prevent freezer burn.
- Label and Date: Clearly label the containers with the contents and date.
- Storage Time: For best quality, use frozen beef tips and gravy within 2-3 months. They will remain safe to eat longer if kept consistently frozen at 0°F (-18°C), but the quality may decline over time.
- Reheating from Frozen: Thaw overnight in the refrigerator for best results. Reheat gently on the stovetop over medium-low heat, stirring frequently, until heated through. You may need to add a little beef broth or water to adjust the gravy consistency. Alternatively, you can reheat from frozen in a saucepan over low heat, covered, stirring occasionally; this will take longer. Avoid high heat, which can make the beef tough.
FAQs
Can I make these beef tips in a slow cooker?
Yes, you absolutely can adapt this recipe for a slow cooker. Brown the beef tips and sauté the onions and garlic on the stovetop as directed in Steps 1 and 2, then transfer everything (including the deglazing liquid) to your slow cooker. Add the remaining broth and seasonings (except the cornstarch slurry). Cook on low for 6-8 hours or on high for 3-4 hours, until the beef is tender. About 30 minutes before serving, whisk together the cornstarch slurry and stir it into the slow cooker. Turn the slow cooker to high (if it was on low) and cook until the gravy has thickened.
What can I serve with beef tips and gravy?
Beef tips and gravy are incredibly versatile! Classic pairings include creamy mashed potatoes, buttered egg noodles, or fluffy white rice – all excellent for soaking up that delicious gravy. Steamed green beans, roasted carrots, or a simple side salad also complement the richness of the dish wonderfully. For a more rustic meal, serve with crusty bread or biscuits.
My gravy isn’t thick enough. How can I fix it?
If your gravy isn’t as thick as you’d like after adding the initial cornstarch slurry and simmering, you can easily thicken it further. Make another small slurry with 1 tablespoon of cornstarch mixed with 2 tablespoons of cold water. Slowly whisk this into the simmering gravy and cook for another minute or two until it reaches your desired consistency. Remember that gravy will also thicken slightly as it cools.
Why are my beef tips tough?
There are a few common reasons why beef tips might turn out tough. Firstly, you might have used a cut of beef that isn’t ideal for slow cooking (like a very lean steak). Secondly, and more commonly, the beef tips may not have been cooked long enough. Tough cuts of beef need ample time over low, moist heat for the connective tissue to break down and become tender. Lastly, cooking at too high a heat can also cause the muscle fibers to seize up and become tough. Ensure a gentle simmer throughout the cooking process.
Can I use wine in this recipe?
Yes, adding wine can enhance the flavor. After sautéing the onions and garlic (Step 2), and before adding the broth, you can deglaze the pot with about 1/2 cup of dry red wine, such as Merlot, Cabernet Sauvignon, or a Côtes du Rhône. Scrape up the browned bits and let the wine simmer and reduce by about half before proceeding with adding the beef broth and other ingredients. This adds an extra layer of complexity to the gravy for your beef tips.
Conclusion
This Beef Tips and Gravy recipe is more than just a meal; it’s a comforting embrace, a taste of home, and a surefire way to bring smiles to the dinner table. The rich, savory gravy and incredibly tender beef tips create a symphony of flavors and textures that will have everyone asking for seconds. Whether you’re looking for a hearty weeknight dinner, a satisfying Sunday supper, or a reliable dish for meal prepping, these beef tips are a go-to that never disappoints. Simple to prepare yet impressively delicious, it’s a classic for a reason.


