
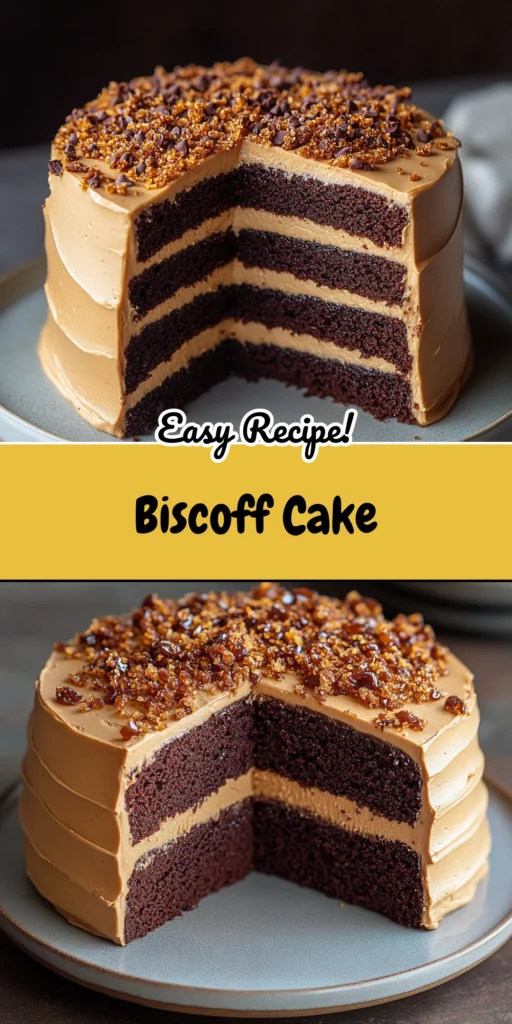
That first crisp bite of a Biscoff cookie, with its unique caramelized spice, is a simple pleasure many of us adore. Now, imagine that distinct, beloved flavor infused into a stunningly moist and decadent cake. This Biscoff cake recipe takes that iconic cookie butter and transforms it into a show-stopping dessert that’s surprisingly straightforward to make, bringing a touch of European café charm right into your kitchen.
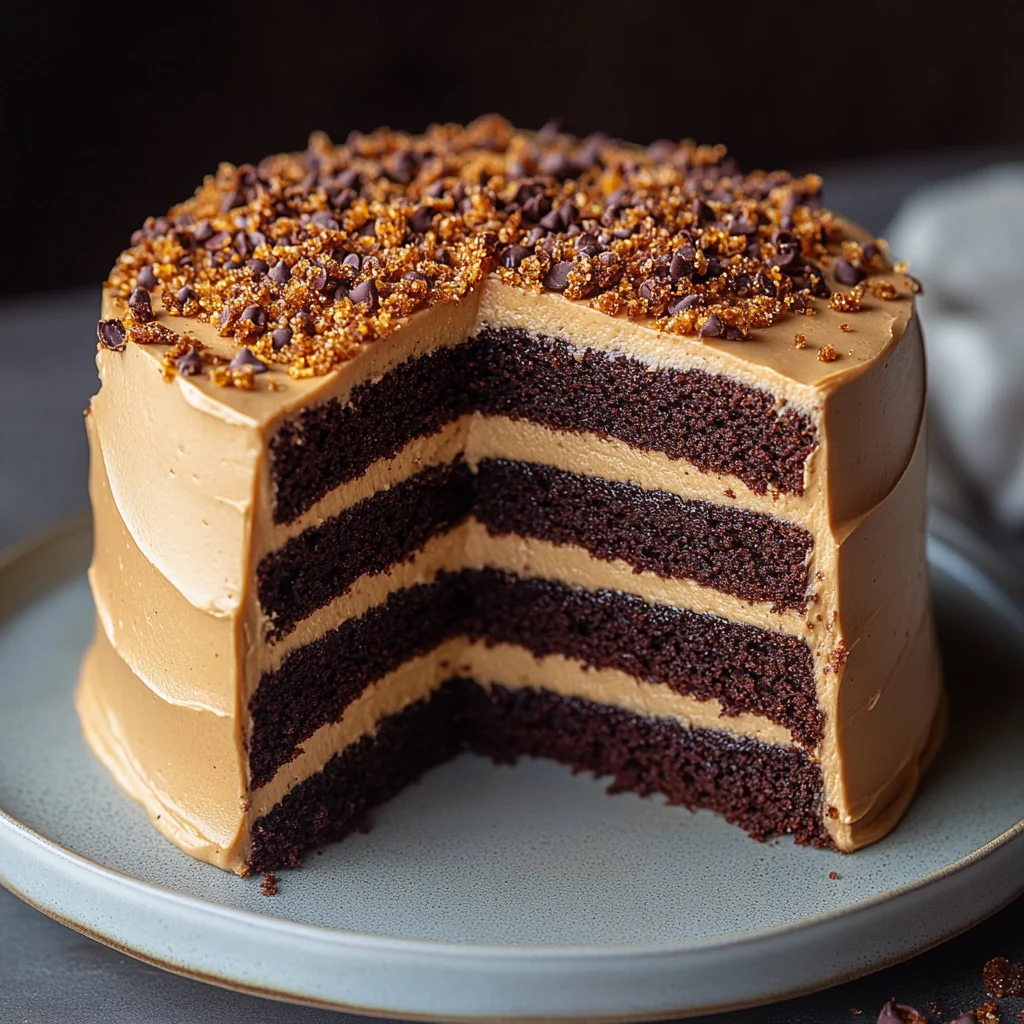
This Biscoff cake is a true celebration of that classic spiced shortcrust biscuit, pairing rich, tender chocolate cake layers with a sumptuously creamy Biscoff cookie butter frosting. It’s the kind of dessert that elicits audible “oohs” and “aahs” before anyone even takes a bite. Perfect for birthdays, special gatherings, or simply when you crave a truly memorable sweet treat, this Biscoff cake recipe will quickly become a treasured favorite in your baking repertoire.
Why You’ll Love This Recipe
There are so many reasons to adore this particular Biscoff cake. It’s not just about the incredible flavor; it’s a joy to make and share!
- Irresistible Flavor Fusion: The combination of deep chocolate cake with the sweet, spiced notes of Biscoff cookie butter is simply divine. It’s a sophisticated yet comforting taste profile that appeals to all ages.
- Surprisingly Simple to Make: Despite its impressive appearance, the cake layers come together with basic ingredients and a straightforward mixing method. The frosting is even easier! This makes it an accessible Biscoff cake for bakers of all skill levels.
- Incredibly Moist Crumb: Thanks to the oil and the specific liquid ratio, this cake boasts a tender, moist crumb that stays delicious for days. No dry cake here!
- Perfect for Any Occasion: Whether it’s a festive holiday, a birthday celebration, or a cozy weekend treat, this Biscoff cake fits the bill. It feels special without being overly complicated.
- Crowd-Pleaser Guaranteed: Let’s be honest, who can resist the allure of Biscoff? This cake is a certified crowd-pleaser, making you the star baker at any event.
This recipe is perfect for home bakers looking to create an impressive yet manageable dessert, Biscoff enthusiasts wanting to explore new ways to enjoy their favorite spread, and anyone needing a reliable, delicious cake for a special occasion.
Ingredients for Biscoff Cake

This recipe uses common pantry staples for the cake layers, with the star being the Biscoff spread for that signature frosting.
Core Ingredients
For the Chocolate Cake Layers:
- 4 1/4 cups all-purpose flour
- 1 1/2 cups cocoa powder – Use a good quality unsweetened cocoa for the best flavor.
- 2 1/2 cups + 2 tablespoons granulated sugar
- 2 1/4 teaspoons baking soda – Make sure it’s fresh for optimal rise.
- 1 1/2 teaspoons salt – Balances the sweetness and enhances flavors.
- 3 tablespoons vinegar (apple cider or white) – Reacts with baking soda for a tender crumb.
- 1 tablespoon vanilla extract – Rounds out the chocolate flavor.
- 1 cup + 2 tablespoons oil (vegetable or canola oil recommended) – Ensures a moist cake.
- 3 1/4 cups milk (unsweetened almond milk used, but dairy milk works too)
For the Biscoff Frosting:
- 1 1/4 cups + 2 tablespoons unsalted butter (softened) – Should be at cool room temperature, not melty.
- 1 cup Biscoff spread (creamy) – The star of the show!
- 2 1/2 cups confectioners’ sugar (sifted) – For a smooth, lump-free frosting.
Substitutions and Tips
- Flour: While all-purpose flour works beautifully, you can substitute cake flour for an even more tender crumb. If using cake flour, use the same amount by weight if possible, or add an extra 2 tablespoons per cup if measuring by volume.
- Cocoa Powder: Dutch-process cocoa powder will yield a darker cake with a smoother chocolate flavor. If you use it, you might find the cake slightly less reddish in hue.
- Vinegar: If you don’t have apple cider or white vinegar, lemon juice can work in a pinch, though the flavor might be subtly different.
- Oil: Any neutral-flavored oil like sunflower or light olive oil can be used instead of vegetable or canola oil. Avoid strongly flavored oils.
- Milk: Regular dairy milk (whole, 2%, or even buttermilk for extra tang) can be used instead of almond milk. If using buttermilk, you might slightly reduce the vinegar, though it’s often fine as is.
- Biscoff Spread: Always use creamy Biscoff spread for the frosting to ensure a smooth consistency. Crunchy Biscoff spread can be great for a filling between layers if you desire extra texture, but not ideal for the main frosting.
- Make it Vegan: This cake is very close to being vegan! To make it fully vegan, ensure your sugar is vegan (some white sugar is processed with bone char), use a plant-based butter alternative for the frosting, and confirm your Biscoff spread is vegan (most varieties are, but always check the label). The chocolate cake base, with almond milk, is already dairy-free and egg-free.
Best Type of Biscoff Spread, Flour, and Cocoa to Use
Choosing quality ingredients will make a significant difference in the outcome of your Biscoff cake.
Biscoff Spread:
The hero of this cake is undeniably the Biscoff spread.
- Creamy vs. Crunchy: For the frosting, creamy Biscoff spread is essential. It will whip up into a smooth, luscious frosting that’s easy to spread. Crunchy Biscoff spread contains cookie bits that, while delicious for eating straight from the jar, will make your frosting lumpy and difficult to pipe or spread neatly. If you absolutely love the texture, consider using crunchy spread as part of a filling between layers, but stick to creamy for the outer frosting.
- Brand: Lotus is the original and most widely recognized brand, and its flavor is iconic. There are other brands of speculoos or cookie butter spreads available. While they might work, the flavor profile could differ slightly from the classic Biscoff taste we’re aiming for in this Biscoff cake. For authenticity, Lotus Biscoff spread is recommended.
All-Purpose Flour:
All-purpose flour is, as the name suggests, versatile and works perfectly well in this Biscoff cake recipe, producing a tender yet sturdy crumb that holds up well to stacking.
- Consistency: Ensure your flour is fresh and hasn’t been sitting in the pantry for too long, as old flour can affect the cake’s rise and texture.
- Alternative – Cake Flour: If you want an even lighter, more delicate crumb, you can use cake flour. Cake flour has a lower protein content, which results in a softer texture. If substituting, you might want to use about 2 tablespoons more per cup than all-purpose flour if measuring by volume, or preferably measure by weight for accuracy. This cake recipe is very forgiving, so either will yield a delicious result.
Cocoa Powder:
The type of cocoa powder you use will significantly impact the flavor and color of your chocolate cake layers.
- Natural Unsweetened Cocoa Powder: This is the standard cocoa powder found in most grocery stores. It has a strong, intense chocolate flavor and a slightly acidic nature. When paired with baking soda (as in this recipe), it reacts to help the cake rise and gives it a reddish-brown hue. This is what was used in developing this Biscoff cake.
- Dutch-Process Cocoa Powder: This cocoa has been treated with an alkali to neutralize its acidity. This results in a darker, often blacker, color and a milder, smoother chocolate flavor. If you use Dutch-process cocoa, your cake will be darker and might have a slightly less assertive chocolate flavor, which can be nice as it allows the Biscoff frosting to shine even more. Because this recipe uses baking soda and vinegar, it can accommodate either type of cocoa, but the rise might be slightly different. For the most consistent results with this recipe, natural unsweetened is a safe bet.
Kitchen Tools You’ll Need
Having the right tools makes baking this Biscoff cake a breeze. Here’s what I recommend:
Must-Have Tools
- Three 8-inch Round Cake Pans: This recipe is designed for three layers, which gives great height and a good cake-to-frosting ratio. If you only have two, you can make thicker layers, but baking time will need adjustment.
- Parchment Paper: Essential for lining the cake pans to prevent sticking and ensure easy removal of the cake layers.
- Large Mixing Bowls: You’ll need at least two – one for dry ingredients and one for wet ingredients.
- Whisk: For combining dry ingredients and mixing the wet ingredients.
- Rubber Spatula or Wooden Spoon: For folding the batter and scraping the bowl.
- Measuring Cups and Spoons: Accurate measurements are key in baking.
- Electric Mixer (Handheld or Stand Mixer): Crucial for making the Biscoff frosting smooth and fluffy. While you could make the frosting by hand, an electric mixer makes it much easier and yields better results.
- Offset Spatula: For evenly spreading the frosting on the cake. A long, thin one is ideal.
- Wire Cooling Rack: For cooling the cake layers completely before frosting.
Nice-to-Have Extras
- Cake Turntable: Makes frosting the cake much easier and more professional-looking.
- Bench Scraper: Great for achieving smooth sides on your frosted Biscoff cake.
- Piping Bag and Tips: If you want to add decorative flourishes with the Biscoff frosting.
- Sifter or Fine-Mesh Sieve: For sifting flour, cocoa powder, and confectioners’ sugar to prevent lumps. This is highly recommended for the smoothest results.
- Cake Leveler or Serrated Knife: To level the tops of your cake layers if they dome during baking, ensuring even layers for stacking.
How to Make Biscoff Cake

Follow these steps carefully, and you’ll be rewarded with a truly spectacular Biscoff cake.
Step 1: Preheat Oven and Prepare Pans
Preheat your oven to 350°F (175°C). Grease and flour three 8-inch round cake pans. Line the bottoms with parchment paper, then grease and flour the parchment paper as well. This double prep ensures your cake layers release perfectly.
Step 2: Combine Dry Ingredients
In a large mixing bowl, whisk together the all-purpose flour, cocoa powder, sugar, baking soda, and salt. Whisk thoroughly for at least 30 seconds to ensure everything is evenly distributed and aerated. This step is important for a consistent Biscoff cake crumb.
Step 3: Combine Wet Ingredients
In a separate medium mixing bowl, whisk together the vinegar, vanilla extract, oil, and milk until well combined. The mixture might look a little separated due to the oil and vinegar, but that’s okay.
Step 4: Combine Wet and Dry Ingredients
Pour the wet ingredients into the dry ingredients. Mix with a whisk or a rubber spatula until just combined. Be careful not to overmix. A few small lumps are perfectly fine. Overmixing develops gluten and can make your Biscoff cake tough. The batter will be relatively thin.
Step 5: Divide Batter and Bake
Divide the batter evenly among the three prepared cake pans. A kitchen scale can be helpful here for precision, but eyeballing it works too. Bake for 30-35 minutes, or until a wooden skewer or toothpick inserted into the center of the cakes comes out clean or with a few moist crumbs attached. You should start to smell that lovely chocolate aroma as they get close to being done.
Step 6: Cool Cake Layers
Once baked, let the cake layers cool in their pans on a wire rack for about 15-20 minutes. Then, carefully invert the cakes onto the wire rack, peel off the parchment paper, and let them cool completely before frosting. This can take a couple of hours. Attempting to frost a warm cake will result in melted frosting – a baker’s nightmare!
Step 7: Make the Biscoff Frosting
While the cake layers are cooling, prepare the Biscoff frosting. In a large bowl using an electric hand mixer or a stand mixer fitted with the paddle attachment, beat the softened butter on medium speed until light and fluffy, about 2-3 minutes. Scrape down the sides of the bowl.
Add the creamy Biscoff spread and beat again until well combined and smooth, about 1-2 minutes. The kitchen will start to smell incredible at this point!
Gradually add the sifted confectioners’ sugar, one cup at a time, beating on low speed until combined, then increasing to medium-high speed and beating for another 2-3 minutes until the frosting is very light, fluffy, and pale. If the frosting is too stiff, you can add a teaspoon of milk or cream at a time until it reaches your desired consistency. This Biscoff frosting is the crowning glory of your Biscoff cake.
Step 8: Assemble the Biscoff Cake
Once the cake layers are completely cool, you can begin assembling your Biscoff cake. If your cake layers have domed tops, use a serrated knife or a cake leveler to trim them flat. This creates a stable base for stacking.
Place one cake layer, cut side up, on a cake stand or serving plate. Spread a generous layer of Biscoff frosting (about 2/3 to 1 cup) evenly over the top.
Place the second cake layer on top and repeat with another layer of frosting.
Top with the third cake layer, ensuring the flattest side (which was the bottom of the cake in the pan) is facing up for a smooth top surface.
Apply a thin crumb coat of frosting over the entire cake (top and sides) and refrigerate for 20-30 minutes. This helps to seal in any loose crumbs, making the final coat of frosting much neater.
Once the crumb coat is set, apply the remaining Biscoff frosting to the top and sides of the cake, using an offset spatula or bench scraper to smooth it out or create swirls as desired. You can garnish with crushed Biscoff cookies, a Biscoff drizzle (melted Biscoff spread), or chocolate shavings for an extra special touch to your Biscoff cake.
Tips for Success
- Measure Ingredients Accurately: Baking is a science! Use proper measuring cups and spoons, and level off dry ingredients. For flour, spoon it into the measuring cup and then level it, don’t scoop directly from the bag. This prevents packing too much flour, which can lead to a dry Biscoff cake.
- Don’t Overmix the Batter: Mix the wet and dry ingredients until just combined. A few lumps are okay. Overmixing develops gluten, which can result in a tough or dense cake.
- Ensure Ingredients are at Room Temperature: This is especially important for the frosting. Softened butter (not melted!) will whip up light and fluffy. Cold ingredients don’t combine as well.
- Cool Cakes Completely: Never try to frost a warm cake. The heat will melt your beautiful Biscoff frosting, creating a soupy mess. Patience is key for a perfect Biscoff cake.
- Sift Dry Ingredients for Frosting: Always sift your confectioners’ sugar (and cocoa powder for the cake) to avoid lumps and ensure the smoothest possible Biscoff frosting.
How to Store Biscoff Cake
Proper storage will keep your Biscoff cake tasting fresh and delicious.
Room Temperature:
If your Biscoff cake is unfrosted or has a stable frosting like this Biscoff buttercream (and your room isn’t too warm), it can be stored in an airtight cake container at room temperature for up to 2 days. If your kitchen is very warm, it’s best to refrigerate.
In the Refrigerator:
Once frosted, this Biscoff cake is best stored in the refrigerator due to the butter in the frosting. Cover it well with plastic wrap or place it in an airtight cake carrier to prevent it from drying out or absorbing fridge odors. It will keep well for 4-5 days. Before serving, allow the cake to sit at room temperature for about 20-30 minutes to allow the frosting and cake to soften slightly for the best flavor and texture. A cold Biscoff cake can taste a bit muted.
Freezing Tips:
Yes, you can freeze this Biscoff cake!
- Freezing Unfrosted Layers: Wrap the completely cooled cake layers individually and tightly in plastic wrap, then in aluminum foil or a freezer-safe bag. They can be frozen for up to 3 months. Thaw overnight in the refrigerator before frosting.
- Freezing Frosted Cake: You can freeze leftover slices or even a whole frosted Biscoff cake. For slices, wrap them individually in plastic wrap, then foil. For a whole cake, flash freeze it uncovered for about an hour until the frosting is firm, then wrap it tightly in plastic wrap followed by foil. Store in the freezer for up to 2 months. Thaw in the refrigerator overnight. The texture of the frosting might change slightly upon thawing but should still be delicious.
Frequently Asked Questions (FAQs)
Can I make this Biscoff cake into cupcakes?
Absolutely! This Biscoff cake recipe will make about 24-30 cupcakes. Line muffin tins with paper liners and fill them about two-thirds full. Bake at 350°F (175°C) for 18-22 minutes, or until a toothpick inserted into the center comes out clean. Then, frost with the Biscoff frosting as desired.
My Biscoff frosting seems too soft/stiff. How can I fix it?
If your Biscoff frosting is too soft, try chilling it in the refrigerator for 15-20 minutes, then beat it again. You can also add a bit more sifted confectioners’ sugar, a tablespoon at a time, until it reaches the desired consistency. If it’s too stiff, add milk or cream, one teaspoon at a time, beating well after each addition, until it’s perfectly spreadable for your Biscoff cake.
Can I prepare parts of this Biscoff cake ahead of time?
Yes! You can bake the cake layers a day or two in advance. Once completely cool, wrap them tightly in plastic wrap and store them at room temperature (if using within a day) or in the refrigerator. The Biscoff frosting can also be made a day or two ahead, stored in an airtight container in the refrigerator. Let it come to room temperature and re-whip it briefly before using.
What can I use if I don’t have 8-inch cake pans?
You can use 9-inch round cake pans instead. The layers will be slightly thinner, so reduce the baking time by about 5-7 minutes, checking for doneness earlier. Alternatively, you can make a two-layer Biscoff cake using 9×13 inch pans (you might only need one for a sheet cake version, adjust baking time) or make a taller two-layer 8-inch cake, but baking times will definitely need to be increased.
Is there a substitute for Biscoff spread in the frosting?
If you can’t find Biscoff spread, another cookie butter or speculoos spread would be the closest substitute. For a completely different flavor profile, you could use peanut butter, almond butter, or even a chocolate hazelnut spread, but then it wouldn’t be a true Biscoff cake. The Biscoff spread is key to this particular recipe’s unique flavor.
This Biscoff cake recipe is more than just a dessert; it’s an experience. The delightful contrast of moist, rich chocolate cake with the uniquely spiced, creamy Biscoff frosting makes it an unforgettable treat. Easy enough for a weekend baking project yet stunning enough for a celebration, this Biscoff cake is destined to become a go-to favorite for anyone who tries it. Enjoy every decadent bite!


