
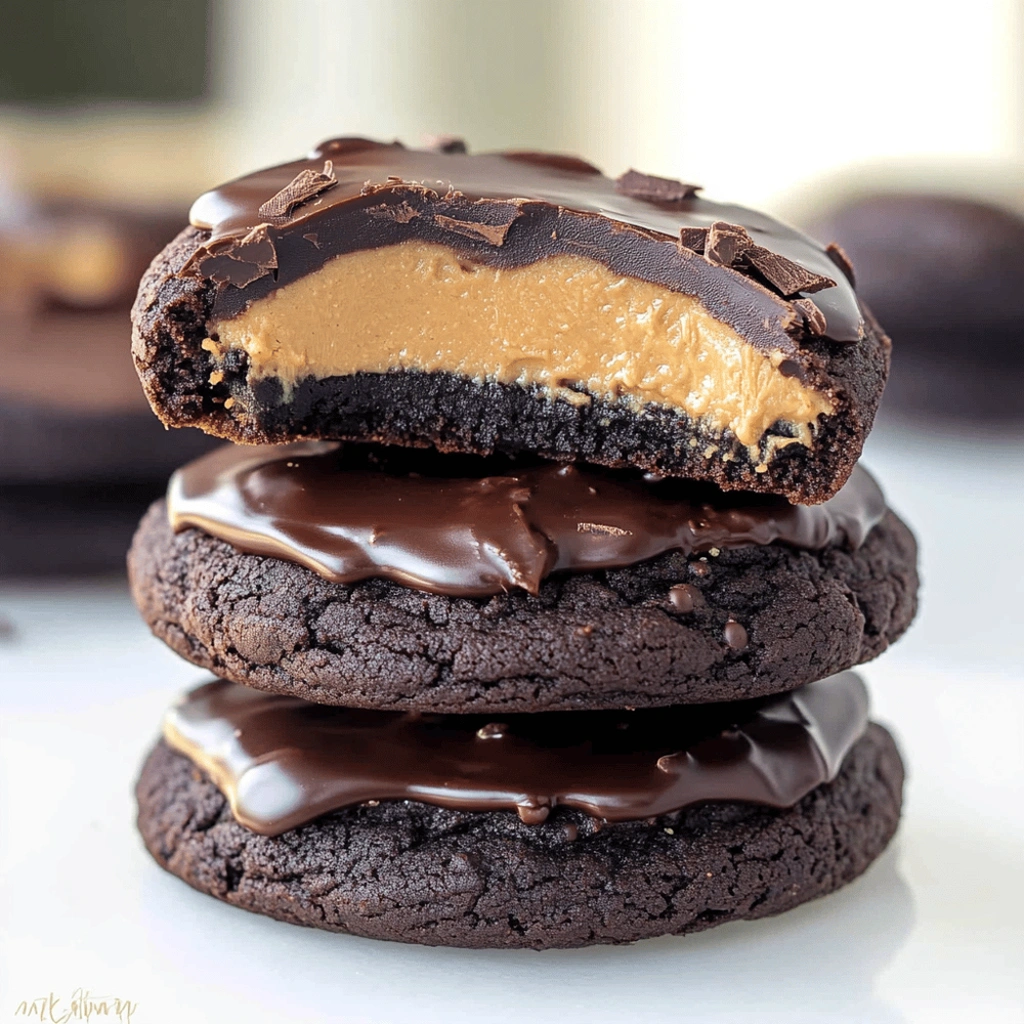
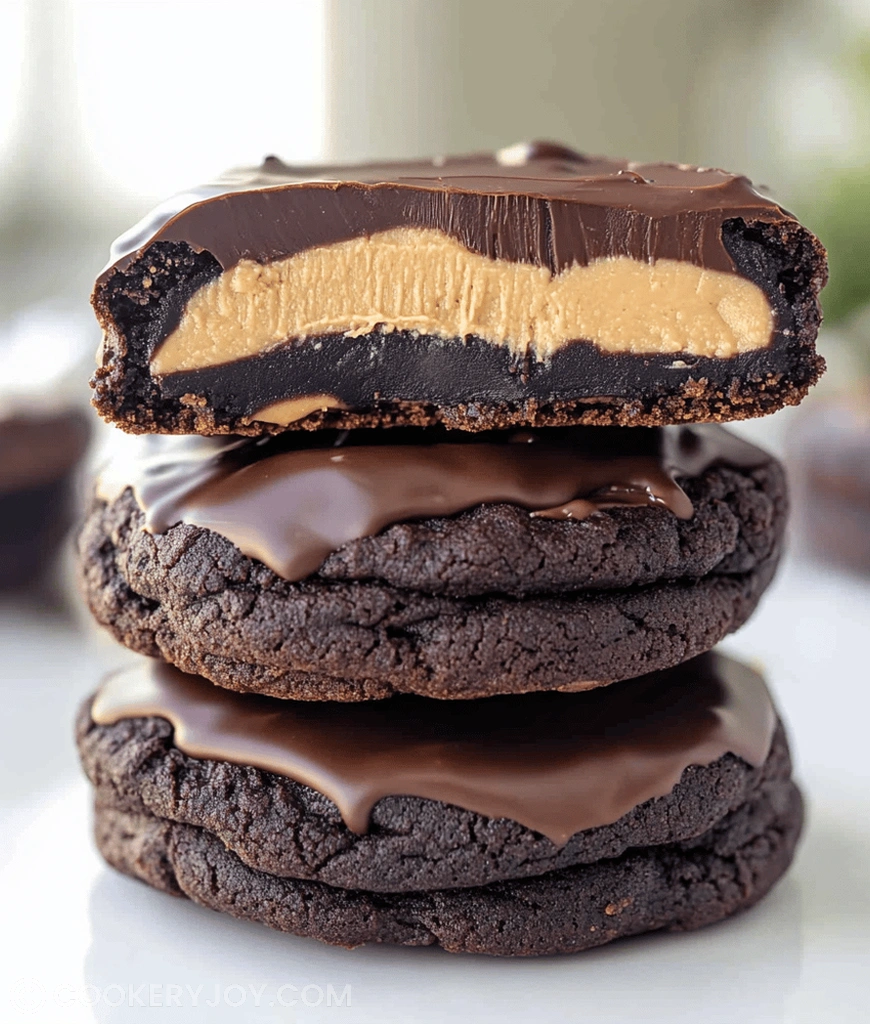
These Buckeye Peanut Butter Cup Cookies deliver pure, comforting nostalgia. They strike that perfect balance of soft, chewy cookie dough. Plus, they hide a molten, rich chocolate and peanut butter heart inside. Seriously, this recipe for Buckeye Peanut Butter Cup Cookies is a weeknight game-changer.
I usually bake these when the grandkids visit unexpectedly. They disappear faster than leftovers at a potluck, honestly. Storing them is easy, too, which helps my busy schedule immensely.
Why I Love This Recipe
I adore making these cookies often. They truly satisfy that deep craving. The ease factor is incredible for busy days. Here is why they top my list:
- Speedy Assembly: The dough comes together so fast.
- Major Flavor Payoff: That creamy center is divine.
- Crowd Pleaser: Everyone asks for the recipe.
These Buckeye Peanut Butter Cup Cookies feel fancy but are simple.
Buckeye Peanut Butter Cup Cookies Ingredients
Mixing these simple elements creates true magic, I promise you. We are blending familiar cookie textures with that famous peanut butter cup punch. These are not complicated items at all. We build our rich base first, then add the creamy filling.
Here are the stars of our Buckeye Peanut Butter Cup Cookies:
- Unsalted Butter: This provides essential richness and structure for the dough.
- Granulated Sugar: It helps spread the cookies slightly when baking.
- Brown Sugar: This adds moisture and that lovely, deep molasses flavor.
- Large Egg: It binds everything together nicely, creating structure.
- Vanilla Extract: Vanilla always brightens the overall taste profile.
- All-Purpose Flour: This is the backbone of the cookie texture.
- Baking Soda: It gives just the right lift to keep them soft.
- Salt: A necessary pinch balances all the sweetness present.
- Mini Peanut Butter Cups: These are our secret weapon for the ultimate center!
Remember, exact measurements sit on the recipe card below. You will find my best advice just under this ingredient list.
Substitutions and Tips
Sometimes we need quick workarounds in the kitchen. For instance, no brown sugar? Just use a bit more granulated sugar. However, expect a slightly crisper cookie texture then. If you want a bigger flavor pop, try adding 1/2 teaspoon of instant espresso powder. This deepens the chocolate notes beautifully. Want a slight texture change? Add quick oats to the dry mix. For best results, chill your dough briefly. This helps prevent excessive spreading during baking time. Always use room temperature butter for proper creaming action.
Kitchen Tools You’ll Need
- Mixing Bowls: You need some trusty mixing bowls. A stand mixer works too.
- Measuring Cups/Spoons: Accuracy matters for great baked goods.
- Baking Sheets: Line these with parchment paper, please.
- Cookie Scoop: A scoop helps keep all the Buckeye Peanut Butter Cup Cookies uniform.
- Cooling Rack: Essential for even cooling post-bake.

How to Make Buckeye Peanut Butter Cup Cookies
Making these amazing cookies is quite straightforward, really. Follow these steps closely for success. Remember, timing is everything here, especially at the end. We want perfect cookie de manteiga de amendoim results.
Preparing the Dough Base
First, turn your oven up to three seventy-five degrees Fahrenheit. Yes, preheat right away. Then, line your trusty baking sheets with fresh parchment paper. I find this prevents sticking beautifully. Now grab your large bowl. Cream the softened butter and both sugars together well. Beat them until the mixture looks genuinely pale and airy. This step incorporates needed air into the dough structure.
Combining Wet and Dry Ingredients
Next, introduce the egg and vanilla extract slowly. Mix only until they disappear into the batter completely. In a separate bowl, whisk your flour, salt, and baking soda. Now, add these dry items to the wet ones gradually. Mix on low speed. Stop mixing right when you see no more streaks of dry flour remaining. Overmixing develops gluten too much, which yields tough cookies. We want soft texture!
Shaping and Baking the Cookies
Use a small spoon or scoop for this part. Roll the dough into small balls, about one inch across. Place these dough balls onto your prepared sheets. Give them space, maybe two inches apart. They will spread slightly while baking gently. Bake these delights for only eight to ten minutes. Look for edges that seem slightly set and firm. The centers should still look a little soft. Do not bake them until they are hard, please.
The Crucial Buckeye Addition
This part needs your immediate attention after baking. Pull the tray right out of the hot oven. Immediately take your unwrapped mini peanut butter cups. Press one cup right into the center of each warm cookie firmly. The residual heat melts the chocolate filling just enough. This ensures the cup adheres perfectly. It creates that famous gooey center we crave so much.
Cooling and Setting
Patience is key during this final stage now. Leave the cookies on the hot baking sheet for five full minutes. This short rest allows the melted chocolate to start firming up slightly. After five minutes, carefully move them. Transfer cookies over to a wire cooling rack now. Let them cool completely there before anyone tries to eat them. They firm up beautifully as they cool down fully.
How to Store Buckeye Peanut Butter Cup Cookies
Storing these amazing Buckeye Peanut Butter Cup Cookies is simple. Keep them in an airtight container at room temperature. They stay fresh for about four days easily. If you need longer storage, try freezing them first. Place parchment paper between layers before freezing them well. You can freeze them for up to three months, too. Thaw them slowly on the counter overnight. Enjoying these treats should never be difficult.
Tips for Success
- Use room temperature butter always for creaming.
- Do not overbake your cookies one bit.
- Measure flour by gently spooning it into the cup.
- Unwrap all your peanut butter cups beforehand.
- Work quickly when pressing the cups in place.
- Chilling dough helps maintain a thicker cookie shape.
- These Buckeye Peanut Butter Cup Cookies taste best slightly warm.
Serving Suggestions
- Serve these rich chocolate peanut butter cookies with cold milk.
- A scoop of vanilla bean ice cream is divine alongside.
- They look beautiful piled high on a simple white platter.
- Coffee pairs nicely for an afternoon indulgence moment.
- Presenting these Buckeye Peanut Butter Cup Cookies warm is the best.

Buckeye Peanut Butter Cup Cookies
- Prep Time: 20 minutos
- Cook Time: 8-10 minutos
- Total Time: 30 minutos
- Yield: Aproximadamente 40 cookies
- Category: Sobremesa
- Method: Assar
- Cuisine: Americana
- Diet: Vegetarian
Description
Receita de cookies de manteiga de amendoim com recheio de ‘Buckeye’ (copinhos de chocolate e pasta de amendoim), resultando em um biscoito macio com um centro derretido e delicioso.
Ingredients
- 1/2 xícara (1 tablete) de manteiga sem sal, amolecida
- 1/2 xícara de açúcar granulado
- 1/2 xícara de açúcar mascavo compactado
- 1 ovo grande
- 1 colher de chá de extrato de baunilha
- 1 3/4 xícaras de farinha de trigo
- 1/2 colher de chá de bicarbonato de sódio
- 1/4 colher de chá de sal
- Aproximadamente 40 copinhos mini de manteiga de amendoim (‘Buckeye’), desembrulhados
Instructions
- Pré-aqueça o forno a 190°C (375°F). Forre assadeiras com papel manteiga.
- Em uma tigela grande, bata a manteiga amolecida, o açúcar granulado e o açúcar mascavo até ficar claro e fofo.
- Bata o ovo e o extrato de baunilha até incorporar bem.
- Em uma tigela separada, misture a farinha, o bicarbonato de sódio e o sal. Adicione gradualmente os ingredientes secos aos ingredientes molhados, misturando até que estejam apenas combinados e forme uma massa macia.
- Enrole a massa em bolinhas de 2,5 cm (1 polegada) e coloque-as a cerca de 5 cm (2 polegadas) de distância nas assadeiras preparadas.
- Asse por 8 a 10 minutos, ou até que as bordas estejam firmes e o topo ligeiramente rachado (não asse demais).
- Imediatamente após retirar do forno, pressione um copinho mini de manteiga de amendoim desembrulhado no centro de cada biscoito quente.
- Deixe os biscoitos esfriarem nas assadeiras por 5 minutos antes de transferi-los para uma grade de resfriamento para esfriar completamente. O copinho de manteiga de amendoim irá amolecer e depois firmar.
Notes
- A massa deve ser manuseada rapidamente para evitar que a manteiga derreta antes de assar.
- Pressionar o copinho de manteiga de amendoim imediatamente após sair do forno é crucial para que ele derreta levemente e grude no biscoito.


