I still remember the first time I made chicken paillard. It was a hectic Tuesday evening, and I needed something quick yet impressive for dinner. The result? Golden-seared chicken breasts, so thin and tender they practically melted in your mouth. I seasoned them simply with garlic powder and paprika, then topped everything with a velvety lemon butter sauce. That nutty browned butter and fresh parsley made it taste like something from a fancy bistro.
As a busy mom juggling work and family, I adore how this chicken paillard recipe fits right into my weeknight chaos. It’s ready in under 30 minutes and gluten-free, too, which keeps everyone happy at the table. The picky eaters in my house even ask for seconds. Serve it fresh from the skillet for that perfect crunch, or save leftovers for easy lunches. Plus, it’s versatile enough to wow guests without slaving away in the kitchen all day. Trust me, once you try it, chicken paillard will become your go-to for effortless elegance.
Why I Love This Recipe
I first discovered chicken paillard during a rushed weeknight. Honestly, it saved dinner that night. This recipe comes together in just 30 minutes. So, it blends juicy seared chicken with a tangy lemon butter sauce. The result feels indulgent but totally effortless.
The pounding technique makes all the difference. It ensures even cooking and real tenderness. Busy schedules demand that, right? As a mom, I juggle too much already. So, anything quick like this wins big.
I especially love the nutty browned butter. Fresh parsley adds a bright pop, too. Together, they turn simple ingredients into a comforting French-inspired dish. It wows without any fuss. No more stressing over complicated meals.
Plus, chicken paillard is so versatile. Serve it solo for a light bite. Or pair it with greens to keep picky eaters smiling. For quick dinners, it beats takeout hands down. You save time and get amazing flavor every time.
Trust me, this has become my weeknight hero. It fits right into my chaotic routine. And the whole family loves it. Finally, a recipe that delivers without the drama.
Chicken Paillard Ingredients
These ingredients make chicken paillard shine. Simple spices boost the chicken’s flavor. Meanwhile, the lemon butter sauce adds bright contrast. It all ties into an elegant dish. I always choose fresh items like real lemon and herbs. They bring vibrant taste that lifts the meal. As a busy mom, I love how straightforward they are.
- Chicken breasts: They form the lean, tender base. Pound them thin for quick searing and delicate texture. I start here every time.
- Garlic powder: It adds subtle aroma. This complements the chicken without overwhelming the sauce. Just a sprinkle does the trick.
- Paprika: This brings mild smokiness and color. It warms the seasoning perfectly. I use it for that extra pop.
- Sea salt: It enhances all flavors. Plus, it helps create a crispy sear outside. Don’t skip this step.
- Black pepper: This offers gentle heat. It rounds out the spices for balance. Freshly ground tastes best.
- Olive oil: Use it for cooking. It gives a golden crust while keeping chicken moist. A quick heat-up, and you’re set.
- Salted butter: Brown it for a nutty sauce base. It adds richness and silkiness. Watch it closely, though.
- Garlic: Mince it fresh for the sauce. It infuses pungent aroma when sautéed. So simple yet effective.
- Fresh lemon juice: Squeeze it for zesty acidity. This cuts through the butter brightly. Bottled just won’t do.
- Fresh parsley: Chop it for a herbaceous finish. It adds color and freshness. I grab it last for that lift.
The complete list of ingredients with exact measurements is available in the printable recipe card at the bottom of the post.
Kitchen Tools You’ll Need
I keep my kitchen simple for chicken paillard. No fancy equipment needed. These basics make prep easy and fast. As a busy mom, I appreciate that. They help avoid frustration during weeknights.
- Large stainless steel skillet: It ensures even searing. A nonstick pan works well as an alternative. I prefer stainless for that golden crust.
- Meat mallet or rolling pin: Use this to pound chicken evenly. Stick to the flat side for best results. It tenderizes without tearing.
- Plastic wrap: It protects chicken during pounding. Parchment paper substitutes nicely if you run out. Quick cleanup, too.
- Tongs: These handle chicken safely while flipping. No burns or mess. I grab mine every time.
- Sharp knife: Perfect for slicing and mincing garlic. It speeds up everything. Dull blades just slow you down.
- Citrus juicer: This extracts lemon juice easily. Or squeeze by hand if needed. Fresh zest makes a big difference.
With these tools, chicken paillard comes together smoothly at home. You save time and effort. Trust me, it feels rewarding.
How to Make Chicken Paillard
Making chicken paillard at home is simple and rewarding. I walk you through each step. You’ll get that golden sear and zesty sauce in no time. As a busy mom, I love how it streamlines dinner prep. Let’s dive in.
Step 1: Prepare the Chicken
First, slice each chicken breast horizontally if needed. This creates thinner cutlets. Then, place them between two pieces of plastic wrap. Pound to an even 1/4-inch thickness. Use the flat side of a meat mallet or rolling pin. It ensures uniform cooking. Next, pat dry with paper towels. Season both sides generously. Add garlic powder, paprika, salt, and black pepper. This builds deep flavor right away.
Step 2: Sear the Chicken
Now, heat olive oil in a large stainless steel skillet. Set it over medium-high heat. Wait until it’s hot and shimmering. Add the seasoned cutlets. Sear for 2-3 minutes per side. Look for golden brown color. Ensure they’re cooked through to 165°F inside. Then, remove from the pan. Cover to keep warm. Set aside while you make the sauce. This step creates that irresistible crust.
Step 3: Make the Lemon Butter Sauce
Reduce heat to medium-low. Add the butter to the same skillet. Let it melt and brown slightly. Scrape up those browned bits for extra depth. Watch closely—it should smell nutty but not burn. Stir in minced garlic. Sauté for about 1 minute until fragrant. Then, pour in fresh lemon juice. Add chopped parsley. Let the mixture sizzle briefly. So, the flavors come alive quickly.
Step 4: Coat and Finish the Chicken
Finally, return the seared chicken to the pan. Turn each piece to coat well. Simmer in the warm lemon butter sauce for 2-4 minutes. This melds the flavors beautifully. Check that chicken hits 165°F internally. Serve right away. Drizzle generously with the pan sauce. Enjoy that lemony burst—it ties everything together perfectly.
Tips for Success
I’ve learned a few tricks for perfect chicken paillard over time. These tips save hassle during busy evenings. They ensure tender results without extra effort. As a mom fighting prep fatigue, I swear by them.
- Pound chicken evenly to 1/4-inch thickness. This guarantees quick, tender cooking. Thicker spots cause uneven doneness. So, use your mallet gently but firmly.
- Stick to medium-high heat for searing. It creates a crisp exterior. Meanwhile, it keeps the lean meat juicy. No dry chicken here—trust me!
- Brown the butter just until nutty. It adds rich flavor to your chicken paillard. But it burns fast, so stir constantly. I watch like a hawk every time.
- Always use fresh lemon juice. Bottled versions lack that bright zing. It really brightens the sauce and wakes up the dish.
- Check internal temperature with a thermometer. Aim for 165°F for safety. This step prevents guesswork and keeps everyone healthy.
- Pat chicken dry before seasoning. It promotes better browning. Plus, spices stick well. Skip this, and you’ll miss that golden sear.
Follow these, and chicken paillard turns out effortlessly. No more weeknight disasters. Your family will thank you, especially the picky ones.
How to Store Chicken Paillard
I know how precious time is during busy weeks. So, storing chicken paillard leftovers saves the day. It lets you meal prep without extra stress. Plus, it keeps that fresh flavor for later. Let me share my simple tips.
For short-term storage, first let cooled chicken paillard reach room temperature briefly. Then, transfer it to an airtight container. Refrigerate for up to 3 days. The lemon butter sauce might separate a bit. But it reheats beautifully. Just stir it gently.
To freeze, wrap individual portions tightly in plastic wrap and foil. Place them in a freezer bag. They last up to 2 months this way. Thaw overnight in the fridge before using. This avoids rushed mornings, right?
Reheat gently in a skillet over low heat. Add a splash of water or butter to revive moisture. Avoid the microwave—it can make chicken tough. Always check for 165°F internally. Safety first for your family.
This method makes chicken paillard perfect for prepping ahead. No more last-minute dinners. As a mom, I rely on it during hectic schedules. Enjoy the convenience!
Serving Suggestions
Serving chicken paillard just right makes dinner special. As a busy mom, I look for easy pairings that please picky eaters without extra work. These ideas keep things light and flavorful. Plus, they fit gluten-free needs perfectly.
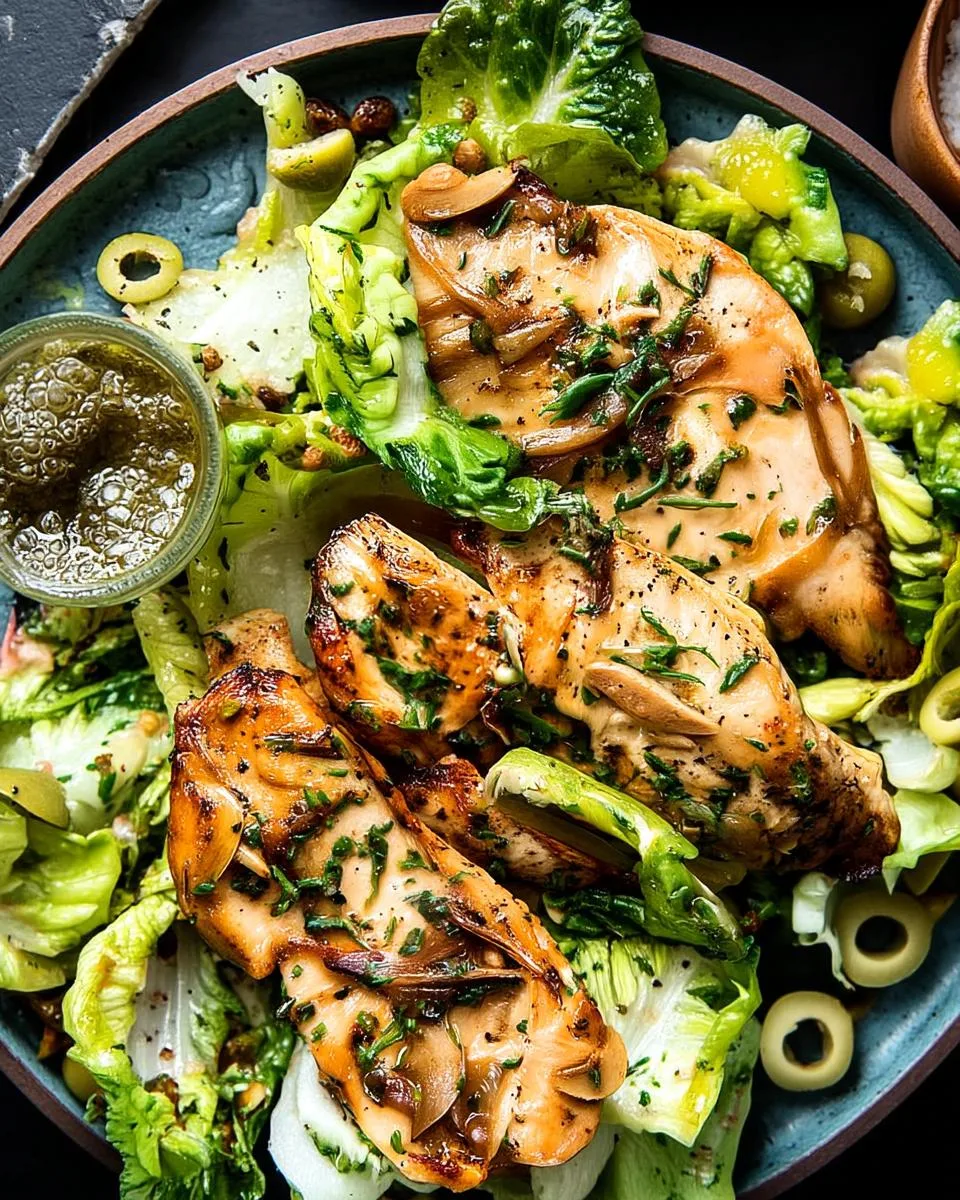
- Pair chicken paillard with a crisp green salad. Dress it in vinaigrette for refreshing contrast. It’s quick to toss together after a long day.
- Serve alongside roasted asparagus or steamed broccoli. They add vibrant color and nutrients. Kids often surprise me by eating more veggies this way.
- Drizzle extra sauce over quinoa or couscous. This creates a simple, gluten-free base. For instance, it soaks up that tangy lemon butter beautifully.
- For drinks, try chilled white wine like Sauvignon Blanc. Or go with sparkling water and lemon. Both enhance the bright flavors without overwhelming.
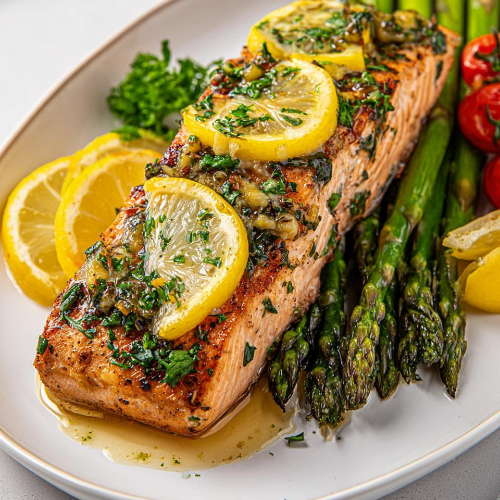
- Garnish with lemon wedges and more parsley. This gives an elegant touch that impresses guests. It takes seconds but looks fancy.
These suggestions turn chicken paillard into a complete meal. They save time while satisfying everyone at the table. Next time, try one and see the smiles. It’s worth the small effort!
Print
Chicken Paillard with Lemon Butter Sauce
- Prep Time: 15 minutes
- Cook Time: 15 minutes
- Total Time: 30 minutes
- Yield: 2 servings
- Category: Main Dish
- Method: Pan-searing
- Cuisine: French-inspired
- Diet: Gluten Free
Description
Thinly pounded chicken breasts seasoned with spices, seared to perfection, and finished with a flavorful lemon butter sauce made from browned butter, garlic, and fresh parsley.
Ingredients
- 2 boneless, skinless chicken breasts (or pre-cut thin cutlets)
- Garlic powder, to taste
- Paprika, to taste
- Sea salt, to taste
- Black pepper, to taste
- 2 tablespoons olive oil
- 4 tablespoons salted butter
- 2 cloves garlic, minced
- Juice of 1 fresh lemon
- 2 tablespoons fresh parsley, chopped
Instructions
- Prepare the chicken: Slice each chicken breast horizontally to create thinner cutlets, if they aren’t already thin.
- Place the chicken cutlets between two pieces of plastic wrap. Using the flat side of a meat mallet or a rolling pin, pound them to an even 1/4-inch thickness.
- Pat the pounded chicken dry with paper towels. Season both sides generously with garlic powder, paprika, salt, and black pepper.
- Heat olive oil in a large stainless steel skillet over medium-high heat. Once hot, sear the chicken cutlets for about 2-3 minutes per side, until they are golden brown and cooked through. Remove the chicken from the pan and set aside, covering to keep warm.
- Reduce the heat to medium-low. Add the butter to the same skillet. Allow it to melt and brown slightly, scraping up any delicious browned bits from the bottom of the pan, until it smells nutty.
- Add the minced garlic to the pan and sauté for about 1 minute until fragrant.
- Pour in the fresh lemon juice and add the chopped parsley. The mixture will sizzle.
- Return the cooked chicken to the pan, turning each piece to coat thoroughly in the warm lemon butter sauce. Continue cooking for another 2-4 minutes, just to allow the flavors to meld and the chicken to reach an internal temperature of 165°F (74°C).
- Serve the chicken paillard immediately, drizzling the pan sauce generously over each cutlet.
Notes
- Ensure chicken reaches an internal temperature of 165°F for safety.
- Browning the butter adds a nutty flavor; watch closely to avoid burning.
- This recipe is quick and suitable for weeknight dinners.