
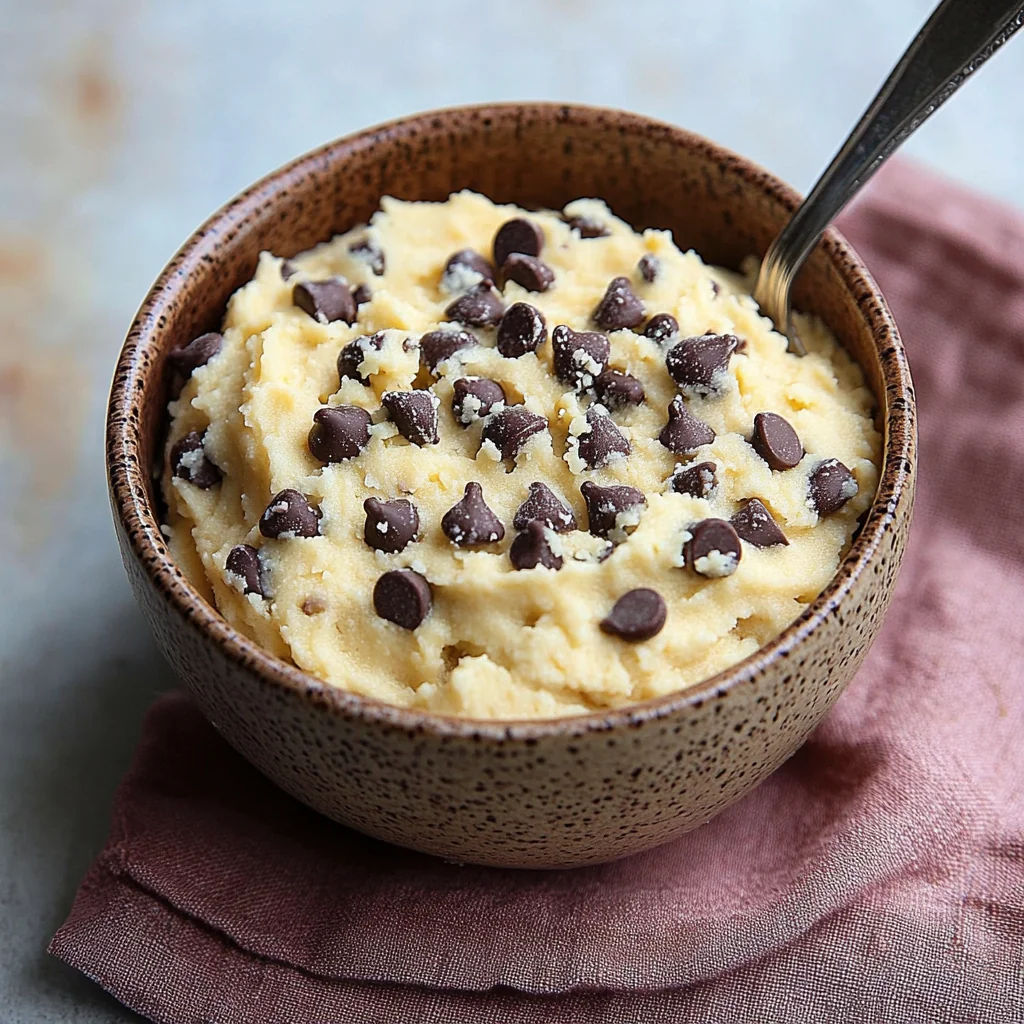
The whisper of “cookie dough” usually conjures images of forbidden spoonfuls, delightful but perhaps a tad indulgent. But what if I told you there’s a version that not only satisfies that craving but also packs a nutritious punch? Enter the glorious world of Chickpea Cookie Dough – a revelation that has genuinely transformed my snack game and will undoubtedly revolutionize yours. It’s the kind of treat that feels like a well-kept secret, one you’re almost hesitant to share until you see the look of surprised delight on someone’s face after their first bite.
This edible Chickpea Cookie Dough is a game-changer for anyone seeking healthier alternatives without sacrificing flavor. It’s a smooth, creamy, and perfectly sweet concoction that brilliantly mimics the texture and taste of traditional cookie dough, but with the added benefits of protein and fiber from its star ingredient. Perfect for a quick afternoon pick-me-up, a post-workout snack, or even a fun, kid-friendly treat, this recipe is versatile and incredibly easy to whip up. It has become a staple in our house, especially on busy weeknights when a wholesome yet delicious dessert is called for.
Why You’ll Love This Recipe
This Chickpea Cookie Dough isn’t just another healthy dessert attempt; it’s a genuinely delicious and satisfying treat. Here’s why you’ll find yourself making it again and again:
- Surprisingly Delicious: Let’s be honest, “chickpea” and “cookie dough” might sound like an odd pairing at first, but the neutral flavor of chickpeas makes them a perfect canvas. Blended smooth, they create an incredibly creamy texture that’s a dead ringer for traditional dough. The taste is sweet, satisfying, and wonderfully familiar.
- Quick & Easy: From pantry to spoon in under 10 minutes! This recipe requires minimal effort and uses mostly common pantry staples. It’s perfect for those moments when a sweet craving hits and you need a quick fix. Busy parents, this one’s for you!
- Packed with Goodness: Unlike its flour-and-egg-based cousin, this Chickpea Cookie Dough is loaded with plant-based protein and fiber from chickpeas, making it a much more satiating and blood-sugar-friendly option. It’s a treat you can feel good about eating.
- Highly Customizable: This recipe is a fantastic base for your creativity. Add different mix-ins, switch up the nut butter, or adjust the sweetness to your liking. It’s incredibly forgiving and adaptable to various dietary needs and preferences, making it ideal for those who love to experiment in the kitchen.
- No-Bake & Egg-Free: Completely safe to eat raw, this edible Chickpea Cookie Dough eliminates any worries associated with consuming uncooked flour or eggs. This makes it a fantastic option for kids, pregnant individuals, or anyone who loves the taste of raw cookie dough without the risk.
Ingredients for Chickpea Cookie Dough
Crafting this delightful Chickpea Cookie Dough requires just a handful of simple, wholesome ingredients. Here’s what you’ll need:
Core Ingredients
- 1 (14-ounce) can chickpeas (garbanzo beans): Thoroughly rinsed and drained. This is the magical base that provides creaminess and a surprising protein punch. Ensure they are well-rinsed to remove any “canned” taste. The skins can be removed for an even smoother texture, though it’s not strictly necessary.
- 1/3 cup almond butter (or other nut/seed butter): This adds richness, healthy fats, and a delicious nutty flavor. Creamy, natural almond butter works best. See below for substitution ideas!
- 3 tablespoons maple syrup (or brown sugar/honey): For that essential sweetness. Maple syrup offers a lovely depth of flavor. Adjust the amount to your preference.
- 1/4 teaspoon salt: Crucial for balancing the sweetness and enhancing all the other flavors. Don’t skip it!
- 1 tablespoon vanilla extract: Pure vanilla extract adds warmth and that classic cookie dough aroma. It makes a big difference in mimicking the traditional flavor profile.
- 1/4 cup rolled oats (certified gluten-free if needed): These contribute to the texture, making it more dough-like. Quick oats can also work, but rolled oats provide a slightly better chew.
- 2 tablespoons milk (unsweetened almond milk or any milk of choice): Helps to achieve the perfect consistency. Start with this amount and add a little more if needed to get your blender or food processor going smoothly.
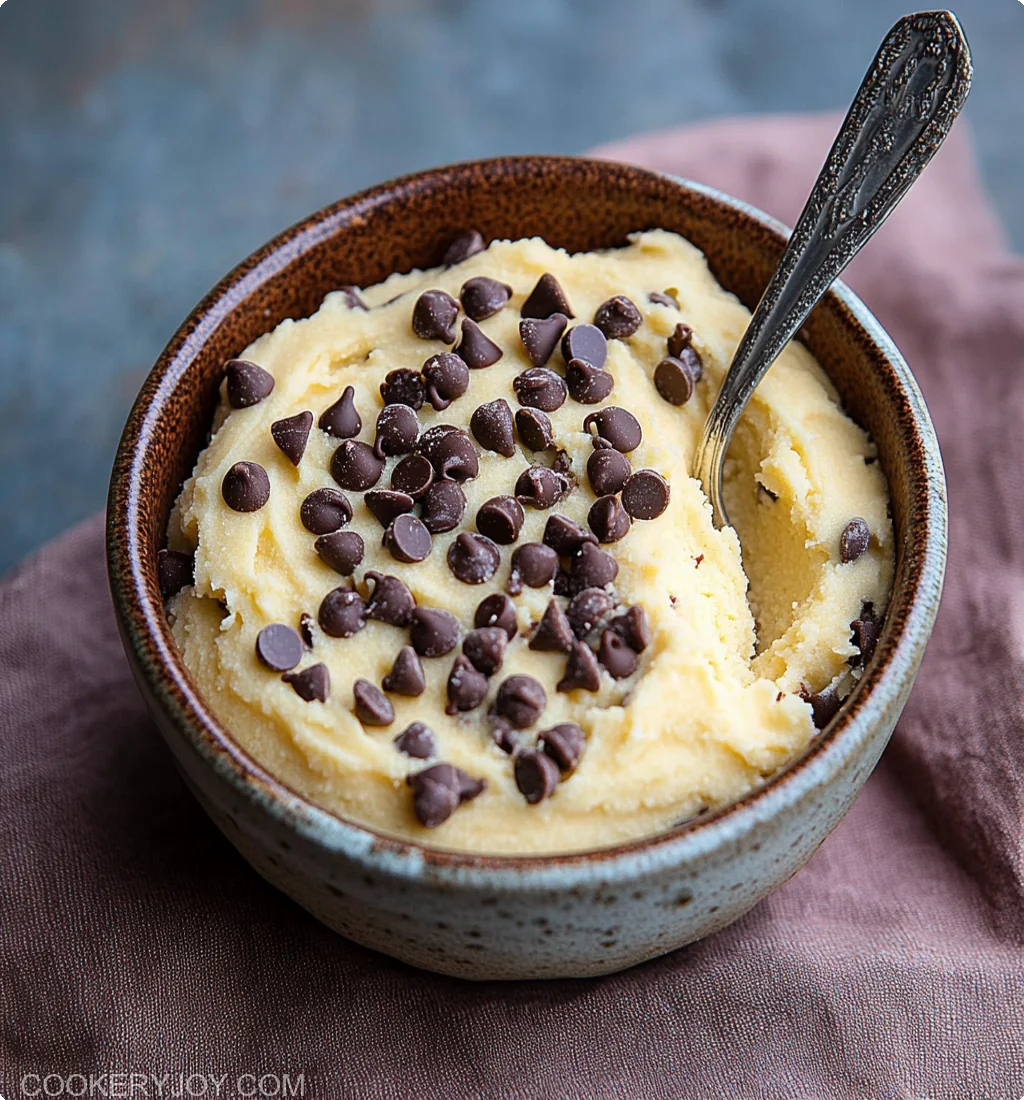
- 1/2 cup chocolate chips: Because what’s cookie dough without chocolate chips? Semi-sweet, dark, or milk chocolate chips all work wonderfully. Mini chocolate chips distribute more evenly.
Substitutions and Tips
One of the best things about this Chickpea Cookie Dough recipe is its adaptability. Here are some common swaps and chef insights:
- Nut Butter Variations: Don’t have almond butter? No problem! Peanut butter will lend a classic peanut butter cookie dough vibe. Cashew butter offers a milder, super-creamy result. For nut-free options, sunflower seed butter (like SunButter) or tahini are excellent choices. Tahini will give it a slightly more complex, earthy flavor that many people love, reminiscent of halva. Granola butter is another delicious, often nut-free, option.
- Sweetener Swaps: If you’re out of maple syrup, honey (if not vegan) or agave nectar can be used in a 1:1 ratio. Light or dark brown sugar also works well; you might want to dissolve it in the milk slightly first for a smoother texture, or simply ensure it’s well blended. Start with 2-3 tablespoons of brown sugar and adjust to taste.
- Oat Alternatives: If you don’t have rolled oats or need a grain-free option, you can try almond flour (start with 2-3 tablespoons and adjust) or even omit the oats altogether for a slightly smoother, more dip-like consistency. The texture will change, but it will still be delicious.
- Milk Choices: Any milk works here – dairy milk (whole, 2%, skim), unsweetened almond milk, soy milk, oat milk, or coconut milk. Use whatever you have on hand.
- Flavor Boosters & Mix-Ins: This is where you can truly make the Chickpea Cookie Dough your own!
- Spices: A pinch of cinnamon or nutmeg can add warmth.
- Texture: Consider adding 1/4 cup of crushed nuts (walnuts, pecans), chopped pretzels (for a sweet and salty kick!), or unsweetened shredded coconut.
- Dried Fruit: A handful of raisins, dried cranberries, or chopped dates can add chewiness and extra sweetness.
- For a richer flavor, try adding a teaspoon of cocoa powder to make a chocolate Chickpea Cookie Dough base.
Chef’s Insight: When substituting ingredients, always taste and adjust. For instance, some nut butters are saltier than others, so you might need to tweak the added salt. If using a liquid sweetener other than maple syrup, the consistency might vary slightly.
Best Type of Chickpeas to Use
The star of our Chickpea Cookie Dough is, of course, the humble chickpea (also known as a garbanzo bean). The type and preparation of chickpeas you use can subtly affect the final texture and flavor of your dough.
Canned Chickpeas: The Convenient Choice
For ease and speed, canned chickpeas are your best friend for this recipe. They are already cooked and ready to use.
- What to look for: Opt for unsalted or low-sodium canned chickpeas if possible. This gives you more control over the final seasoning of your Chickpea Cookie Dough.
- Preparation is key: Thoroughly rinse and drain the canned chickpeas. This step is crucial to wash away any “canned” flavor from the liquid (aquafaba) they are packed in and to reduce sodium. Some people find that the chickpea liquid can impart a slightly metallic or bean-like taste if not rinsed off properly.
- To skin or not to skin? For the absolute smoothest, creamiest Chickpea Cookie Dough, taking a few extra minutes to remove the skins from the chickpeas can make a noticeable difference. The skins are perfectly edible and contain fiber, but they can sometimes leave tiny flecks in the final product. To remove them, simply rub the rinsed chickpeas gently between your hands or between a clean kitchen towel. The skins will loosen and slip off easily. It’s a bit tedious, but for some, the ultra-smooth result is worth it. However, if you’re short on time or don’t mind a slightly more rustic texture, skipping this step is perfectly fine. Your food processor should do a good job of breaking them down.
Dried Chickpeas: The From-Scratch Option
If you prefer to use dried chickpeas, you’ll need to cook them before using them in this Chickpea Cookie Dough recipe. This option is more economical and allows you complete control over the cooking process and sodium content.
- How to prepare: Soak the dried chickpeas overnight (or for at least 8 hours) in plenty of water. Drain and rinse them, then cook them in fresh water until they are very tender – softer than you’d typically cook them for a salad. They should mash easily between your fingers. This usually takes about 1.5 to 2 hours on the stovetop or about 20-25 minutes in a pressure cooker.
- Flavor advantage: Chickpeas cooked from scratch often have a purer, cleaner flavor compared to their canned counterparts.
- Comparison: Using home-cooked chickpeas will yield a fantastic Chickpea Cookie Dough. The main difference is the prep time. If you regularly cook beans from scratch, this is a great option. If not, canned chickpeas offer a perfectly delicious and much quicker alternative.
In summary: For most people, well-rinsed canned chickpeas are the way to go for convenience and great results in this Chickpea Cookie Dough. If you’re aiming for ultimate smoothness, consider de-skinning them.
Kitchen Tools You’ll Need
Making this Chickpea Cookie Dough is wonderfully straightforward, and you likely already have the necessary tools in your kitchen.
Must-Have Tools
- Food Processor: This is the hero tool for this recipe. A good food processor will effortlessly blend the chickpeas and other ingredients into a smooth, creamy consistency, which is key for authentic-tasting Chickpea Cookie Dough. A high-powered blender can also work, but you may need to stop and scrape down the sides more frequently, and potentially add a touch more liquid to get things moving.
- Measuring Cups and Spoons: Accuracy is helpful for achieving the right balance of flavors and textures, especially when you’re making it for the first time.
- Can Opener: If using canned chickpeas.
- Colander/Sieve: For rinsing and draining the chickpeas thoroughly.
- Spatula: A flexible silicone spatula is invaluable for scraping down the sides of the food processor bowl to ensure everything is well combined, and for getting every last bit of delicious Chickpea Cookie Dough out!
Nice-to-Have Extras
- Small Bowls: Useful for measuring out ingredients beforehand (mise en place), which can make the process feel even smoother.
- Airtight Storage Container: For storing any leftover Chickpea Cookie Dough (if there is any!).
- Cookie Scoop: If you want to portion the Chickpea Cookie Dough into uniform balls for serving or chilling, a small cookie scoop works wonderfully. It also enhances the “cookie dough” illusion!
That’s it! No fancy gadgets required. The simplicity of the equipment mirrors the simplicity of making this fantastic Chickpea Cookie Dough.
How to Make Chickpea Cookie Dough
Ready to transform humble chickpeas into an irresistible, healthy treat? Follow these simple steps to create your very own delicious Chickpea Cookie Dough.
Step 1: Prepare the Chickpeas
Open your can of chickpeas. Pour them into a colander or sieve and rinse them thoroughly under cold running water. Drain them well, shaking off any excess water. If you’re aiming for an ultra-smooth texture, you can take a few minutes to remove the skins from the chickpeas by gently rubbing them between your fingers or a clean kitchen towel. This step is optional but recommended for the creamiest Chickpea Cookie Dough.
Pro-Chef Tip: Rinsing chickpeas until the water runs clear helps to remove any residual “canned” flavor and excess sodium. Well-drained chickpeas also prevent the dough from becoming too watery.
Step 2: Combine Wet Ingredients (Except Milk and Chocolate Chips)
In the bowl of your food processor, combine the rinsed and drained chickpeas, almond butter (or your chosen nut/seed butter), maple syrup (or other sweetener), salt, and vanilla extract.
Sensory Cue: At this stage, you’ll already start to smell the sweet, nutty aromas that hint at the deliciousness to come.
Step 3: Blend Until Smooth
Secure the lid on your food processor and process the mixture until it’s completely smooth and creamy. This might take a couple of minutes. Stop and scrape down the sides of the bowl with a spatula a few times to ensure all the ingredients are incorporated evenly and there are no chunky bits of chickpea left. You’re looking for a texture similar to hummus initially, but it will become more dough-like.
Pro-Chef Tip: Be patient with the blending process. The smoother the base, the more authentic your Chickpea Cookie Dough will taste and feel. If using a less powerful food processor, this step might take a little longer.
Step 4: Add Oats and Milk
Once the chickpea mixture is smooth, add the rolled oats and 2 tablespoons of milk. Pulse a few times just until the oats are incorporated and the mixture comes together into a dough-like consistency. Be careful not to over-process at this stage; you still want some texture from the oats. If the mixture seems too thick to process or you prefer a slightly looser dough, add a little more milk, one teaspoon at a time, until you reach your desired consistency.
Sensory Cue: The mixture should now look and feel much more like actual cookie dough. It will be thick but pliable.
Step 5: Stir in Chocolate Chips
Remove the blade from the food processor (or transfer the dough to a separate bowl if easier). Add the chocolate chips to the Chickpea Cookie Dough and stir them in by hand using your spatula. This ensures the chocolate chips remain whole and are evenly distributed.
Pro-Chef Tip: For a fun twist, reserve a few chocolate chips to press onto the top of the Chickpea Cookie Dough after it’s mixed. This makes it look even more enticing!
Step 6: Taste and Adjust (Optional)
Give your Chickpea Cookie Dough a taste. If you’d like it sweeter, you can blend in a little more maple syrup or your preferred sweetener. If it needs a bit more flavor, a tiny dash more vanilla or salt can make a difference.
Step 7: Chill and Serve (Recommended)
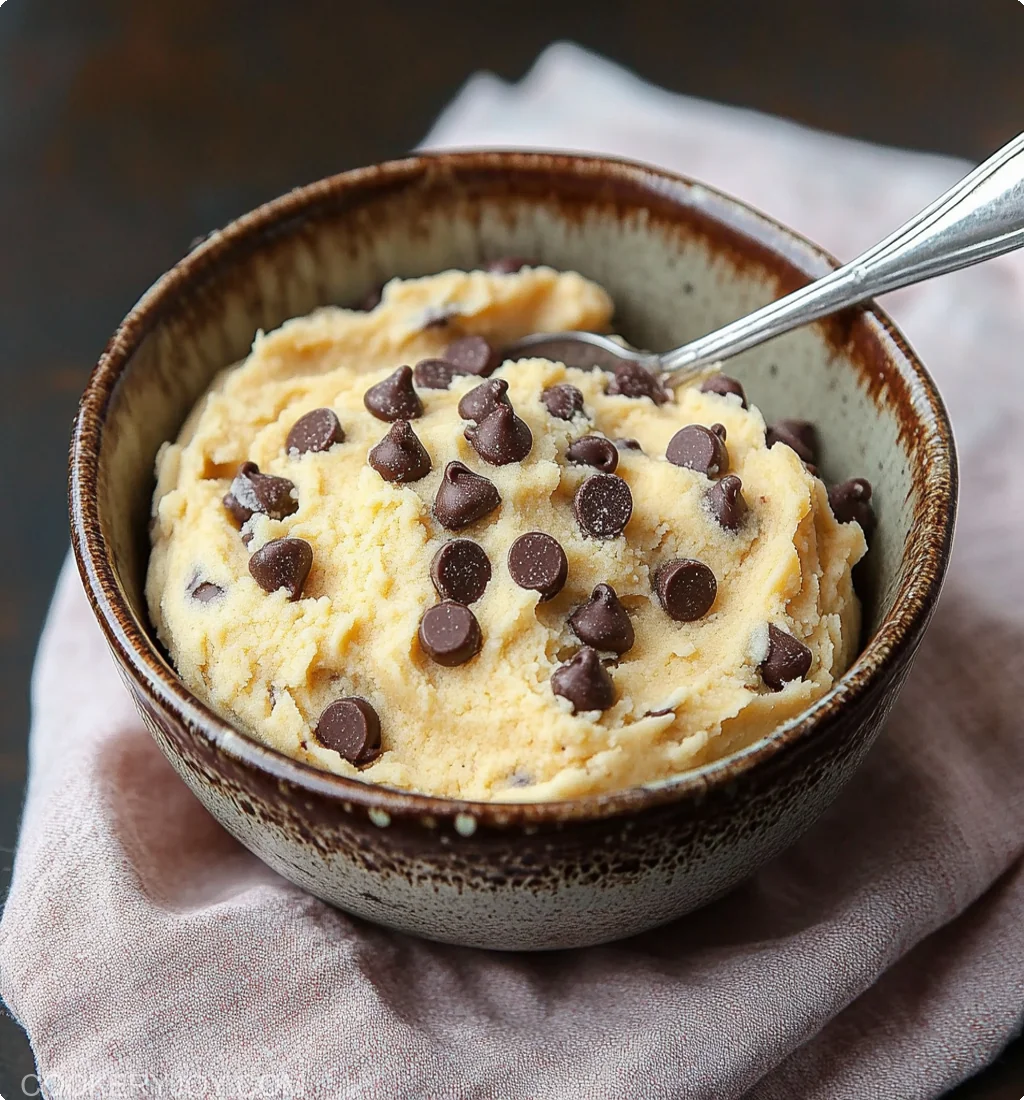
While you can enjoy the Chickpea Cookie Dough immediately, it tastes even better after chilling in the refrigerator for at least 30 minutes. Chilling allows the flavors to meld and the dough to firm up slightly, making it even more reminiscent of traditional cookie dough. Serve it with a spoon, use it as a dip for fruit or pretzels, or simply enjoy it on its own!
Enjoy your incredibly tasty and surprisingly healthy Chickpea Cookie Dough!
Tips for Success
To ensure your Chickpea Cookie Dough turns out perfectly every single time, keep these key tips in mind:
- Rinse Chickpeas Thoroughly: This is paramount for a clean-tasting Chickpea Cookie Dough. The liquid in canned chickpeas (aquafaba) can impart a beany flavor if not washed away completely. Don’t skimp on the rinsing!
- Use a Food Processor for Best Texture: While a high-powered blender can work in a pinch, a food processor is ideal for achieving that smooth, creamy, yet slightly textured Chickpea Cookie Dough. Avoid under-blending; aim for no chickpea chunks.
- Adjust Sweetness and Consistency to Your Liking: The beauty of this recipe is its flexibility. Taste the Chickpea Cookie Dough before adding the chocolate chips. Need more sweetness? Add a touch more maple syrup. Too thick? A teaspoon more milk will do the trick. Remember, you are in control of the final flavor and texture.
- Don’t Over-Process After Adding Oats: The oats are there to provide texture. If you blend them too much, they’ll break down completely, and you’ll lose that lovely, subtle chewiness that mimics real cookie dough. Pulse just until combined.
- Chill for Optimal Flavor and Texture: While it’s tempting to dive right in, letting the Chickpea Cookie Dough chill in the refrigerator for at least 30 minutes makes a big difference. The flavors meld, and the dough firms up to a more classic cookie dough consistency. Patience rewards the palate!
By following these simple pointers, you’ll be well on your way to making the most delicious and satisfying Chickpea Cookie Dough.
How to Store Chickpea Cookie Dough
One of the great things about this Chickpea Cookie Dough is that it stores beautifully, making it perfect for meal prepping a healthy snack or satisfying a sweet craving throughout the week.
Room Temperature
Generally, it’s not recommended to store Chickpea Cookie Dough at room temperature for extended periods, especially if it contains dairy milk (if you opted for that). Due to its moist ingredients, it’s best kept chilled to maintain freshness and prevent any potential spoilage. If you plan to consume it within an hour or two of making it, leaving it out is usually fine.
In the Refrigerator
This is the ideal way to store your Chickpea Cookie Dough.
- How to Store: Transfer the Chickpea Cookie Dough to an airtight container. This prevents it from drying out and absorbing any odors from the refrigerator.
- Storage Time: Properly stored, it will keep well in the refrigerator for up to 4-5 days. The flavors may even continue to meld and improve over the first day or two!
- Reheating/Serving: Enjoy it straight from the fridge! It will be firmer when chilled. If you prefer a slightly softer consistency, you can let it sit at room temperature for 10-15 minutes before serving. No reheating is necessary since it’s an edible, no-bake dough.
Freezing Tips
Yes, you can freeze Chickpea Cookie Dough! This is a fantastic option if you want to make a larger batch or save some for later.
- Freezability: It freezes quite well. The texture may be slightly different upon thawing (perhaps a tiny bit softer or more prone to slight separation, though usually minimal), but it will still be delicious.
- Storage Suggestions:
- Portioning: For easy snacking, you can roll the Chickpea Cookie Dough into individual balls or press it into a small, freezer-safe container. Portioning it before freezing makes it convenient to grab just what you need. Place balls on a parchment-lined baking sheet to freeze individually, then transfer to a freezer bag or container.
- Container: Use a freezer-safe airtight container or a heavy-duty freezer bag. If using a bag, try to remove as much air as possible to prevent freezer burn.
- Storage Time: For best quality, consume frozen Chickpea Cookie Dough within 2-3 months.
- Reheating/Thawing Instructions: Thaw the Chickpea Cookie Dough in the refrigerator overnight. Avoid thawing it at room temperature for extended periods. Once thawed, give it a good stir to recombine any slight separation that might have occurred. It’s ready to eat once thawed – no reheating required. You can also enjoy it partially frozen for a firmer, icier treat!
Storing your Chickpea Cookie Dough correctly ensures you can enjoy this delightful treat safely and at its best quality.
Frequently Asked Questions (FAQs)
Here are some common questions about making and enjoying Chickpea Cookie Dough:
Is Chickpea Cookie Dough actually healthy?
Yes, compared to traditional cookie dough, Chickpea Cookie Dough is a significantly healthier option. It’s packed with plant-based protein and fiber from the chickpeas and often uses natural sweeteners and healthy fats from nut butter. This makes it more satiating and better for blood sugar levels.
Can you taste the chickpeas in Chickpea Cookie Dough?
When prepared correctly (especially with thorough rinsing and smooth blending), the chickpea flavor is virtually undetectable. The other ingredients, like nut butter, vanilla, and sweetener, mask the chickpea taste, leaving you with a delicious cookie dough flavor. If you’re concerned, try removing the chickpea skins for an even milder base.
Can I bake this Chickpea Cookie Dough into cookies?
This recipe is designed to be an edible, no-bake Chickpea Cookie Dough. It lacks the binding agents (like eggs) and leavening agents (like baking soda/powder) typically found in bakeable cookie dough. Therefore, it won’t bake into traditional cookies; it would likely just melt or dry out.
What if I don’t have a food processor?
A high-powered blender can work as an alternative for making Chickpea Cookie Dough, but you might need to stop and scrape down the sides more frequently. You may also need to add a little extra liquid (milk or water, a teaspoon at a time) to help the blades move and process the mixture smoothly. The texture might end up slightly more “blended” than “processed,” but it will still be tasty.
Is this recipe gluten-free?
Yes, this Chickpea Cookie Dough recipe can easily be gluten-free. The main ingredient to watch is the rolled oats. Ensure you use certified gluten-free rolled oats if you have celiac disease or a gluten sensitivity. All other core ingredients are naturally gluten-free.
How can I make this Chickpea Cookie Dough nut-free?
Absolutely! To make it nut-free, simply replace the almond butter with a seed butter. Sunflower seed butter (SunButter) is a popular and excellent choice, or you could use tahini (sesame seed paste) for a unique flavor. Also, ensure your chocolate chips and any optional add-ins are nut-free.
My Chickpea Cookie Dough isn’t smooth, what went wrong?
This usually comes down to a few things: not rinsing the chickpeas enough (though this affects flavor more than texture), not removing the skins (optional, but helps for super smoothness), or not processing long enough. Make sure to blend the chickpeas and wet ingredients until completely smooth before adding the oats when making your Chickpea Cookie Dough.
Conclusion
This Chickpea Cookie Dough is more than just a recipe; it’s a delightful discovery that proves healthy eating can be incredibly satisfying and fun. It’s a versatile, quick-to-make treat that caters to various dietary needs without compromising on that classic, comforting cookie dough flavor and texture we all adore. Whether you’re looking for a guilt-free snack, a kid-approved dessert, or a creative way to boost your protein intake, this Chickpea Cookie Dough is a fantastic go-to. Give it a try, and you might just find your new favorite way to indulge!


