
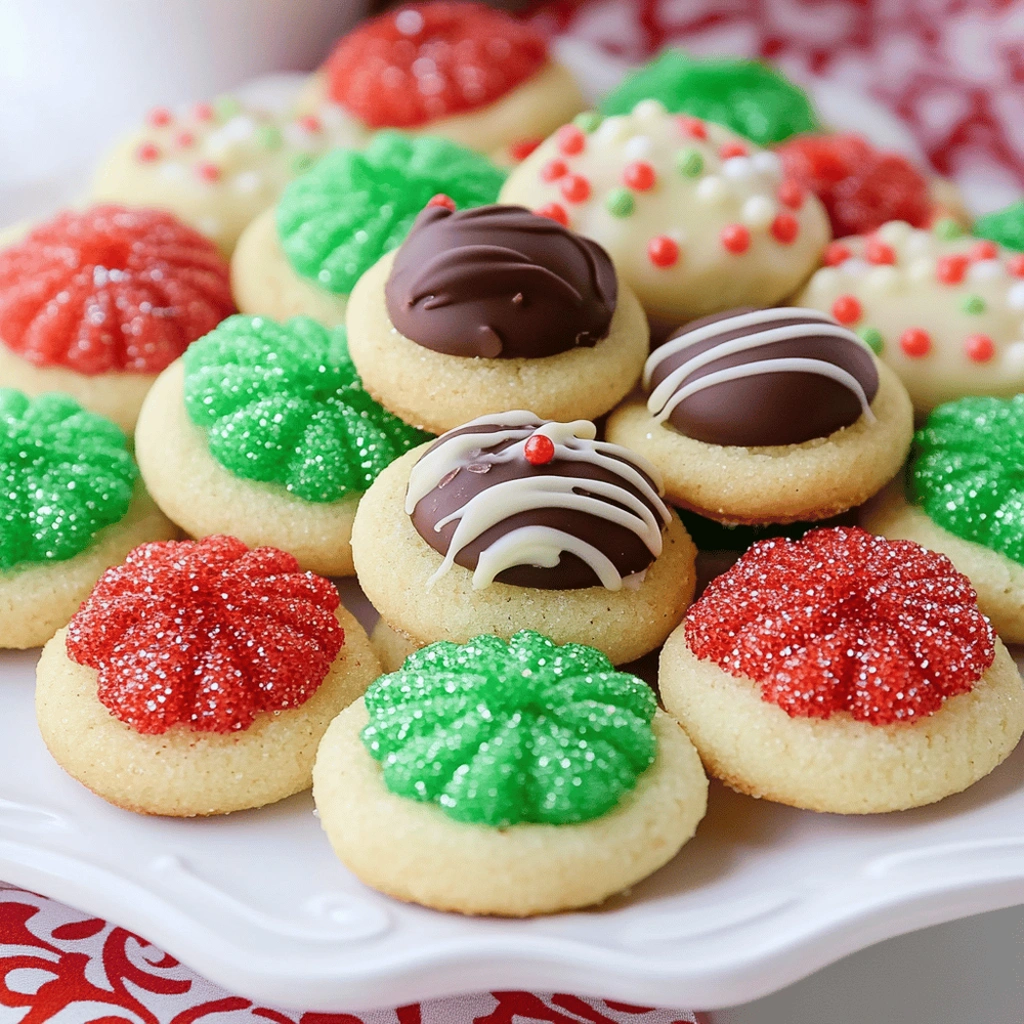
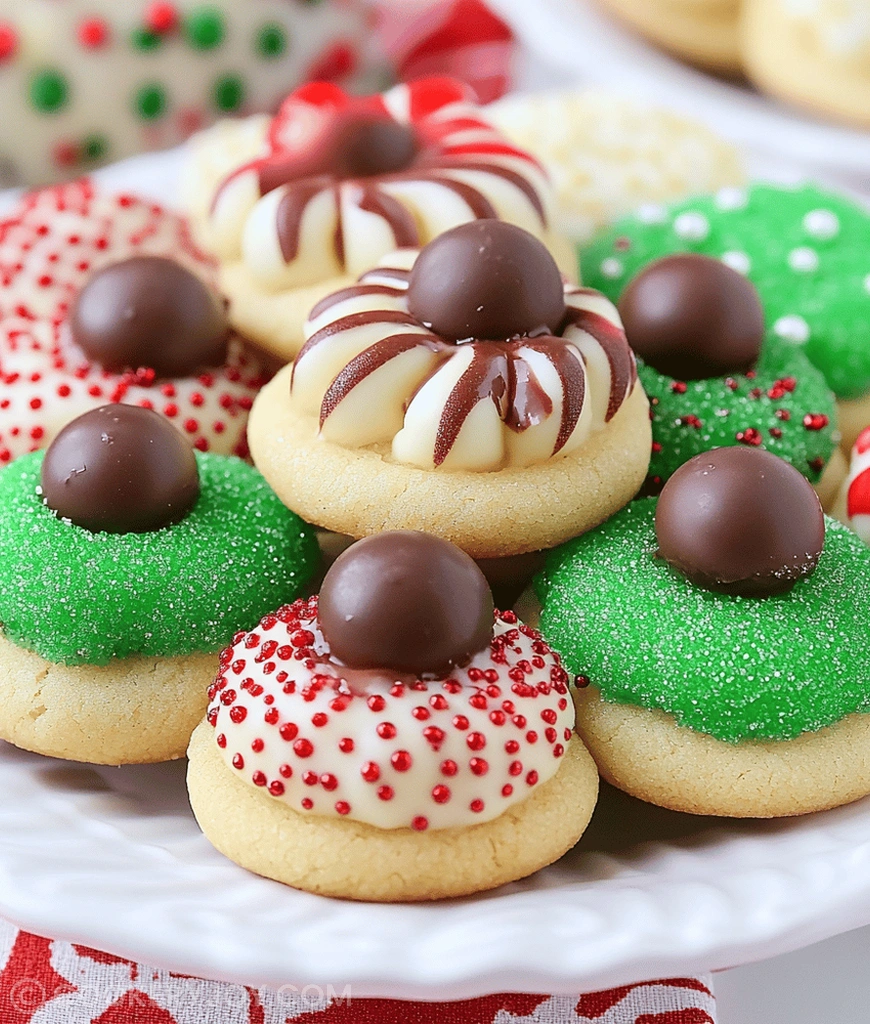
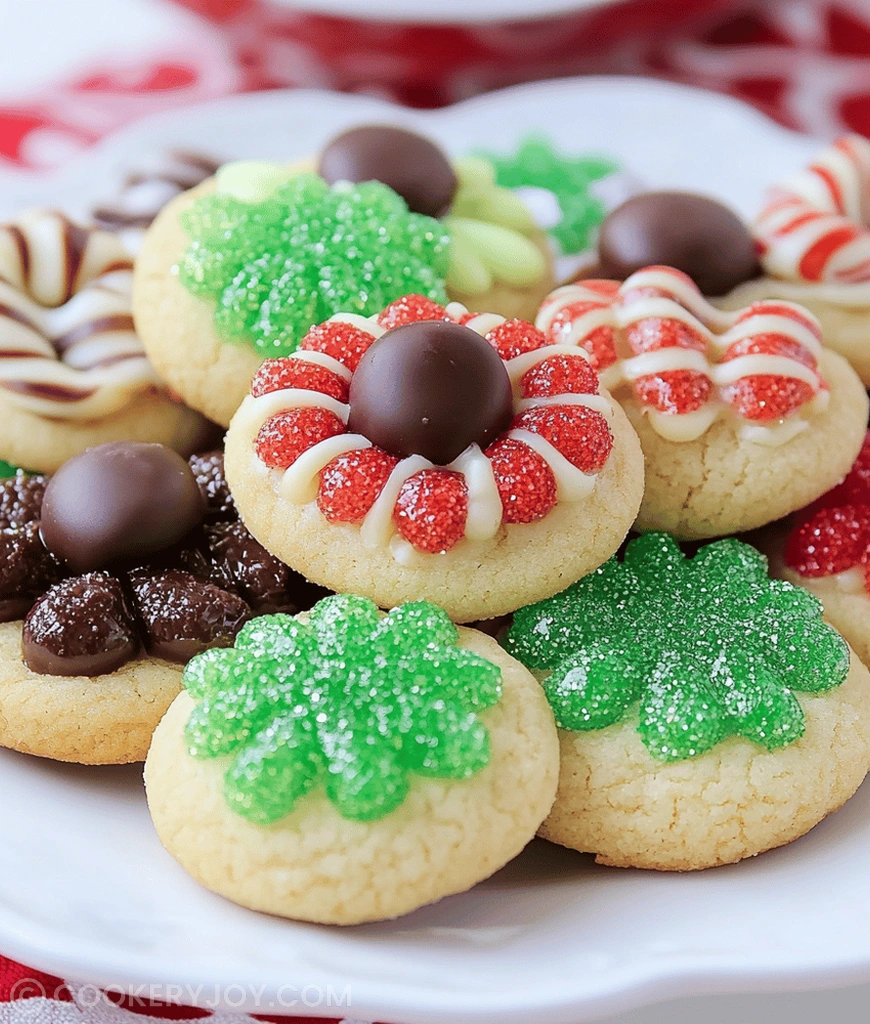
Sometimes the simplest holiday treats hold the most magic. These cookies give you that deeply satisfying, buttery shortbread texture. Moreover, the contrast with the melting chocolate kiss on top is simply divine. We are baking up the very best Christmas blossom cookies right now.
I find myself making these cookies every year without fail. They store beautifully, which is a huge plus for busy bakers like us. Truly, everyone always asks for the recipe immediately.
Why I Love This Recipe
I adore this recipe for its sheer speed. You whip up the dough fast. The flavor is bright and sweet. Forget complicated pastry work. These Christmas blossom cookies look way fancier than they are. They are my go-to comfort bake.
- Super quick prep time.
- Festive look with sprinkles.
- Kid-approved chocolate center.
Christmas blossom cookies Ingredients
Mixing these few quality components yields such a beautiful outcome. The rich butter creates a tender base for the sweet chocolate topping. Truly, it is a classic combination that never fails to impress during holiday gatherings.
Here is what you will need for your decadent holiday batch:
- Unsalted Butter: This forms the tender, moist foundation of the cookie.
- Granulated Sugar: It sweetens the dough and helps with that lovely spread while baking.
- Large Egg: This binds all our beautiful ingredients together nicely.
- Vanilla Extract: A classic flavor boost, lending warmth to every bite.
- All-Purpose Flour: The structure provider here; keep it light when measuring.
- Baking Powder: Just a touch gives the cookie a nice lift.
- Salt: A necessary pinch to balance all that sweetness perfectly.
- Sugar/Sprinkle Mix: This adds that gorgeous, colorful, crunchy exterior coating.
- Hershey’s Kisses: The signature crowning jewel that melts just right.
Substitutions and Tips
For a twist, try swapping the milk chocolate Kisses for the dark chocolate variety. Mint Kisses work wonderfully too, offering a pop of festive flavor. If you lack sprinkles, roll the dough balls in fine granulated sugar instead. Store any leftover unwrapped Kisses in a cool, dry spot.
Kitchen Tools You’ll Need
You won’t need many specialized gadgets for this bake. Let’s gather our essentials quickly:
- Electric mixer for creaming the butter.
- Two large mixing bowls for dry and wet items.
- Baking sheets lined with parchment paper.
- A small cookie scoop helps keep size consistent.
- A wire rack for effective cooling.
How to Make Christmas blossom cookies
Following these steps ensures you get that perfect soft center every time. Remember, timing is everything when adding that chocolate kiss.
Preparation and Mixing the Dough
First, get your oven preheated to the right temperature. Line your baking sheets carefully with parchment paper sheets. Next, cream the butter and initial sugar well in a large bowl. Beat in the egg and vanilla until everything looks smooth. In a different bowl, whisk your flour, powder, and salt together lightly. Gradually add the dry mix to the wet ingredients. Mix gently until a soft, workable dough just forms.
Rolling and Baking the Cookie Base
Pour your sugar and sprinkle blend into one shallow dish. Roll your soft dough into uniform one-inch balls next. Roll each ball completely in the colorful sprinkle mixture. Place the coated balls onto your prepared sheets. Space them about two inches apart from one another. Bake for only eight to ten minutes maximum. Watch for very light golden edges; do not overbake these beauties.
Adding the Chocolate Topping
This step requires immediate action for success, so stay alert! As soon as the cookies exit the hot oven, press one unwrapped chocolate kiss right into the center. Push down gently but firmly. Let the cookies sit on the hot pan briefly. This five minutes lets the chocolate soften beautifully. Then, move them carefully to a rack to finish cooling completely.
How to Store Christmas blossom cookies
These tender cookies keep wonderfully well, which is great news. Store them in an airtight container at room temperature. They should stay fresh for up to five days. For longer storage, you can freeze them un-topped, baked discs only. Thaw them first, then top with the chocolate kisses after baking to set. Enjoy your delicious holiday stash!
Tips for Success
Using softened butter helps immensely with the creaming process. Creaming incorporates air, giving you that lighter cookie texture. Do not overbake the cookie bases at all. Residual heat finishes the baking off nicely. Press the chocolate kiss on quickly while the cookie is still extremely hot. This ensures a perfect melted chocolate blanket.
Serving Suggestions
Creating a lovely platter makes these treats shine brightly. Here are a few quick serving ideas.
- Serve alongside rich eggnog or warm spiced cider.
- Arrange them on a tiered stand with other small treats.
- Add a sprinkle of edible gold dust for extra dazzle.
- They look wonderful next to simple sugar cookies.

Christmas blossom cookies
- Prep Time: 20 minutes
- Cook Time: 8-10 minutes
- Total Time: Approx. 30 minutes (plus cooling time)
- Yield: Approx. 40 cookies
- Category: Dessert
- Method: Baking
- Cuisine: American
- Diet: Vegetarian
Description
A festive and classic holiday cookie featuring a soft, buttery base rolled in colorful sprinkles and topped with a melted chocolate kiss.
Ingredients
- 1/2 cup (1 stick) unsalted butter, softened
- 3/4 cup granulated sugar
- 1 large egg
- 1 teaspoon vanilla extract
- 1.5 cups all-purpose flour
- 1/2 teaspoon baking powder
- 1/4 teaspoon salt
- 1/4 cup granulated sugar mixed with red/green sprinkles (for rolling)
- Approx. 40 Hershey’s Kisses (milk chocolate or peppermint), unwrapped
Instructions
- Preheat oven to 375°F (190°C). Line baking sheets with parchment paper.
- In a large bowl, cream together the softened butter and 3/4 cup granulated sugar until light and fluffy.
- Beat in the egg and vanilla extract until well combined.
- In a separate bowl, whisk together the flour, baking powder, and salt.
- Gradually add the dry ingredients to the wet ingredients, mixing until just combined and a soft dough forms.
- Place the sugar-sprinkle mixture in a shallow bowl.
- Roll dough into 1-inch balls, then roll each ball in the sugar-sprinkle mixture to coat.
- Place the coated balls about 2 inches apart on the prepared baking sheets.
- Bake for 8-10 minutes, or until the edges are lightly golden (do not overbake).
- Immediately upon removing from the oven, press one unwrapped Hershey’s Kiss into the center of each hot cookie.
- Let the cookies cool on the baking sheets for 5 minutes before transferring to a wire rack to cool completely. The chocolate will soften, then set.
Notes
- Use room temperature butter for easier creaming.
- Do not overbake the cookies, as they will continue to set as they cool.
- The Hershey’s Kiss needs to be pressed into the cookie immediately after baking while the cookie is still hot for the chocolate to soften properly.


