
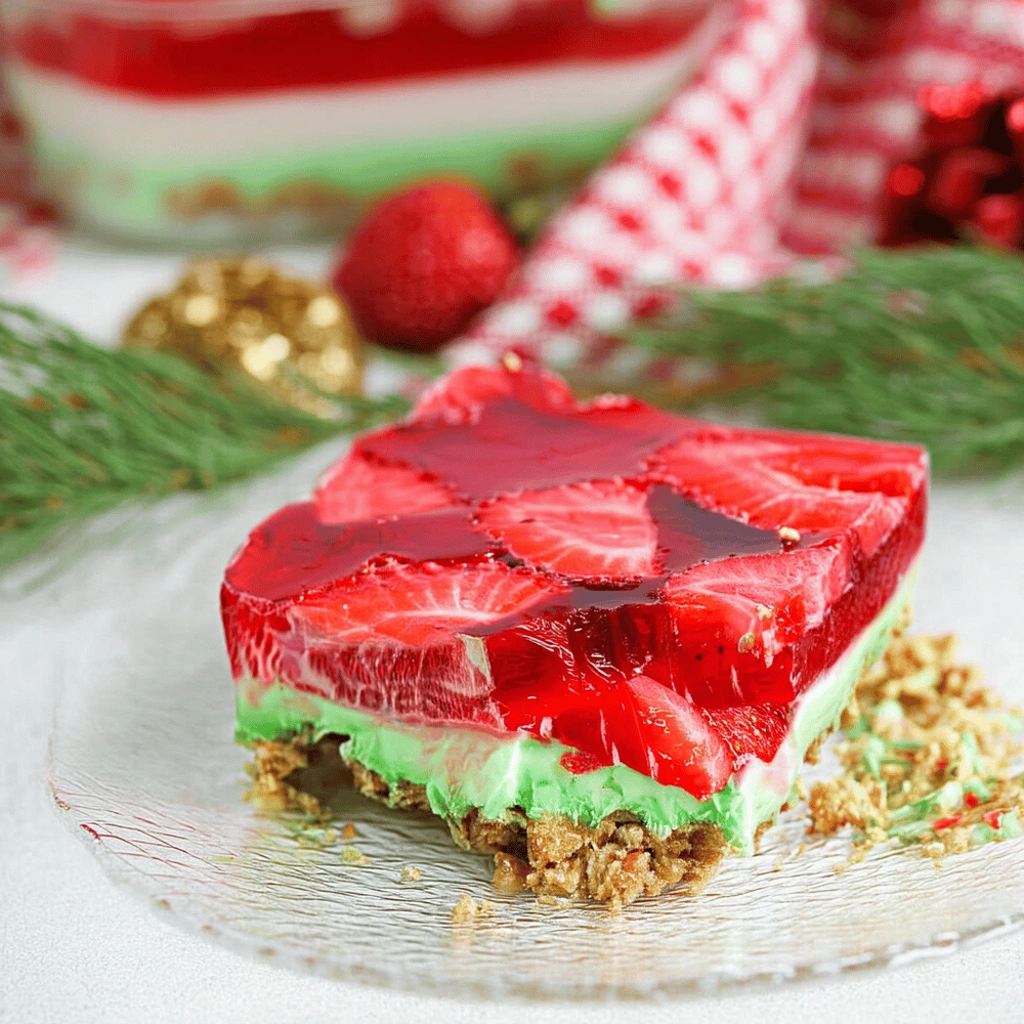
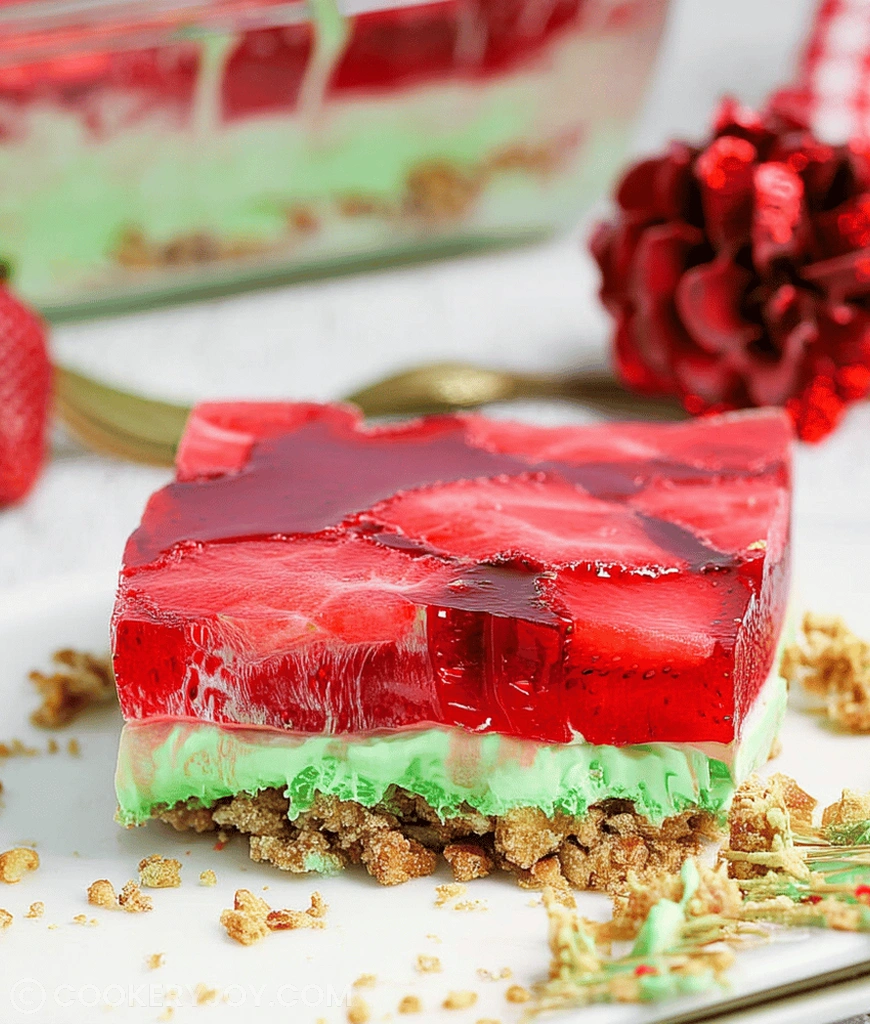
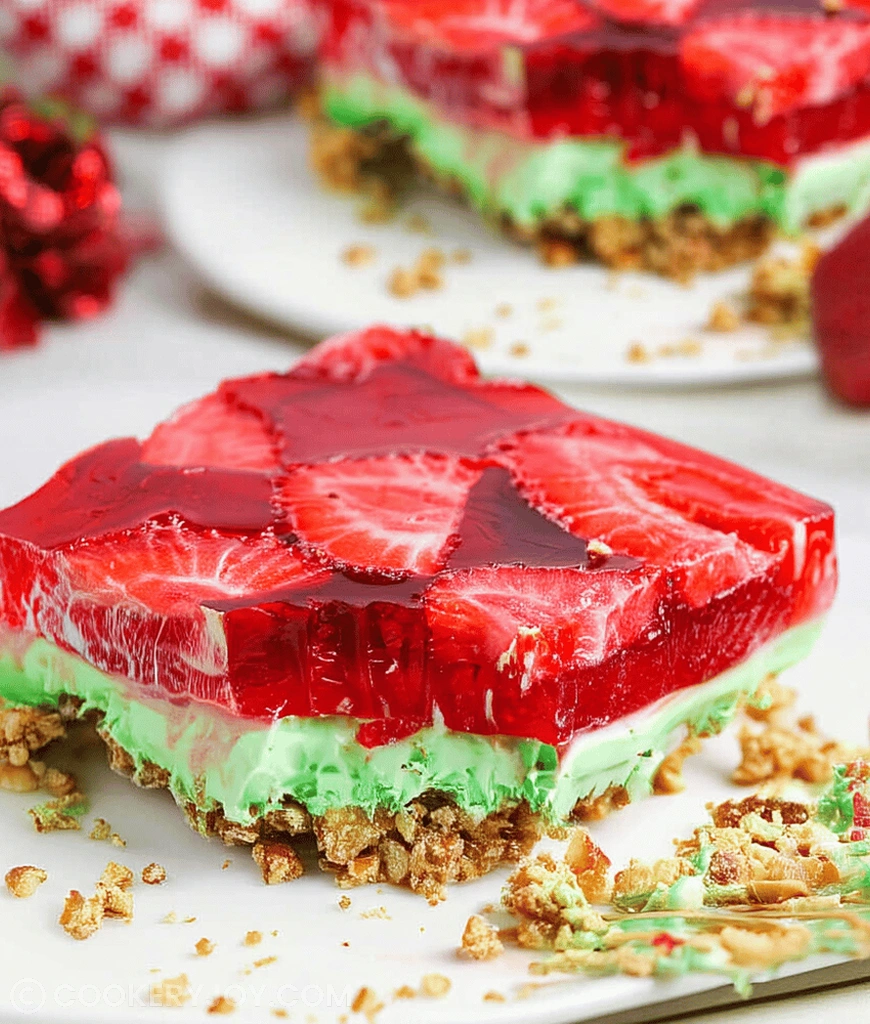
This layered beauty brings the perfect salty-sweet balance to any holiday table. My favorite feature is that delightful, crisp pretzel crust beneath a cloud of sweet cream. Seriously, the combination of textures in this Christmas Pretzel Salad is absolutely addictive. The bright fruit topping shines like a holiday jewel atop the rich filling. I hope you find this dessert as charming and simple as I do.
I often make this a day ahead for gatherings. It truly sets up beautifully overnight in the fridge. Everyone asks me for the recipe when they taste that perfect blend of flavors. It always vanishes from the dessert platter first, which makes all the effort worthwhile.
Why I Love This Recipe
Honestly, this recipe is my secret weapon for busy holiday weeks. It requires very little fuss, which I adore. This Christmas Pretzel Salad truly impresses everyone who tries it. Folks think it takes ages to assemble, but it moves quickly. Here are a few reasons why I keep coming back:
- Minimal Baking Time: The crust only needs ten minutes in the oven.
- Big Flavor Payoff: Salt mixed with sugar is pure magic every time.
- Make-Ahead Marvel: It tastes even better the next day, saving last-minute stress.
Christmas Pretzel Salad Ingredients
Getting this layered dessert right relies on balancing just a few core elements. We need the saltiness, the lovely sweetness, and that beautiful fruity brightness to truly sing together. This combination is what makes the classic Christmas Pretzel Salad so memorable.
Let us look at the stars of our show below. Remember, exact amounts are waiting for you on the card.
- Crushed Pretzels: These form our necessary salty, crunchy base.
- Unsalted Butter: This binds the salty bits together for that firm crust.
- Granulated Sugar: We use this to sweeten both the crust and the creamy filling.
- Cream Cheese: This ingredient provides the rich, velvety texture for the middle layer.
- Whipped Topping: Thawed whipped topping makes the cream layer light and airy.
- Gelatin (Strawberry or Raspberry): This gives us that jiggly, brightly colored fruit top layer.
- Frozen Sliced Fruit: Thawed fruit adds texture and intense flavor to the gelatin.
See recipe card below for a full list of ingredients and measurements.
Substitutions and Tips
Sometimes we need to get creative with what is in the pantry. I always encourage making smart swaps work for you over running to the store.
- For the Crust: You can use crushed saltines if pretzels are unavailable. It yields a slightly different, yet still tasty, salty crunch.
- For the Cream Layer: If you prefer a homemade topping, skip the frozen whipped topping. Whip 1 1/2 cups of heavy cream with a touch of powdered sugar instead.
- Flavor Boost: Try adding a teaspoon of vanilla extract to the cream cheese layer for extra depth. This is a fantastic little trick.
- Storage Shortcut: Don’t wash that mixing bowl right away. Keep the cream mixture covered in the bowl until you top it with gelatin.
- Fruit Swaps: Feel free to use pineapple or mixed berries in the topping, but drain them well first.
kitchen tools you’ll need
Gathering your essentials first makes this dessert assembly smooth. You won’t need complicated gadgets for this treat.
- A 9×13 inch baking dish is a must for layering.
- Use a large mixing bowl for the cream base.
- You will need a rubber spatula for careful folding.
- A whisk helps cream the cheese and sugar nicely.
- Measuring cups and spoons complete the necessary kit.
Don’t worry if you lack a fancy mixer. A good hand whisk works just fine here!
how to make christmas pretzel salad
Now that we have our fantastic ingredients ready, let us dive into the assembly process. This layered dessert comes together quickly, but timing is everything. We want firm layers that stay separate and defined. Follow these simple steps closely for perfect results every time.
preparing the salty pretzel crust
First, get your oven warming up. Set that temperature to 350 degrees Fahrenheit. While heating, mix the crushed pretzels well. Add the melted butter and the small amount of sugar. Use a sturdy spoon to combine everything thoroughly. Next, press this mixture firmly into your 9×13 inch baking pan. Make it compact and even along the bottom. Bake this salty base for exactly ten minutes. After baking, you must let it cool down completely. A warm crust melts the next layer.
assembling the creamy center layer
Now we focus on that luscious, creamy middle. In a large bowl, beat the softened cream cheese first. Add the larger portion of sugar; beat until it looks completely smooth. Now, gently fold in the thawed whipped topping. Use a gentle hand here to keep the mixture light. Do not overmix the gelatin dessert components. Spread this lovely mixture over your fully cooled crust. Make sure it touches all the edges, creating a seal there. This seal stops the jelly from seeping down below. Chill this layer while you make the topping next.
creating and setting the fruit topping
This final fruit layer needs your full attention now. Grab a separate bowl for the gelatin mixture. Pour in the two packages of gelatin powder. Next, add the two cups of boiling water slowly. Stir this constantly for at least two full minutes. You need every granule fully dissolved. After that, stir in the thawed, sliced fruit, including all its juices. Now, stop and wait. This part is very important for a successful gelatin layer. Let this mixture sit until it reaches room temperature completely.
the importance of cooling the gelatin
Why wait for room temperature magic? If you pour warm gelatin onto the cream cheese, it will surely melt that base. Melting ruins the defined layers we worked hard to build. Warm liquid will seep right through the creamy center. Wait until the gelatin mixture is cool, even slightly thickened. This cooling step ensures crisp, clean separation for your beautiful Christmas Pretzel Salad.
how to store christmas pretzel salad
Storing this layered treat correctly keeps it fresh for days. Always cover the dish tightly with plastic wrap or foil. Keep your finished Christmas Pretzel Salad in the refrigerator. It lasts wonderfully for up to three days chilled. Freezing is tricky due to the creamy texture. The whipped topping often separates when thawed. For the best texture and flavor, enjoy it within 48 hours.
tips for success
I have learned a few tricks over the years making this dessert. Follow these quick tips for the best results, truly.
- Make sure your cream cheese is very soft before beating it. Cold cheese clumps badly.
- Press the crust down hard; a firm base prevents sogginess later.
- Cool the gelatin fully; this is the most crucial step, trust me on this.
- Chop your pretzels finely for the best texture overall.
- Use good quality, bright red or pink gelatin packets for color.
serving suggestions
- Present slices on small, festive dessert plates for easy serving.
- Offer a dollop of extra whipped cream on the side if desired.
- Serve this rich gelatin dessert alongside simple coffee or hot cocoa.
- A light salad makes a great counterpoint to this sweet dish.
- For extra flair, sprinkle crushed pecans over the top layer gently.

Christmas Pretzel Salad
- Prep Time: 20 minutes
- Cook Time: 10 minutes
- Total Time: 4 hours 30 minutes (minimum, includes chilling)
- Yield: 12-16 servings
- Category: Dessert
- Method: Baking and Chilling
- Cuisine: American
- Diet: Vegetarian
Description
A festive and layered dessert featuring a salty pretzel crust, a creamy sweet cheese layer, and a bright fruit gelatin topping, perfect for Christmas gatherings.
Ingredients
- Crust: 2 cups crushed pretzels
- Crust: 3/4 cup (1 1/2 sticks) unsalted butter, melted
- Crust: 1/4 cup granulated sugar
- Cream Cheese Layer: 1 (8 oz) package cream cheese, softened
- Cream Cheese Layer: 1 cup granulated sugar
- Cream Cheese Layer: 1 (8 oz) container frozen whipped topping, thawed (like Cool Whip)
- Topping: 2 (6 oz) packages strawberry or raspberry gelatin (e.g., Jell-O)
- Topping: 2 cups boiling water
- Topping: 2 (10 oz) packages frozen sliced strawberries or raspberries, thawed
Instructions
- For the Crust: Preheat oven to 350°F (175°C). In a bowl, combine crushed pretzels, melted butter, and 1/4 cup sugar. Press firmly into the bottom of a 9×13 inch baking dish. Bake for 10 minutes. Let cool completely.
- For the Cream Cheese Layer: In a large bowl, beat softened cream cheese and 1 cup sugar until smooth and creamy. Gently fold in the thawed whipped topping until no streaks remain. Spread this mixture evenly over the cooled pretzel crust, ensuring it touches the edges of the pan to prevent gelatin from seeping into the crust. Refrigerate while preparing the topping.
- For the Topping: In a separate bowl, dissolve the gelatin in boiling water. Stir for at least 2 minutes until completely dissolved. Add the thawed fruit (undrained) and stir. Let this mixture cool to room temperature (it’s important it’s not warm when poured over the cream cheese layer).
- Carefully pour the cooled gelatin mixture over the cream cheese layer.
- Refrigerate for at least 4-6 hours, or preferably overnight, until the gelatin is completely set.
- Cut into squares and serve chilled.
Notes
- Ensure the cream cheese layer touches the edges of the pan to seal the crust before adding the gelatin.
- It is crucial that the gelatin mixture cools to room temperature before pouring over the cream cheese layer to prevent melting.
- For best results, chill the salad overnight.


