
Baking during the holidays should feel joyful, not stressful. These festive Christmas Tree Cupcakes bring pure delight to any gathering. They transform simple vanilla treats into edible, miniature holiday icons. The rich, creamy buttercream frosting pipes up beautifully into spiky green trees. Honestly, perfecting these charming Christmas Tree Cupcakes is simpler than you might think.
I often make a batch when my grown kids visit unexpectedly. They always disappear first from the dessert table. These little cakes store wonderfully, too. They truly capture all the fun of decorating without requiring hours of complicated work.
Why I Love This Recipe
I adore whipping up this treat because it ticks every box for a busy home baker. Seriously, they are total showstoppers with minimal fuss involved. Here is why I keep coming back to this recipe:
- Speedy Setup: From start to finish, they come together quite fast.
- Instant Wow Factor: Guests always rave about how adorable they look.
- Crowd-Pleaser Flavor: The soft cake pairs perfectly with that sweet green frosting.
- Simple Technique: Piping those little trees is surprisingly easy and very rewarding.
Christmas Tree Cupcakes Ingredients
Gathering the components for these delightful treats feels like gathering miniature decorations for your pantry. The magic truly happens when simple vanilla flavor meets bright green, fluffy sweetness. These ingredients come together beautifully for our festive project.
We start with the cake mix, which provides a reliable, moist base for our little trees. Next comes the unsalted butter; it must be softened for the creamiest possible finished frosting. Powdered sugar is the powerhouse that gives the buttercream its structure and sweetness. We use a touch of milk or cream to adjust that perfect spreading consistency. Finally, green gel food coloring brings our trees to life in vibrant holly green hues.
Substitutions and Tips
You have lots of room to play with this base recipe. If you prefer a richer flavor, try using chocolate cake mix instead of vanilla. For the frosting, you can swap out the vanilla extract for almond extract for a slightly different almond fragrance. If you are out of cream, regular milk works just fine. Remember, gel colors provide much better pigment than liquid dyes. Feel free to use pre-made frosting too!
For an extra holiday kick, try adding a tiny pinch of ground cardamom to your cake batter. That little addition really elevates these easy Christmas Tree Cupcakes. We can even skip the optional stump ingredients if time is short. Store any leftover green frosting covered tightly so it does not dry out before your next baking session.
See recipe card below for a full list of ingredients and measurements.
Kitchen Tools You’ll Need
- Mixing bowls are essential for both the cake and the frosting.
- Use an electric mixer for smooth, airy buttercream in minutes.
- Wire rack needed for cooling those vanilla or chocolate bases completely.
- A piping bag fitted with a large star tip creates the tree shape.
- Measuring cups and spoons ensure accurate ingredient ratios for success.
How to Make Christmas Tree Cupcakes
Now we move from gathering supplies to actually creating these amazing little holiday scenes. Following these simple steps ensures your baking adventure is fun. Remember, these instructions help you craft perfect festive cupcakes every single time.
Preparing the Cupcakes
First, preheat your oven according to the cake mix instructions. Prepare your cupcake pans by adding liners to each cup. Mix up your chosen cake batter carefully. Do not overmix the batter; stop when just combined. Pour the mix evenly into the liners. Bake these until a toothpick inserted comes out clean. Let the baked cakes cool in the pans for a few minutes. Then, move them gently to a wire rack. They must cool completely before we frost anything.
Creating the Perfect Buttercream
The frosting is key to our Christmas Tree Cupcakes success. Start by creaming the softened butter until it looks really light and fluffy. This takes a little patience with your mixer. Next, slowly begin beating in the powdered sugar, one cup at a time. Keep the speed moderate so sugar does not explode everywhere. Then, add your milk or cream plus the vanilla extract. Beat this mixture until the buttercream looks wonderfully smooth and creamy. Taste it—it should be sweet and rich.
Coloring and Piping the Green Frosting
Time to make those trees green! Add small drops of the gel food coloring to your frosting bowl. Mix thoroughly until you reach a lovely, deep green shade. Gel coloring works wonders here. Now, load up your piping bag. Make sure that star tip is securely attached to the bag opening. Gently spoon the green buttercream into the prepared piping bag. Gently squeeze the top to remove any large air pockets lurking inside. This step prevents messy interruptions later on.
Assembling Your Festive Christmas Tree Cupcakes
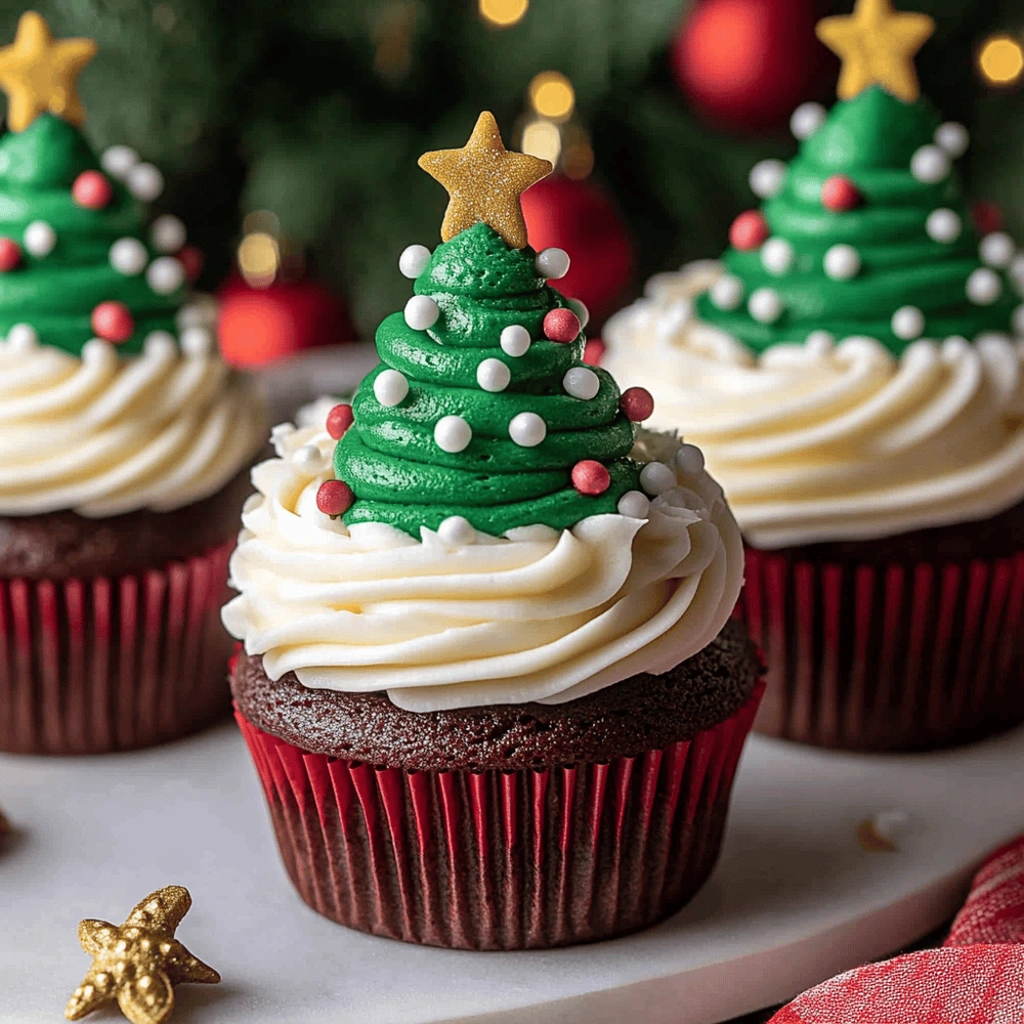
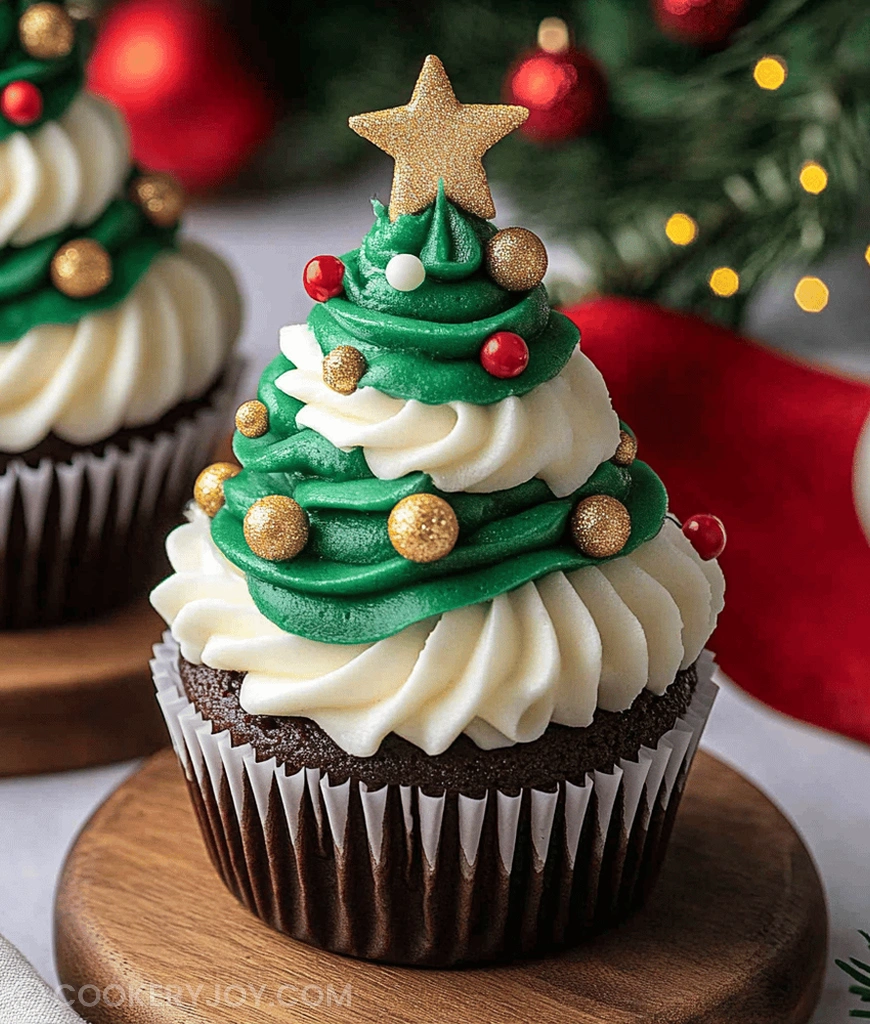
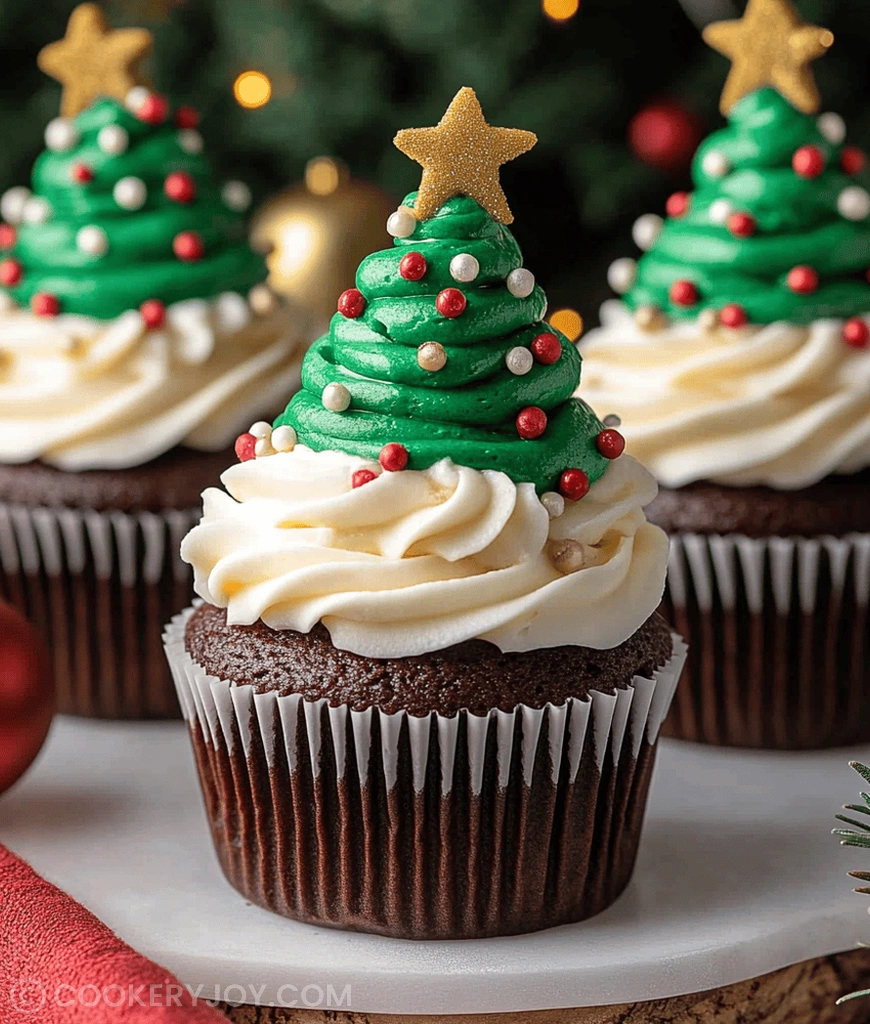
This is where the real fun begins, honestly. Take one completely cooled cupcake base. Hold the piping bag vertically over the center of the cupcake. Start piping in the center, moving outward in a circular, upward motion. This motion builds the classic cone shape of a tree. Continue until the frosting forms a nice, tall tree shape. Next, grab your colorful sprinkles, the little holiday ornaments! Scatter them across the green frosting right away. If you want a stump, gently press a mini candy cane into the bottom edge. Admire your edible art!
How to Store Christmas Tree Cupcakes
Keeping these lovely treats fresh is super easy, thankfully. Store unfrosted cupcakes right on the counter tightly sealed. Once frosted, many folks wonder about refrigerator storage. For best texture, keep these festive cupcakes at room temperature if serving within a day. If you must refrigerate, use an airtight container first. This stops the frosting from drying out too quickly. They should remain tasty for up to three full days this way.
Freezing works too, by the way. Freeze them without sprinkles for the best results. Then, decorate them right before your party!
Tips for Success
- Make sure your butter is truly room temperature for the best frosting. Cold butter makes lumpy buttercream, believe me.
- Use gel food coloring, not liquid dye, for vibrant green color without thinning the frosting.
- Practice piping one tree onto wax paper first if you feel nervous. It really builds confidence.
- Cooling the cupcakes fully prevents the frosting from melting into a sad green puddle.
- Adding sprinkles immediately helps them stick firmly to the creamy frosting surface.
Serving Suggestions
- Serve these alongside warm mugs of spiced cider for a perfect pairing.
- Arrange them on a simple white platter to make the green trees pop.
- Offer them as the grand finale after a lighter holiday soup or salad.
- A dusting of powdered sugar around the base mimics fresh fallen snow well.
- These wonderful treats look great served next to hot cocoa cups.

Christmas Tree Cupcakes
- Prep Time: 30 minutes (estimated)
- Cook Time: 20-25 minutes (for cupcakes)
- Total Time: Approximately 1 hour (plus cooling time)
- Yield: Depends on the cake mix yield (usually 12-24 cupcakes)
- Category: Dessert
- Method: Baking and Frosting
- Cuisine: American
- Diet: Vegetarian
Description
A festive and fun recipe for decorating vanilla or chocolate cupcakes to look like miniature Christmas trees using green buttercream frosting and colorful sprinkles.
Ingredients
- 1 box (15.25 ounces) vanilla or chocolate cake mix (plus ingredients to make the cupcakes, e.g., eggs, oil, water)
- 1 cup (2 sticks) unsalted butter, softened
- 4–5 cups powdered sugar
- 1/4 cup milk or cream
- 1 teaspoon vanilla extract
- Green gel food coloring
- Red, green, yellow, or white sprinkles (stars, spheres, or other festive shapes)
- Sugar cookies or mini candy canes for tree stumps (optional)
Instructions
- Prepare cupcakes according to package directions. Let them cool completely on a wire rack.
- To make the buttercream frosting: In a large bowl, beat the softened butter with an electric mixer until light and fluffy.
- Gradually add the powdered sugar, one cup at a time, beating well after each addition. Add milk or cream and vanilla extract. Continue beating until smooth and creamy. If frosting is too thick, add more milk a teaspoon at a time; if too thin, add more powdered sugar.
- Add green gel food coloring until you achieve your desired shade of green.
- Fit a piping bag with a star tip (such as Wilton 1M or 21). Fill the bag with the green frosting.
- Pipe the frosting onto each cooled cupcake in a spiraling motion, starting from the outside edge and working your way up to form a cone-like Christmas tree shape.
- Decorate the ‘trees’ with festive sprinkles. Add a star sprinkle on top if desired.
- For a tree stump, you can gently press a small piece of a sugar cookie or a mini candy cane into the base of the frosting.
Notes
- Ensure cupcakes are completely cool before frosting.
- The choice of star tip (Wilton 1M or 21) is crucial for achieving the classic Christmas tree texture.
- Adjust milk/powdered sugar for desired frosting consistency.


