There’s something incredibly satisfying about making easy hummus right in my own kitchen. The fresh flavors of chickpeas, tahini, and zesty lemon blend into a creamy dip. It’s so much better than store-bought jars. This simple recipe creates a smooth, nutty spread. It balances tang and earthiness perfectly. And it’s ready in under 10 minutes, with no cooking needed. What a game-changer for quick entertaining or snacks.
I know how busy life gets for moms and professionals like us. That’s why I love how this easy hummus slides into packed schedules. It makes a healthy appetizer or lunch staple. Pair it with fresh veggies or warm pita for delight. It stores well in the fridge up to a week. That eases meal prep so much. It reheats gently if you want, but I prefer it chilled or at room temp. Friends always rave about its versatility. It adds cozy Middle Eastern comfort to our daily meals.
Why I Love This Recipe
I adore this easy hummus recipe. It’s incredibly quick to prepare. No cooking involved at all. Just a food processor and 10 minutes of your time. And that fits perfectly for busy weeknights. You know, when you crave a healthy snack without any hassle.
The creamy texture comes from simple pantry staples. Fresh, vibrant flavors make it feel indulgent yet nourishing. I love how it impresses guests at gatherings. Or satisfies family cravings for something light and satisfying. Plus, it’s vegan by nature. So customizable too. That adds real versatility to your routine.
Honestly, making this easy hummus brings a smile every time. It keeps things deliciously comforting. And totally guilt-free. Who wouldn’t want that in their kitchen arsenal? Especially when life pulls you in every direction. This dip saves the day, one creamy scoop at a time.
Easy Hummus Ingredients
These ingredients blend so easily to make a creamy, flavorful easy hummus dip. The nutty tahini balances the earthy chickpeas perfectly. And bright lemon juice adds that refreshing zing I crave. I always choose fresh, high-quality items like good olive oil and roasted tahini. They elevate the taste, creating the smoothest, most authentic homemade version. Trust me, once you try this, you’ll skip the store-bought stuff.
Let me walk you through each one and why it matters. First up is tahini. It provides a rich, nutty base. That gives your hummus its signature creamy texture and depth of flavor.
Next, extra virgin olive oil. It adds smooth, fruity richness. Plus, it helps achieve that velvety consistency. And don’t forget the drizzle on top for extra flair.
Garlic infuses a pungent, savory kick. It balances the natural sweetness of the chickpeas so well.
Then we have chickpeas. They form the hearty, protein-packed foundation. Blended smooth, they offer an earthy taste that’s pure comfort.
Fresh lemon juice brings bright, tangy acidity. It cuts through the richness and boosts overall freshness.
Water or reserved chickpea liquid thins the mixture just right. It reaches that perfect creamy consistency without watering down the flavor.
Kosher salt seasons everything harmoniously. It draws out all the natural flavors beautifully.
Finally, garnish options like paprika, toasted pine nuts, or chopped fresh parsley. They add visual appeal, subtle spice, and a crunchy, herby finish. So inviting!
For the full list of ingredients with precise measurements, check the printable recipe card at the bottom of the post.
Kitchen Tools You’ll Need
I keep my kitchen simple for recipes like easy hummus. You don’t need fancy gadgets here. Just a few basics make blending smooth and quick. That saves time during busy evenings. Let me share what I use every time.
First, grab your food processor. It’s essential for that creamy texture. Blend everything in seconds for velvety results. If you lack one, a high-speed blender works fine too. No stress if your tools vary.
Next, measuring cups and spoons ensure accurate portions. I use the standard ones I already own. They prevent guesswork, especially when you’re tired after a long day.
For garlic, a garlic masher or knife does the trick easily. Mash it roughly to release flavors fast. A press serves as a handy substitute if that’s what you have.
Finally, a serving spoon and dish help plate it nicely. I swirl the top for that pretty look. It impresses without extra effort.
These tools make preparing easy hummus a breeze. You’ll feel like a pro in no time. And cleanup? Super simple afterward.
How to Make Easy Hummus
Making easy hummus at home feels like a little victory. Especially on rushed days when you want something fresh without fuss. I promise, this process takes just minutes. And the results? Pure bliss in a bowl. Follow these steps, and you’ll nail it every time.
Step 1: Prepare the tahini base
Start right in your food processor bowl. Add the tahini and olive oil together. Now, pulse a few times until smooth and light. This color change happens quickly. It emulsifies the fats for top-notch creaminess ahead. I skip this, and the texture suffers. So, don’t rush it. Your easy hummus will thank you.
Step 2: Add remaining ingredients and blend
Next, toss in the mashed garlic. Add drained chickpeas, lemon juice, water or reserved liquid, and salt too. Process on high speed now. It turns completely smooth and creamy in about two to three minutes. For that extra velvety feel, blend longer if your machine handles it. I always do. Trust me, it’s worth the whir.
Step 3: Adjust consistency and seasonings
Check the thickness after blending. If too thick, add water or chickpea liquid one tablespoon at a time. Keep processing until spreadable. Then, taste carefully. Boost with more salt or lemon if needed. This tweak brightens everything. Fine-tuning like this transforms good easy hummus into great. And it fights that prep fatigue we all feel.
Step 4: Serve and garnish
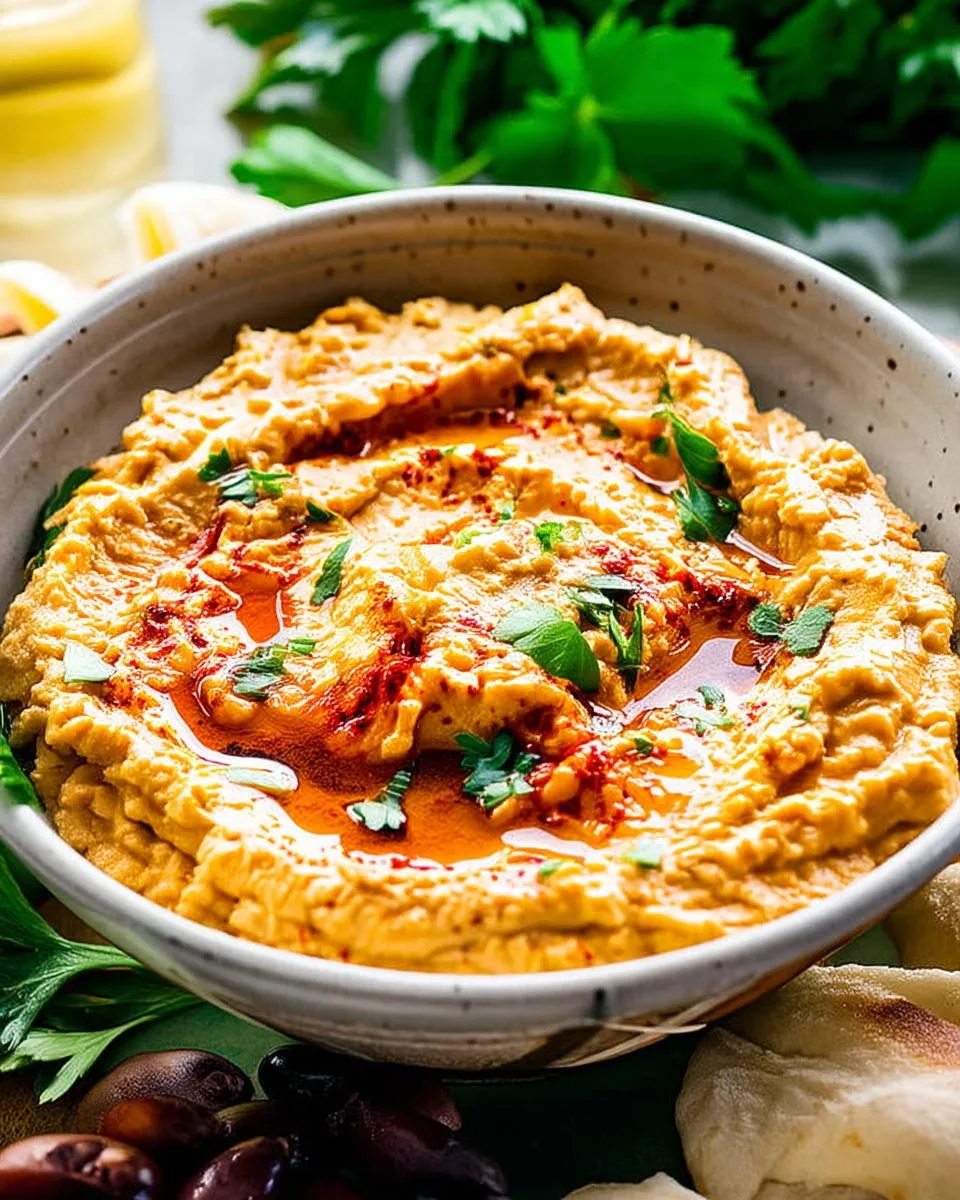
Spoon your finished easy hummus into a dish. Use the spoon back to swirl the top prettily. Drizzle extra olive oil over it. Sprinkle paprika, pine nuts, or parsley for color and crunch. Finally, serve right away. Pair with pita, veggies, or crackers. Fresh flavor shines brightest then. Guests love this simple touch.
Tips for Success
I remember my first batch of easy hummus. It was lumpy, and I felt defeated after a long day. But these tips changed everything. They help you avoid common pitfalls. And they make your dip creamy and delicious every time. Let’s dive in so you can succeed without stress.
Always choose roasted, stirred tahini. It prevents bitterness and blends smoothly. Raw versions can turn your easy hummus unpleasant. Trust me, I’ve learned that the hard way.
Reserve some chickpea liquid, or aquafaba, from the cans. It’s ideal for thinning naturally. This keeps flavors intact while fixing thickness. No watery dip here.
For the creamiest texture, process longer. If you have a moment, peel the chickpeas too. It’s optional, but worth it on lazy weekends. Your blender will thank you.
Taste as you blend. Fresh lemon juice varies, so add it gradually. Nail that perfect tang without overpowering. This step fights prep fatigue beautifully.
Finally, use room temperature ingredients. Let chickpeas and tahini sit out briefly if chilled. They blend better, saving time and frustration. Now, your easy hummus will impress effortlessly.
How to Store Easy Hummus
Storing easy hummus right keeps it fresh and flavorful. I know how hectic days get. So, quick access to healthy snacks matters a lot. Transfer it to an airtight container first. Then, pop it in the fridge. It stays good for up to one week there. Perfect for those rushed mornings or afternoon grabs.
Now, for longer storage, freeze portions ahead. Use freezer-safe bags or containers. They last up to three months without losing quality. When ready, thaw overnight in the fridge. Stir well before serving. This way, you avoid waste during busy weeks.
Always avoid room temperature for more than two hours. It prevents spoilage easily. And check for off smells or weird textures next time. If something seems off, toss it safely. Better safe than sorry, right?
Honestly, this easy hummus shines in meal prep. It fits my schedule perfectly. No more last-minute decisions. Just pull it out and enjoy. Whether chilled or thawed, it brings that comforting dip back to life. You deserve these simple wins.
Serving Suggestions
Now that you’ve whipped up this easy hummus, let’s talk about serving it. I get how busy days leave little room for fancy setups. So, these ideas keep things simple yet delicious. They turn your dip into a star without extra hassle. Perfect for picky eaters or quick family meals.
First, pair it with warm pita bread or crunchy veggie sticks. Think carrots and cucumbers. This combo makes a healthy snack in minutes. No cooking needed, just dip and enjoy. It’s my go-to when kids want something light after school.
For breakfast, spread easy hummus on whole-grain toast. Top with sliced avocado for creaminess. It adds nutrition without effort. Imagine starting your day nourished, especially on rushed mornings. This twist feels indulgent but keeps you fueled.
Use it as a base for wraps or salads too. Add feta or olives for Mediterranean flair. It binds everything together beautifully. Great for lunch prep when time slips away. Even fussy eaters warm up to these flavors.
Finally, serve on a mezze platter with falafel and tabbouleh. It impresses at gatherings effortlessly. Guests love the variety, and you look like the host with the most. This easy hummus shines in crowds, saving you stress.
These suggestions make your easy hummus versatile. It fits any meal or mood. Try them, and watch it become a staple in your kitchen.
Print
Easy Hummus Recipe
- Prep Time: 10 minutes
- Cook Time: 0 minutes
- Total Time: 10 minutes
- Yield: About 3 cups (serves 6-8)
- Category: Appetizer
- Method: Food Processor
- Cuisine: Middle Eastern
- Diet: Vegan
Description
A simple, creamy homemade hummus recipe using chickpeas, tahini, and lemon juice, perfect for dipping with pita bread or vegetables.
Ingredients
- 1/2 cup tahini (roasted, not raw, and well-stirred)
- 1/4 cup extra virgin olive oil (plus more for drizzling)
- 2 cloves garlic, mashed and roughly chopped
- 2 (15-ounce) cans chickpeas, drained (reserve some liquid)
- 1/4 cup fresh lemon juice
- 1/2 cup water (or reserved chickpea liquid)
- 1/2 teaspoon kosher salt
- Garnish options: paprika, toasted pine nuts, chopped fresh parsley
Instructions
- In the bowl of a food processor, combine the tahini and 1/4 cup olive oil. Pulse until the mixture is smooth and light.
- Add the mashed garlic, drained chickpeas, fresh lemon juice, 1/2 cup water (or reserved chickpea liquid), and kosher salt to the food processor.
- Process until the mixture is completely smooth and creamy. For an extra velvety texture, continue processing for a few minutes. If the hummus seems too thick, add a bit more water or reserved chickpea liquid, a tablespoon at a time, until the desired consistency is achieved.
- Taste the hummus and adjust seasonings, adding more salt or lemon juice if needed.
- Spoon the finished hummus into a serving dish. Create a small swirl on top with the back of a spoon.
- Drizzle with additional extra virgin olive oil and sprinkle with your chosen garnishes, such as paprika or chopped parsley.
- Serve immediately with pita bread, fresh vegetables, or crackers.
Notes
- Use roasted tahini for the best flavor and texture.
- Reserve chickpea liquid (aquafaba) to adjust consistency if needed.
- Garnishes like paprika, toasted pine nuts, or chopped parsley add flavor and presentation.