
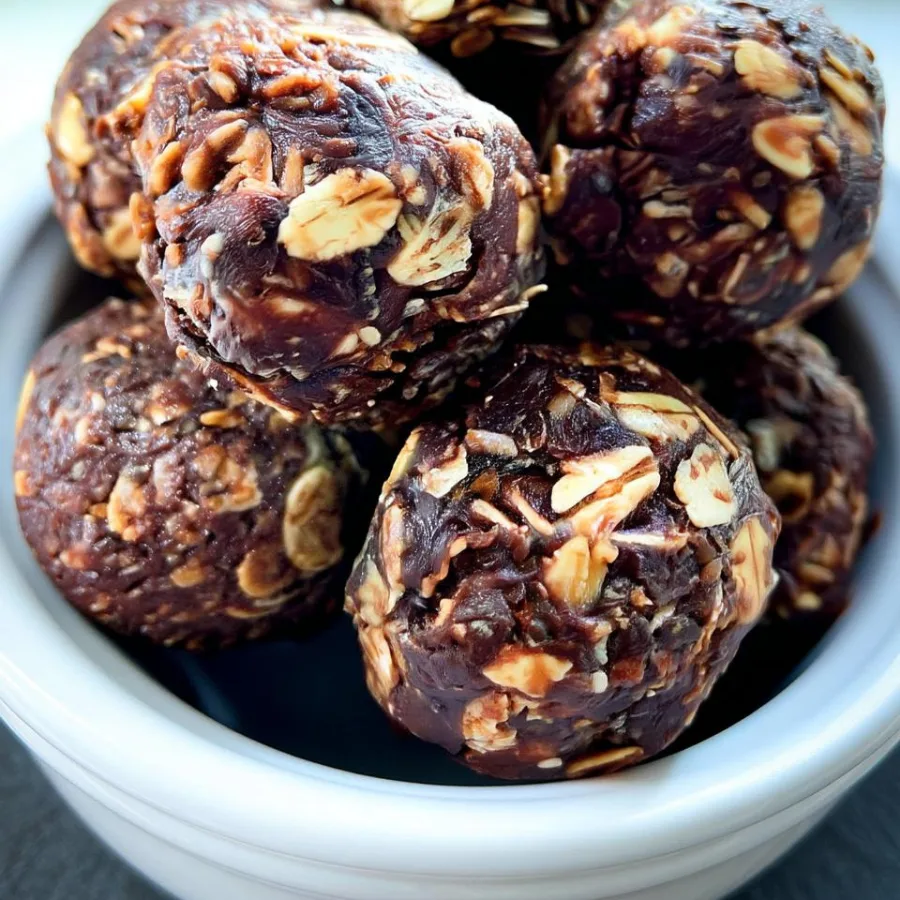
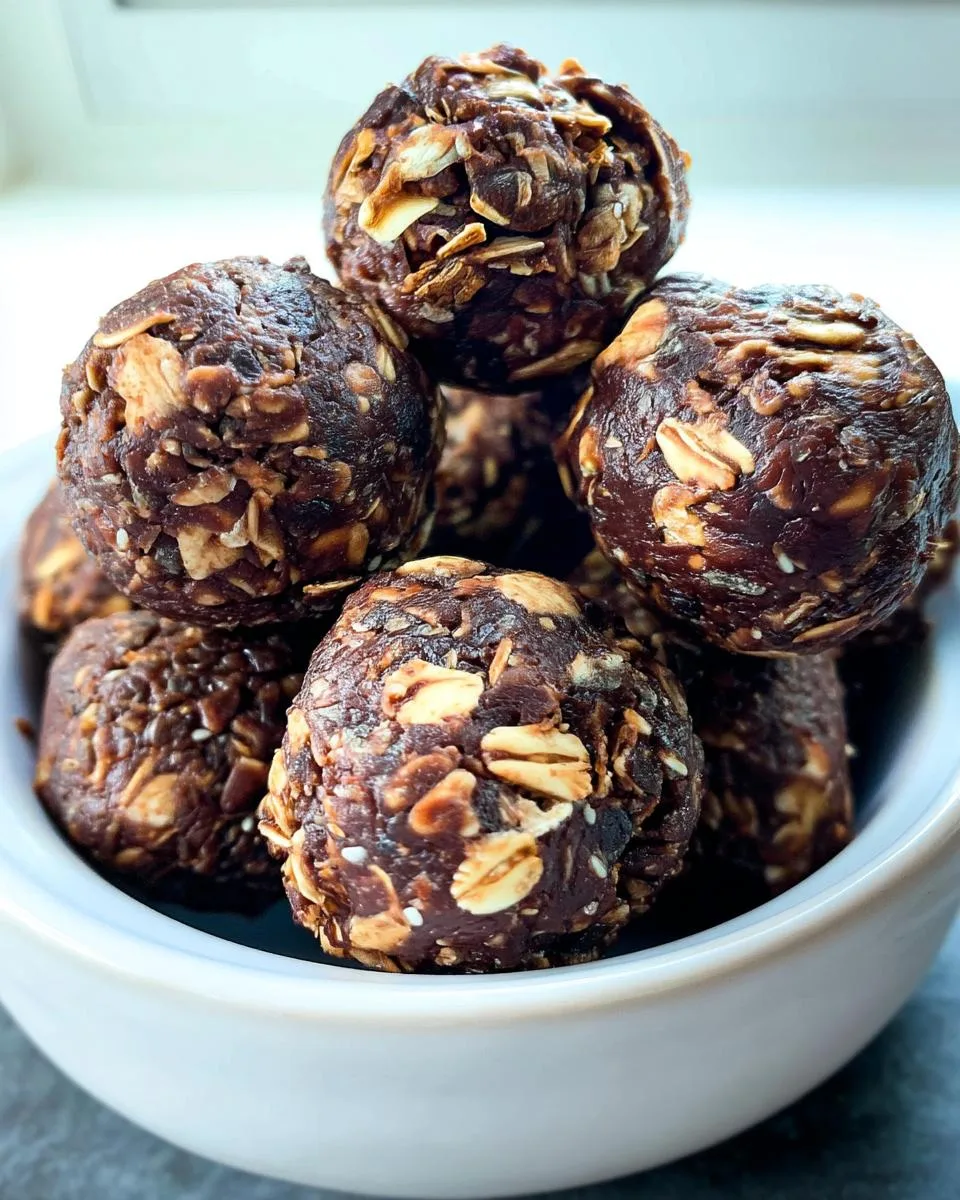
Indulge in the decadent, fudgy taste of chocolate protein balls. They deliver a chocolate hit without any baking hassle. I make them with creamy cashew butter, rich cocoa, and protein powder. This gives a chewy texture packed with nutrition for sustained energy. The simple recipe shines with quick assembly. It becomes my go-to for satisfying sweet tooths effortlessly.
These versatile bites suit busy afternoons perfectly. They refuel after workouts, too. Or serve as a healthy dessert after family dinners. I store them in the fridge for up to a week. Since they’re no-bake, just grab and enjoy cold. Many friends love how chocolate protein balls fit into balanced eating. They curb cravings while staying protein-rich and delicious. As a busy mom, I appreciate this easy win for snack time.
Why I Love This Recipe
These Chocolate Protein Balls are my go-to for a quick, nourishing treat. They fit perfectly into my hectic schedule. With just 10 minutes of prep and no oven required, I find them ideal for busy moms. We juggle work and family all day. Or professionals like me need an easy energy boost. So, I whip them up when time is short.
The rich chocolate flavor comes from cocoa and protein powder. It feels indulgent yet healthy. Plus, they pack in protein to keep me full longer. I love how they curb my afternoon cravings without guilt. And they’re versatile too. I snack on them solo, share at gatherings, or tuck into kids’ lunches. Even picky eaters enjoy the fudgy taste.
Moreover, the no-bake method means less cleanup for me. It lets me savor more family time instead. Who wouldn’t love a recipe this simple and satisfying? Best of all, it’s secretly good for you. I smile every time I grab one from the fridge.
Chocolate Protein Balls Ingredients
I always start with simple, wholesome ingredients for my Chocolate Protein Balls. The nutty cashew butter pairs beautifully with chocolatey cocoa powder. And the protein-packed powder creates a balanced, fudgy base. It’s satisfying and nutritious all at once. I choose fresh, high-quality items like unsweetened cocoa. Plus, pure vanilla elevates the flavor. This makes your Chocolate Protein Balls taste homemade and irresistible. As a busy mom, I appreciate how these few staples come together fast. No fancy shopping trips needed.
- Creamy cashew butter: It adds creaminess and healthy fats. This gives a smooth, binding texture that holds everything together nicely.
- Unsweetened almond milk: This provides just enough moisture. It helps form the dough without overpowering the chocolate notes I love.
- Maple syrup: It brings natural sweetness to the mix. This balances the cocoa’s richness perfectly every time.
- Vanilla extract: This enhances the overall flavor warmly. It adds aromatic depth that makes the balls feel special.
- Chocolate protein powder: It boosts protein content significantly. Meanwhile, it contributes to the chocolatey taste and firm structure.
- Unsweetened cocoa powder: This delivers intense chocolate flavor. And it packs in antioxidants for a guilt-free treat.
- Sea salt: Just a pinch balances the sweetness. It amplifies all the other ingredients beautifully.
- Mini chocolate chips: They add delightful bursts of chocolate. This brings extra indulgence without much effort.
The complete list of ingredients and exact measurements can be found in the printable recipe card at the bottom of the post.
Kitchen Tools You’ll Need
I keep the tools for my Chocolate Protein Balls super simple. No fancy gadgets required. This makes prep easy, even on rushed days. As a busy mom, I love grabbing what I already have. It saves time and frustration.
- Medium to large mixing bowl: It holds all the ingredients comfortably. Use any sturdy bowl in your kitchen if needed. Mine is just glass and works fine.
- Spoon or spatula: Stir the dough with this. A wooden spoon handles vigorous mixing well. It gets the job done without hassle.
- Tablespoon or cookie scoop: This measures portions evenly. Or use your hands to roll if no scoop is handy. Either way, your Chocolate Protein Balls turn out perfect.
These basics mean you whip up Chocolate Protein Balls quickly. Less cleanup too. I always feel accomplished after just a few minutes.
How to Make Chocolate Protein Balls
Step 1: Combine the wet ingredients
I start in a medium to large mixing bowl. I mix the cashew butter, almond milk, maple syrup, and vanilla extract together. Stir vigorously until smooth and fully combined. This moist base ensures even flavors in your no-bake Chocolate Protein Balls. As a busy mom, I love how quick this step is. It takes just a minute or two. No fuss at all.
Step 2: Incorporate dry ingredients to form dough
Next, add the chocolate protein powder, cocoa powder, and a pinch of sea salt. Stir thoroughly into the wet mixture. It might look crumbly at first. But keep mixing until a thick, cohesive dough forms. This builds the protein-rich structure for healthy bites. I always push through the crumbly phase. It comes together fast and rewards you with that fudgy texture.
Step 3: Fold in the chocolate chips
Gently fold the mini chocolate chips into the dough. Do this until evenly distributed. Avoid overmixing to keep chips intact for contrast. This adds a fun, melty element. I smile at the little pops of chocolate. It makes Chocolate Protein Balls irresistible for picky eaters too.
Step 4: Scoop and roll the balls
Use a tablespoon to portion the dough. Roll each piece between your palms into bite-sized balls. If sticky, lightly wet your hands. Aim for about 12 uniform treats. This hands-on step feels therapeutic. Plus, it’s easy even after a long day.
Step 5: Chill for optimal texture
Your Chocolate Protein Balls are ready right away. But for a firmer bite, refrigerate 15 to 30 minutes. The no-bake method stays simple and quick. I grab one cold for an instant boost. Perfect for those hectic afternoons.
Tips for Success
Over the years, I’ve picked up a few simple tricks for flawless Chocolate Protein Balls. These tips save time and reduce frustration, especially on busy days. They help even if you’re new to no-bake treats or dealing with picky eaters at home.
- Choose smooth nut butter like cashew or almond. It gives the best creamy texture. Chunky types can make dough uneven and harder to roll.
- If dough seems too dry, add a splash of almond milk. For sticky dough, sprinkle extra protein powder. This adjusts without changing flavor much.
- Mix vigorously when adding dry ingredients. The dough starts crumbly, but it firms up patiently into perfect bites. I always remind myself to keep stirring.
- Swap cashew butter with peanut if you prefer. This keeps the snack customizable and fun for variety during the week.
- Taste the dough before rolling. Ensure sweetness fits your palate. Adjust maple syrup next time for just-right results.
- Chill briefly after rolling. It makes handling easier and gives a polished look to these quick treats.
Following these, your Chocolate Protein Balls come together effortlessly. I love how they turn a simple snack into something reliable and delicious.
How to Store Chocolate Protein Balls
I make storing Chocolate Protein Balls super easy. It fits my busy life perfectly. For short-term, place them in an airtight container. Keep in the refrigerator. They’ll stay fresh and flavorful up to one week. Prep once, then grab as needed during hectic weeks. This keeps their fudgy texture intact without drying out. As a mom juggling everything, I love this make-ahead trick.
For longer storage, freezing works great. Layer the Chocolate Protein Balls between parchment paper. Use a freezer-safe bag or container. They last up to three months this way. Thaw in the fridge overnight. Or let sit at room temperature for 10-15 minutes before enjoying. Avoid leaving them out more than a couple hours. It prevents softening and keeps them safe.
These steps make Chocolate Protein Balls a practical healthy snack. I rely on them for on-the-go energy boosts.
Serving Suggestions
I love getting creative with my Chocolate Protein Balls. They make any moment better without extra effort. Busy days call for simple pairings that boost nutrition. And they help with picky eaters who want something fun. Here are my favorite ways to serve them.
- Pair with fresh berries or Greek yogurt. This creates a balanced breakfast boost. I start my mornings energized and satisfied.
- Enjoy alongside herbal tea or black coffee. It’s the perfect afternoon pick-me-up. So, when fatigue hits, these keep me going strong.
- Roll extras in powdered sugar or cocoa. This adds a festive touch for gatherings. Guests always rave about the easy indulgence.
- Serve as a post-gym treat with almond milk. It enhances the protein power. I recover faster after workouts this way.
These ideas keep Chocolate Protein Balls versatile for your life. Try them and see how they fit your routine effortlessly.
Print
Easy No-Bake Chocolate Protein Balls
- Prep Time: 10 minutes
- Cook Time: 0 minutes
- Total Time: 10 minutes
- Yield: 12 balls
- Category: Snack
- Method: No-Bake
- Cuisine: American
- Diet: Vegetarian
Description
Easy no-bake chocolate protein balls made with cashew butter, protein powder, and cocoa for a healthy, chocolatey snack.
Ingredients
- 1/2 cup creamy cashew butter (or other smooth nut butter)
- 1/4 cup unsweetened almond milk
- 1 tablespoon maple syrup
- 2 teaspoons vanilla extract
- 1/2 cup chocolate protein powder
- 3 tablespoons unsweetened cocoa powder
- Pinch of sea salt
- 2 tablespoons mini chocolate chips
Instructions
- In a medium to large mixing bowl, combine the cashew butter, almond milk, maple syrup, and vanilla extract. Stir these wet ingredients until thoroughly combined.
- Add the chocolate protein powder, cocoa powder, and a pinch of salt to the wet mixture. Stir vigorously until a thick dough forms. It may appear crumbly at first but will come together with continued mixing.
- Fold in the mini chocolate chips until they are evenly distributed throughout the dough.
- Using a tablespoon as a measure, scoop out portions of the dough. Roll each portion between your hands to create uniform, bite-sized balls.
- These protein balls are ready to enjoy immediately. For firmer bites, you may chill them in the refrigerator for about 15-30 minutes.
- Store any remaining protein balls in an airtight container in the refrigerator for up to a week.
Notes
- Use any smooth nut butter if cashew butter is unavailable.
- These are no-bake and ready in minutes.
- Chill for firmer texture if desired.


