
There are few treats as perfectly satisfying as these creamy, cold desserts. My kitchen always smells wonderfully nutty when I whip up a batch of Frozen Peanut Butter Yogurt Bites. They strike that ideal balance between tangy yogurt and rich peanut butter. Honestly, these little frozen gems taste much more indulgent than they actually are. I think you will love their straightforward preparation method.
These bites are my secret weapon against the mid-afternoon slump. My family devours them quickly, especially on warm days. They store beautifully in the freezer, too. This simple recipe truly fits right into any busy schedule.
why i love this recipe
I keep coming back to this recipe often. They come together so fast!
- Ultimate Ease: Seriously, mixing takes under ten minutes raw time.
- Perfectly Portioned: Great creamy treat without overindulging.
- Kid-Approved Freeze Factor: Little hands adore grabbing these cold snacks.
- Instant Gratification: Minimal cooking means maximum eating time, right?
These Frozen Peanut Butter Yogurt Bites are just pure, simple joy.
Frozen Peanut Butter Yogurt Bites Ingredients
Combining creamy Greek yogurt with smooth peanut butter creates pure, frozen magic. That simple pairing is the heart of these delightful treats. We are building rich flavor easily, my friends. Let’s look at what makes these Frozen Peanut Butter Yogurt Bites work so well.
Greek Yogurt is our base. It gives us the necessary thickness and tang. Peanut butter brings that savory richness we all crave. Honey or maple syrup adds just the right touch of sweetness. Finally, vanilla extract deepens the overall flavor profile wonderfully. Optional add-ins like chocolate chips offer a fun finishing touch.
Substitutions and Tips
Making smart swaps keeps this recipe flexible for everyone. Do you need dairy-free alternatives? Try using a thick coconut yogurt instead of Greek yogurt. For those avoiding honey, maple syrup works beautifully. If you want extra texture, use crunchy peanut butter instead. Sometimes I skip the sweetener entirely if my peanut butter is already quite sweet. Also, a tiny pinch of sea salt really highlights the peanut flavor.
See recipe card below for a full list of ingredients and measurements.
Kitchen Tools You’ll Need
- A medium mixing bowl for combining ingredients easily.
- Parchment paper or a silicone baking mat.
- A small spoon or piping bag for dropping mounds.
- A liquid measuring cup, ideally.
- A freezer-safe, airtight storage container.
How to Make Frozen Peanut Butter Yogurt Bites
Making these frozen yogurt treats is super straightforward. You will not need your oven for this recipe at all. Follow these simple steps closely for the best results. We are aiming for perfect, creamy Greek yogurt bites every time. Keep your movements light and precise during the mixing phase.
Preparing the Baking Surface
First, grab a sturdy baking sheet. Line this sheet very carefully with parchment paper. Alternatively, a good silicone baking mat works wonderfully here too. Getting this ready first saves time later on. This step ensures easy removal of your frozen snacks.
Mixing the Yogurt Base
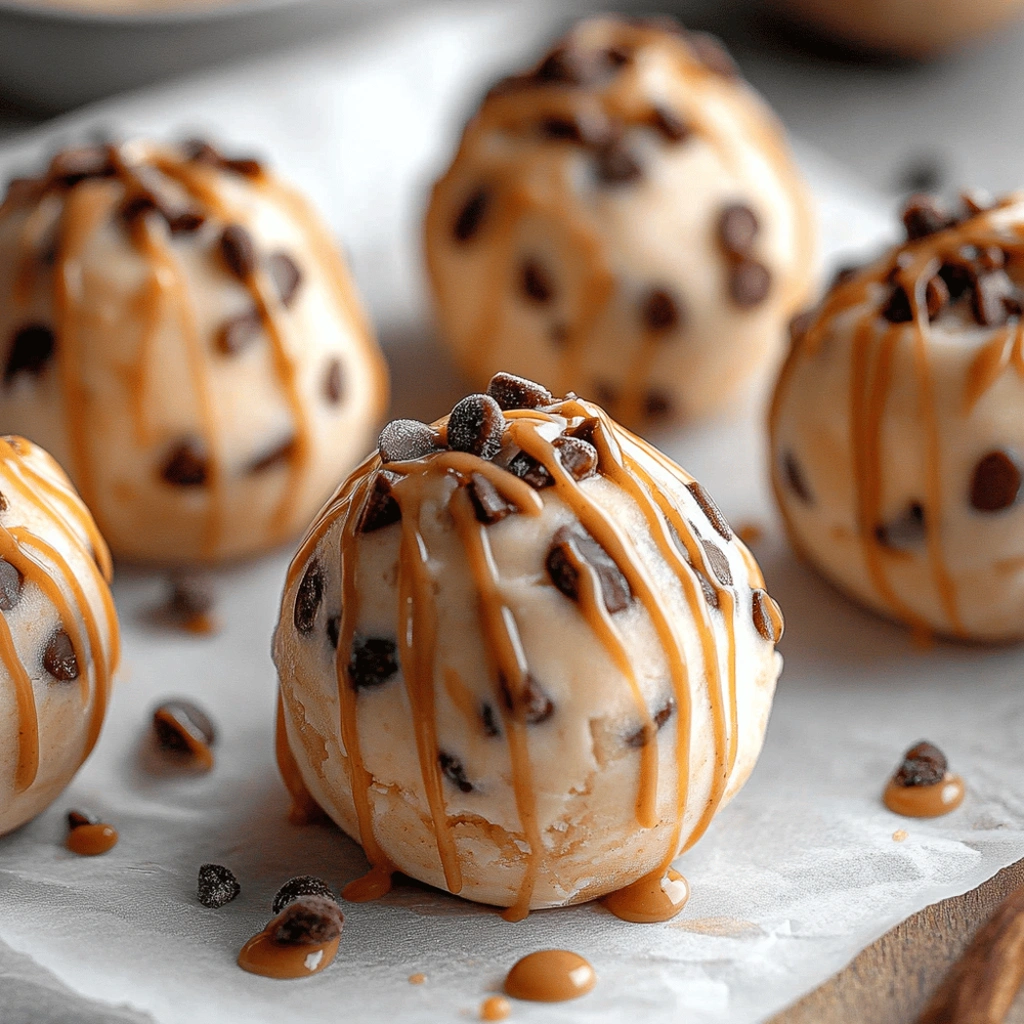
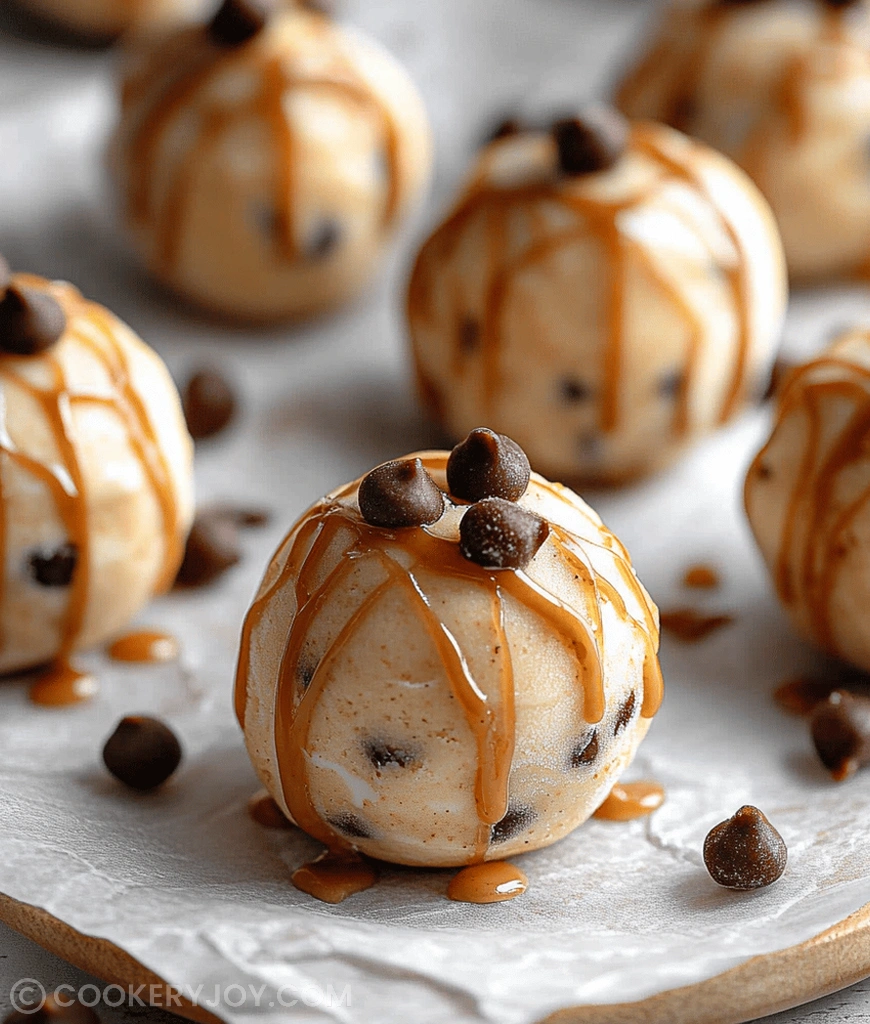
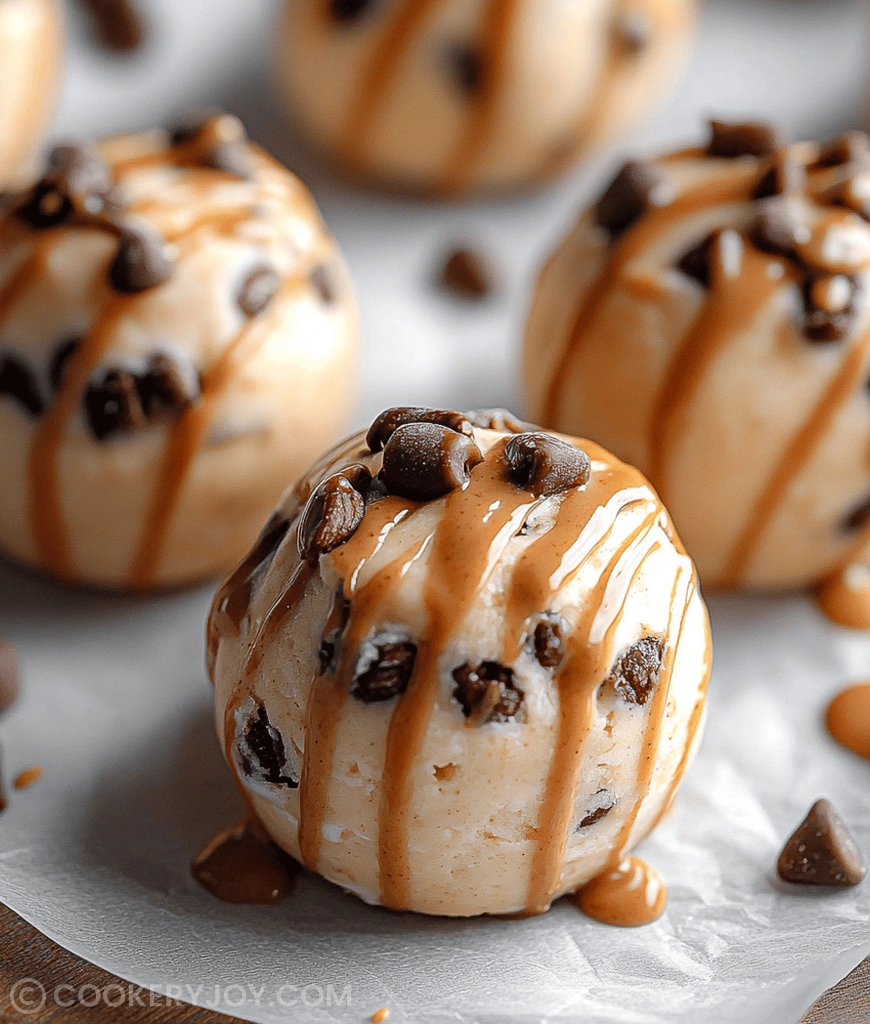
Next, get out a medium-sized kitchen bowl. Add in your thick Greek yogurt first. Then pour in the creamy peanut butter. Measure out your chosen sweetener carefully. A little vanilla extract goes in last. Now, mix everything until it is completely smooth. Ensure no streaks of peanut butter remain visible. This blend forms the core of our frozen peanut butter dessert.
Forming the Bites
This part requires a little patience. Use a small spoon for this job. Drop small spoonfuls onto your prepared sheet. Try to keep them all roughly the same size. Aim for about one inch across each mound. If you prefer, spread the mixture thinly instead. You will break it into pieces once frozen solid.
Adding Optional Toppings
Do you want a little extra crunch or sweetness? Now is the perfect moment. Sprinkle mini chocolate chips on top lightly. Chopped nuts also add great texture. Press them gently into the surface. This adds visual appeal to your healthy snack.
Freezing Until Solid
Carefully place the baking sheet into your freezer. Give the mixture ample time to firm up now. At least one full hour is required for setting. I usually leave mine for two hours minimum. They must be firm before you move them elsewhere.
Storing the Finished Bites
Once they are totally frozen and hard, move them along. Transfer your delicious frozen peanut butter yogurt bites. Use an airtight container for safe keeping. Alternatively, a heavy-duty freezer bag works fine. These taste best straight from the cold freezer.
how to store frozen peanut butter yogurt bites
Proper storage keeps these treats at their best texture. Always keep your bites frozen for serving. They really do not hold up well at room temperature. If you must refrigerate a few, eat them within four hours maximum. For long-term enjoyment, stick to freezer storage. An airtight container keeps freezer burn away effectively. Stored correctly, these yummy frozen yogurt bites last for several weeks. Enjoy your convenient, healthy snack anytime!
Tips for Success
- Always use thick Greek yogurt for the best shape.
- Chill your mixing bowl briefly before starting the recipe.
- If spreading instead of dropping, use a spatula for an even layer.
- Taste the mixture before freezing to check sweetness levels.
- Work quickly when forming the bites to prevent softening.
- Defrosting is not needed; enjoy these straight from the freezer!
serving suggestions
- Serve these alongside fresh berries for a light breakfast.
- They pair perfectly with a hot cup of black coffee.
- Presentation is simple: arrange them beautifully on a chilled plate.
- Try drizzling a tiny bit of melted dark chocolate over them.
- These make a wonderful, light finale after a summer dinner.

Frozen Peanut Butter Yogurt Bites
- Prep Time: 10 minutes
- Cook Time: 0 minutes
- Total Time: 1 hour 10 minutes (including freezing)
- Yield: Varies (approximately 20-30 bites)
- Category: Dessert/Snack
- Method: Freezing
- Cuisine: American
- Diet: Vegetarian
Description
A simple and delicious recipe for making frozen peanut butter yogurt bites, perfect as a healthy snack or light dessert.
Ingredients
- 1 cup plain Greek yogurt
- 1/2 cup peanut butter (creamy or crunchy)
- 2–3 tablespoons honey or maple syrup (adjust to taste)
- 1/2 teaspoon vanilla extract
- Optional: 1/4 cup mini chocolate chips or chopped nuts for topping
Instructions
- Line a baking sheet with parchment paper or a silicone mat. Set aside.
- In a medium bowl, combine the Greek yogurt, peanut butter, honey (or maple syrup), and vanilla extract. Mix well until smooth and thoroughly combined.
- Using a small spoon or a piping bag, drop spoonfuls (about 1-inch in diameter) of the mixture onto the prepared baking sheet. You can also spread the mixture evenly into a thin layer and then break it into pieces once frozen.
- If desired, sprinkle mini chocolate chips or chopped nuts over the top of each bite.
- Place the baking sheet in the freezer for at least 1-2 hours, or until the bites are firm.
- Once frozen, transfer the bites to an airtight container or freezer bag and store them in the freezer. Enjoy directly from the freezer.
Notes
- Adjust the sweetener (honey or maple syrup) based on your preference for sweetness.
- Ensure the yogurt is thick (Greek yogurt works best) to help the bites hold their shape.
- These bites are best eaten directly from the freezer.


