Skip to content
Oh, the warm aroma of peanut butter always fills my kitchen when I bake these gluten-free peanut butter cookies, and they come out with golden edges and a chewy center that just melts in your mouth with every bite. As a busy mom, I appreciate how this classic treat uses a simple measure-for-measure flour blend to keep things tender without any gluten, making it easy for everyone to enjoy. Busy schedules don’t have to mean skipping homemade sweets that taste this good, so I whipped up this recipe one afternoon and it saved the day.
These gluten-free peanut butter cookies fit perfectly into my afternoon snacks or even as a post-workout treat, and they reheat so easily for that quick pick-me-up when energy dips. With peanut butter as the star ingredient, each one delivers about 3 grams of protein to help sustain my energy through the day, and that supports a balanced way to enjoy desserts without guilt. I find they satisfy my sweet tooth while keeping things practical for our family’s picky eaters too.

Why We Love This Recipe
- Chewy Texture Delight: The chilled dough ensures tender, chewy centers with crisp edges that everyone craves in a peanut butter cookie.
- Quick Prep Time: Ready in under an hour from start to finish, ideal for squeezing baking into a packed afternoon.
- Protein Boost: Each cookie provides about 3 grams of protein from the creamy peanut butter, adding a satisfying element to your snack rotation.
- Gluten-Free Friendly: Uses a simple flour swap for inclusive baking that doesn’t compromise on classic flavor.
Ingredients to Make Gluten-Free Peanut Butter Cookies
These straightforward ingredients blend seamlessly for gluten-free peanut butter cookies that stay chewy and flavorful, with high-quality peanut butter elevating the nutty taste while contributing protein. Opt for fresh butter and a reliable flour blend to enhance both texture and subtle sweetness in every bite, and each cookie offers roughly 3 grams of protein primarily from the peanut butter.
- Gluten-free measure-for-measure flour blend – Forms the base structure for tender cookies; choose one with xanthan gum included.
- Baking soda – Helps the cookies rise and spread evenly during baking.
- Baking powder – Adds lift for a light, airy interior without heaviness.
- Kosher salt – Balances sweetness and enhances the overall peanut butter flavor.
- Unsalted butter – Provides richness and creaminess; soften it fully for smooth mixing.
- Creamy peanut butter – Delivers the signature nutty taste and protein; use no-stir for best consistency.
- Granulated sugar – Contributes crisp edges and subtle sweetness.
- Packed light brown sugar – Adds moisture and chewiness with a hint of molasses.
- Large egg – Binds the dough and helps with structure.
- Pure vanilla extract – Infuses a warm aromatic note that complements the peanut butter.
- Flaky sea salt – Optional topping for a savory contrast on the finished cookies.

Gluten-Free Peanut Butter Cookies Recipe
- Prep Time: 20 minutes
- Cook Time: 10 minutes
- Total Time: 1 hour
- Yield: 24 cookies
- Category: Dessert
- Method: Baking
- Cuisine: American
- Diet: Gluten Free
Description
A classic peanut butter cookie recipe adapted to be gluten-free, featuring a measure-for-measure flour blend for tender, chewy results without gluten.
Ingredients
- 1 1/4 cups gluten-free measure-for-measure flour blend (with xanthan gum)
- 1/2 teaspoon baking soda
- 1/2 teaspoon baking powder
- 1/4 teaspoon kosher salt
- 1/2 cup unsalted butter, softened to room temperature
- 3/4 cup creamy peanut butter (no-stir variety recommended)
- 1/4 cup granulated sugar
- 3/4 cup packed light brown sugar
- 1 large egg
- 1 teaspoon pure vanilla extract
- Flaky sea salt for sprinkling (optional)
Instructions
- In a medium bowl, whisk together your dry ingredients: the gluten-free flour blend, baking soda, baking powder, and kosher salt. Set this mixture aside.
- In the bowl of a stand mixer fitted with a paddle attachment (or using a hand mixer), cream together the softened butter, creamy peanut butter, granulated sugar, and brown sugar until the mixture is light and fluffy, which usually takes about 2-3 minutes.
- Add the large egg and vanilla extract to the creamed mixture. Beat until fully incorporated and smooth, about 1 additional minute. Remember to scrape down the sides and bottom of the bowl to ensure everything is well mixed.
- With the mixer running on low speed, gradually add the dry ingredients to the wet ingredients. Mix until just combined and no streaks of flour are visible. Avoid overmixing.
- Cover the cookie dough and refrigerate it for at least 30 minutes. This chilling time is crucial for the gluten-free flour to hydrate, resulting in a less gritty and perfectly textured cookie.
- Preheat your oven to 375°F (190°C). Line a baking sheet with parchment paper or a silicone baking mat.
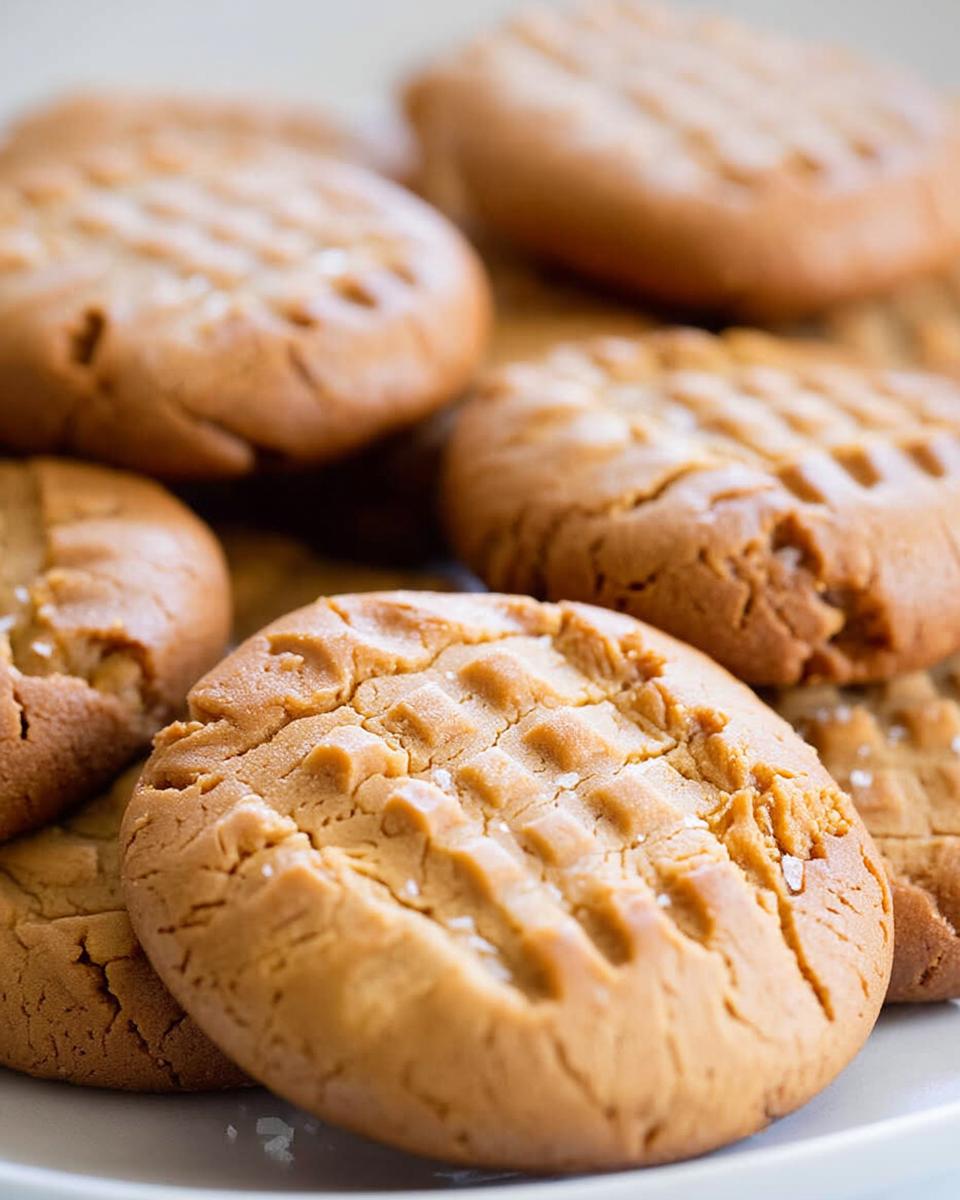
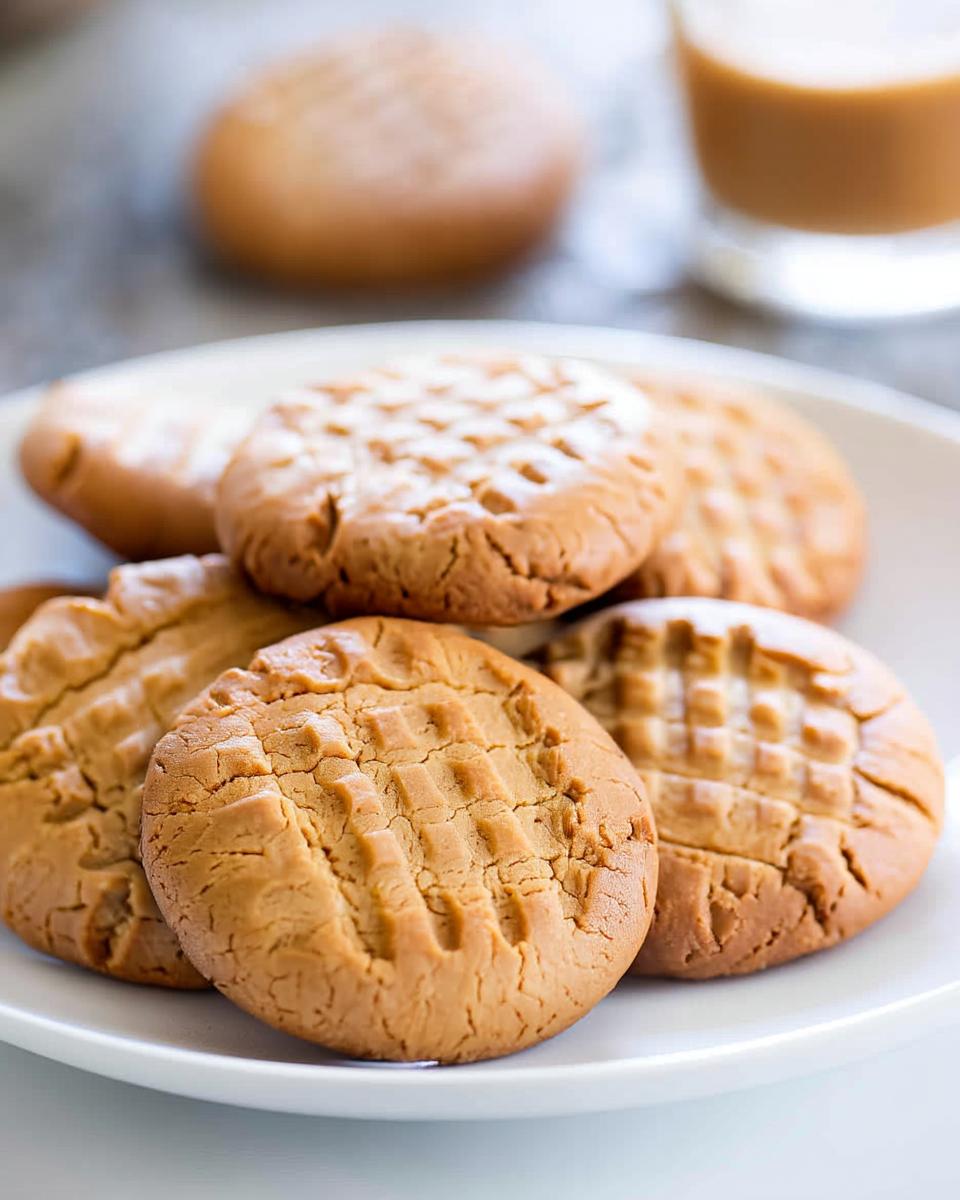
- Scoop the chilled dough into tablespoon-sized balls. For a classic look, roll each ball in granulated sugar and then press a crisscross pattern onto the top of each cookie with a fork.
- Arrange the dough balls about 2 inches apart on the prepared baking sheets. Bake for 9-12 minutes, or until the edges are lightly golden and the centers appear set.
- Let the cookies cool on the baking sheet for a few minutes before transferring them to a wire rack to cool completely. Optionally, sprinkle with flaky sea salt while still warm.
Notes
- Use a no-stir peanut butter to prevent oily cookies.
- Chilling the dough is essential for gluten-free texture.
- These cookies are best enjoyed fresh but can be stored in an airtight container for up to 5 days.
How to Make Gluten-Free Peanut Butter Cookies
Step 1: Whisk Dry Ingredients
I whisk the gluten-free flour blend, baking soda, baking powder, and kosher salt together in a medium bowl. I do this until everything combines evenly. Then, I set the mixture aside for later. This approach helps the leavening agents distribute well. As a result, it prevents uneven rising in your easy gluten-free baking.
Step 2: Cream Butter and Sugars
I use a stand mixer with the paddle attachment, or a hand mixer if that’s handy. I beat the softened unsalted butter, creamy peanut butter, granulated sugar, and brown sugar together. The mixture turns light and fluffy after about 2 to 3 minutes. I scrape the bowl as needed. This creates a smooth base that’s key for chewy peanut butter cookies.
Step 3: Add Egg and Vanilla
Next, I beat the large egg and vanilla extract into the creamed mixture. I continue until everything incorporates fully and smoothly. This takes about 1 minute. Meanwhile, I scrape down the sides and bottom of the bowl. Therefore, this step binds the wet ingredients well. It sets up a cohesive dough for your gluten-free dessert.
Step 4: Combine Wet and Dry, Then Chill
With the mixer on low speed, I gradually add the dry ingredients to the wet mixture. I mix just until no flour streaks remain. Overmixing can toughen the texture, so I avoid it. Then, I cover the dough and refrigerate for at least 30 minutes. This allows the gluten-free flour to hydrate properly. Consequently, you get less gritty and more tender results.
Step 5: Preheat and Shape Cookies
I preheat the oven to 375°F first. Then, I line a baking sheet with parchment paper or a silicone mat. After that, I scoop the chilled dough into tablespoon-sized balls. If I want, I roll each in granulated sugar. I press a crisscross pattern with a fork on top. Finally, I place them 2 inches apart on the sheet for even baking.
Step 6: Bake and Cool
I bake the cookies for 9 to 12 minutes. The edges turn lightly golden, and centers look set when done. Then, I let them cool on the baking sheet for a few minutes. After that, I transfer to a wire rack. If desired, I sprinkle flaky sea salt while warm. This adds a savory touch. As they cool, the cookies firm up perfectly.
Pro Tips for Success
- Choose No-Stir Peanut Butter: Opt for a no-stir variety to avoid oily dough and maintain the right consistency for tender cookies.
- Chill for Texture: Refrigerate the dough at least 30 minutes so the gluten-free flour hydrates, yielding less gritty and more chewy results.
- Boost Protein Option: Add a tablespoon of chia seeds to the dry ingredients for an extra gram of protein per cookie without altering flavor.
- Check Doneness Carefully: Bake until edges are lightly golden to prevent overbaking, keeping centers soft and satisfying.
How to Serve Gluten-Free Peanut Butter Cookies
Garnishes
I love adding a pinch of flaky sea salt right after baking to bring out the nutty sweetness in these gluten-free peanut butter cookies. For extra crunch, press a few chopped peanuts onto the tops before they go into the oven. A light dusting of powdered sugar works well too, giving a subtle contrast without overpowering the flavor.
Side Dishes
Pair these cookies with a tall glass of almond milk to complement their creamy texture and keep things light. Fresh sliced apples add a crisp tartness that balances the richness nicely. If you’re hosting, serve alongside herbal tea for a relaxing end to the meal.
Creative Ways to Present
I often break the cookies into chunks and mix them into yogurt parfaits for a fun breakfast twist. Arrange them on a platter with fresh berries for a colorful dessert board that impresses guests. For kids, sandwich vanilla ice cream between two cookies to create mini treats that disappear fast.
Make Ahead and Storage
Storing Leftovers
I store my baked gluten-free peanut butter cookies in an airtight container at room temperature. They stay fresh there for up to 5 days, as the recipe suggests. I layer them with parchment paper too. This prevents sticking and keeps their chewy texture intact for easy snacking all week.
Freezing
When I need longer storage, I freeze unbaked dough balls on a sheet first. Then, I transfer them to a freezer bag for several months. Baked cookies freeze well in a layered container to avoid breakage. I thaw everything at room temperature before baking or serving.
Reheating
I reheat cookies in the microwave for 10-15 seconds to restore warmth quickly. Or, I use a 300°F oven for 3-5 minutes while covering loosely with foil. This retains moisture and revives golden edges without toughening them. I always warm just one or two at a time for best results.