
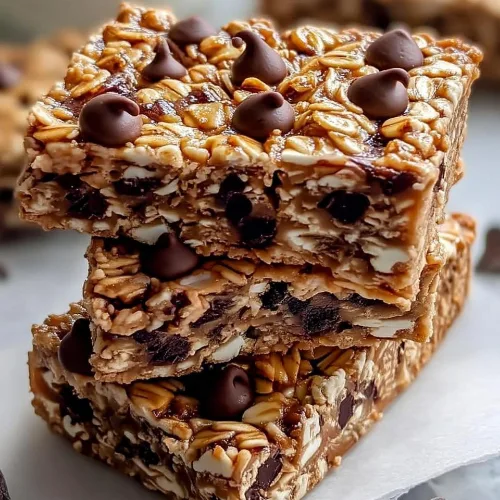
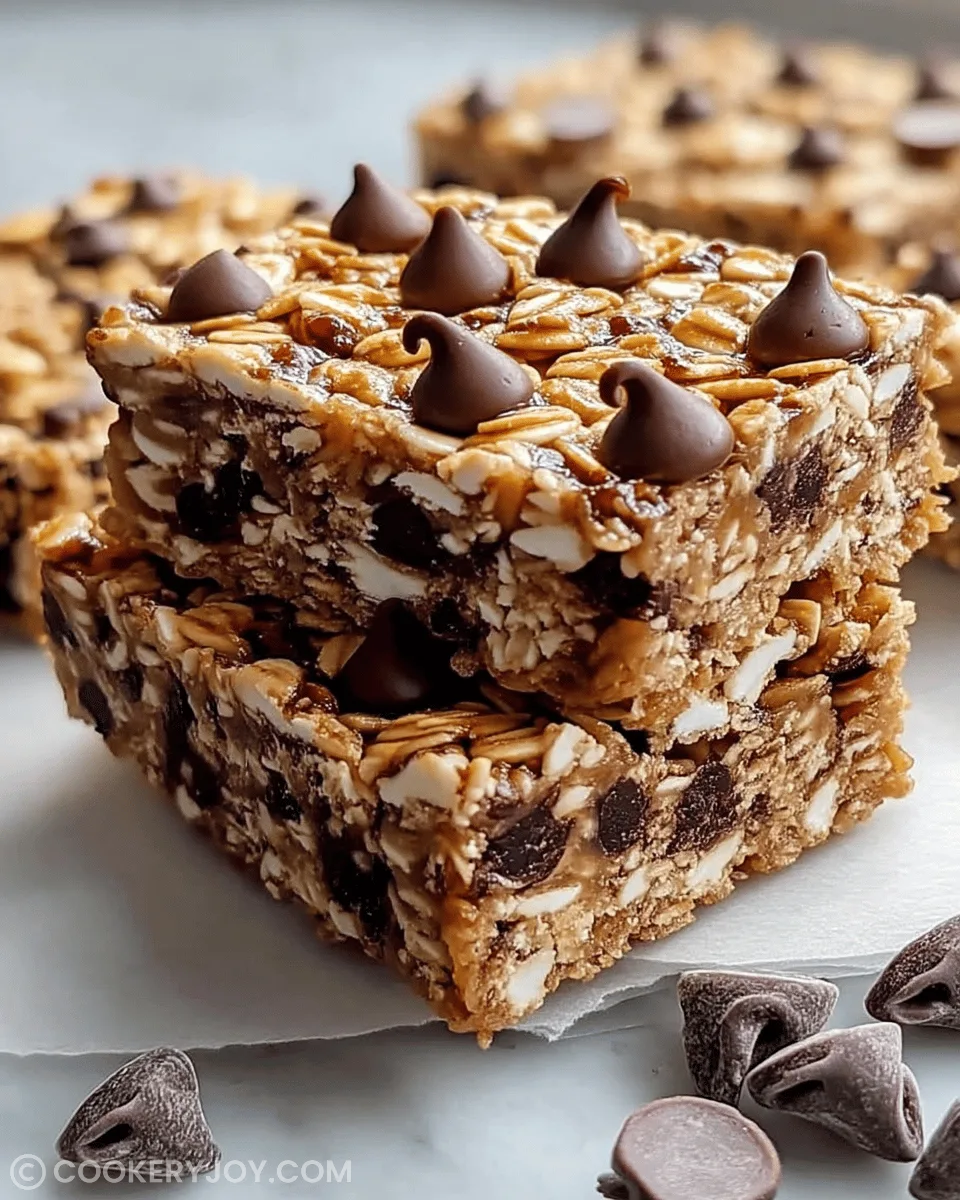
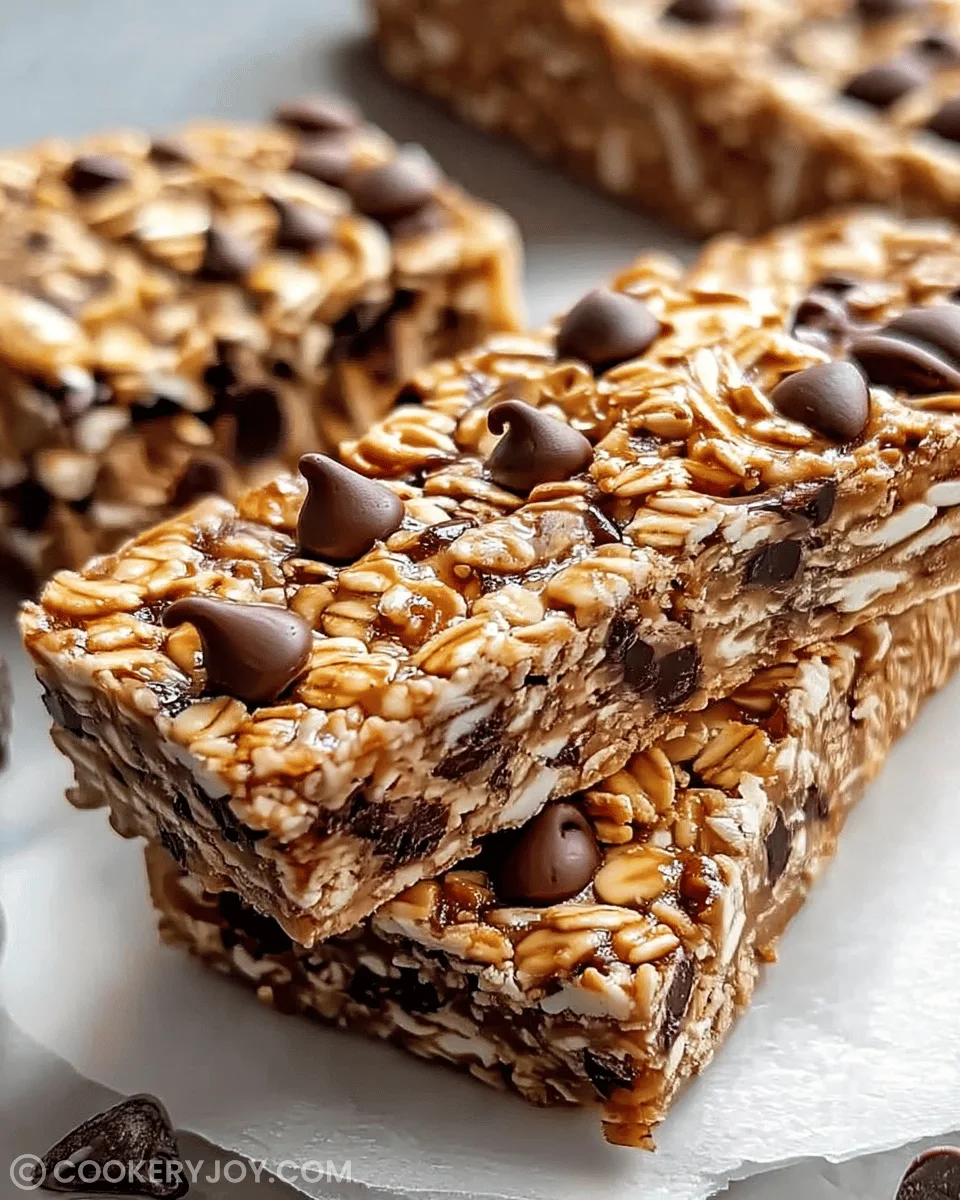
No bake granola bars are a reliable go-to for anyone craving a wholesome treat without turning on the oven. These bars blend the nutty richness of peanut butter with the subtle sweetness of honey, creating a chewy texture thats both satisfying and energizing. Oats and pumpkin seeds add a hearty crunch that makes them feel substantial yet light.
I appreciate how these bars fit seamlessly into a hectic schedule, ready in just minutes of hands-on time before chilling. They store well in the fridge, staying fresh for quick grabs during busy mornings or afternoon slumps. Family members often reach for them as a healthier alternative to store-bought snacks, praising the balance of flavors.
Why You’ll Love This Recipe
- Quick Preparation: I whip up these no bake granola bars in under 15 minutes of active time. This makes them a stress-free snack option for busy days. You’ll appreciate the minimal effort.
- Wholesome Ingredients: These bars pack oats and nuts for sustained energy. They avoid refined sugars dominating the flavor. I choose them for healthier snacking.
- Customizable Appeal: Easily swap add-ins like chocolate chips for fruits. This suits different tastes or dietary needs. I adapt them for picky eaters often.
- Family Favorite: The chewy texture and nutty sweetness make them a hit. Kids and adults alike reach for these bars. I love sharing them at home.
- Make-Ahead Friendly: Prepare a batch ahead and store in the fridge. Enjoy grab-and-go convenience all week. This fits my hectic schedule perfectly.
No Bake Granola Bars Ingredients
These ingredients come together for a balanced, chewy bar thats naturally sweet and nutty. Opting for fresh, high-quality items like natural peanut butter enhances the overall taste and keeps the bars moist and flavorful.
- Whole rolled oats: Provide a hearty base that adds chewiness and absorbs the wet ingredients evenly.
- Creamy natural peanut butter: Brings nutty richness and binds everything together for a smooth, cohesive texture.
- Honey: Offers natural sweetness that complements the salt and helps the mixture set firmly.
- Vanilla extract: Infuses a subtle aromatic warmth that rounds out the flavors without overpowering.
- Sea salt: Balances the sweetness with a touch of savoriness for better depth.
- Mini chocolate chips: Add bursts of melty sweetness and a slight crunch when chilled.
- Pumpkin seeds: Contribute a nutty crunch and nutritional boost for added texture contrast.
Note: The complete list of ingredients and exact measurements can be found in the printable recipe card at the bottom of the post.
How to Make No Bake Granola Bars
Step 1: Prepare the baking pan
Line an 8×8-inch baking pan with parchment paper, allowing some overhang on the sides. This makes removal easy later without sticking. The setup takes just a minute and ensures clean edges for slicing.
Step 2: Mix the wet ingredients
In a large mixing bowl, combine the peanut butter, honey, vanilla extract, and sea salt. Stir until the mixture becomes smooth and glossy, which helps it bind the dry components effectively. This step creates the sticky base for chewy granola bars.
Step 3: Incorporate the dry ingredients
Add the oats, mini chocolate chips, and pumpkin seeds to the wet mixture. Stir vigorously to coat everything thoroughly, resulting in a thick, uniform dough. The combination yields a hearty texture perfect for healthy snacks.
Step 4: Press into the pan
Transfer the mixture to the prepared pan and top with another sheet of parchment paper. Use a heavy glass or measuring cup to press down firmly, packing it as tightly as possible for bars that hold their shape. This pressing ensures a dense, satisfying bite.
Step 5: Chill and set
Place the pan in the refrigerator for at least 1 to 2 hours until fully set. The chilling firms up the bars for easy cutting. Once ready, lift out using the overhang and slice into rectangles.
Step 6: Store for freshness
Keep the sliced no bake granola bars in the fridge to maintain their chewy texture. This storage method preserves the peanut butter oats bars for longer enjoyment. Theyre best enjoyed cold straight from the refrigerator.
Pro Tips for Success
- Stir Thoroughly: I mix the wet ingredients until glossy to ensure even binding and prevent dry spots in the bars. This step helps everything come together smoothly.
- Press Firmly: I use firm pressure when packing the mixture to create dense, sliceable bars that dont crumble. A heavy glass works great for this.
- Chill Fully: I refrigerate the bars for the full 1 to 2 hours so they set properly and achieve optimal chewiness. Patience here pays off in texture.
- Customize Add-Ins: I swap chocolate chips for dried fruit or nuts to vary flavors while keeping the base intact. This keeps picky eaters happy.
- Store Chilled: I always keep the bars in the fridge to maintain their signature chewy texture over time. This simple habit extends their freshness.
How to Serve No Bake Granola Bars
Garnishes
I like to sprinkle a few extra pumpkin seeds or a drizzle of melted peanut butter on top of no bake granola bars right before serving for added crunch. A light dusting of sea salt enhances the sweetness from the honey. These simple touches make the bars feel more indulgent without much effort.
Side Dishes
I pair no bake granola bars with fresh apple slices or Greek yogurt for a balanced snack thats both filling and refreshing. Often, I serve them alongside a handful of berries for a burst of tartness that contrasts the chewy texture. This combination keeps things light and nutritious for midday energy.
Creative Ways to Present
I wrap individual no bake granola bars in parchment for easy lunchbox packing, turning them into portable treats. Arranging sliced bars on a platter with nuts scattered around adds visual appeal for gatherings. Cutting them into smaller squares works well for party platters, offering cozy bites everyone can grab.
Make Ahead and Storage
Storing Leftovers
I store leftover no bake granola bars in an airtight container in the refrigerator to keep their chewy texture intact. They stay fresh for up to a week this way, making them ideal for busy weeks. Just grab one whenever you need a quick snack.
Freezing
For longer storage, I wrap no bake granola bars individually in plastic wrap and place them in a freezer-safe bag. They freeze well for up to a month, thawing quickly at room temperature. This method is perfect if you want to stock up without waste.
Reheating
I let frozen bars thaw in the fridge overnight for the best results, or microwave them briefly on low power if in a rush. Another option is to warm them gently in a low oven for a few minutes. Covering with a damp paper towel during microwaving helps retain moisture and chewiness.
Print
Healthy No Bake Granola Bars
- Prep Time: 15 minutes
- Cook Time: 0 minutes
- Total Time: 2 hours
- Yield: 12 bars
- Category: Snacks
- Method: No-Bake
- Cuisine: American
- Diet: Vegetarian
Description
Simple and healthy no-bake granola bars packed with oats, peanut butter, honey, chocolate chips, and pumpkin seeds for a chewy, satisfying snack.
Ingredients
- 2 1/2 cups whole rolled oats
- 1 cup creamy natural peanut butter
- 2/3 cup honey
- 1 teaspoon vanilla extract
- 1/2 teaspoon sea salt
- 1/3 cup mini chocolate chips
- 3 tablespoons pumpkin seeds (pepitas)
Instructions
- Line an 8×8-inch baking pan with parchment paper, leaving a bit of overhang on the sides for easy removal.
- In a large mixing bowl, stir together the peanut butter, honey, vanilla, and salt until the mixture is completely smooth and glossy.
- Add the oats, chocolate chips, and pumpkin seeds to the wet ingredients. Stir vigorously until the oats are thoroughly coated and the mixture is very thick.
- Transfer the mixture to the prepared pan. Place a second sheet of parchment paper on top and use a heavy glass or measuring cup to press down firmly, packing the bars as tightly as possible.
- Place the pan in the refrigerator for at least 1 to 2 hours to set.
- Lift the bars out using the parchment overhang and slice into rectangles. Keep these stored in the fridge for the best chewy texture.
Notes
- Store the bars in the refrigerator to maintain the best chewy texture.
- These bars are customizable; feel free to swap chocolate chips for dried fruit or nuts for variety.


