

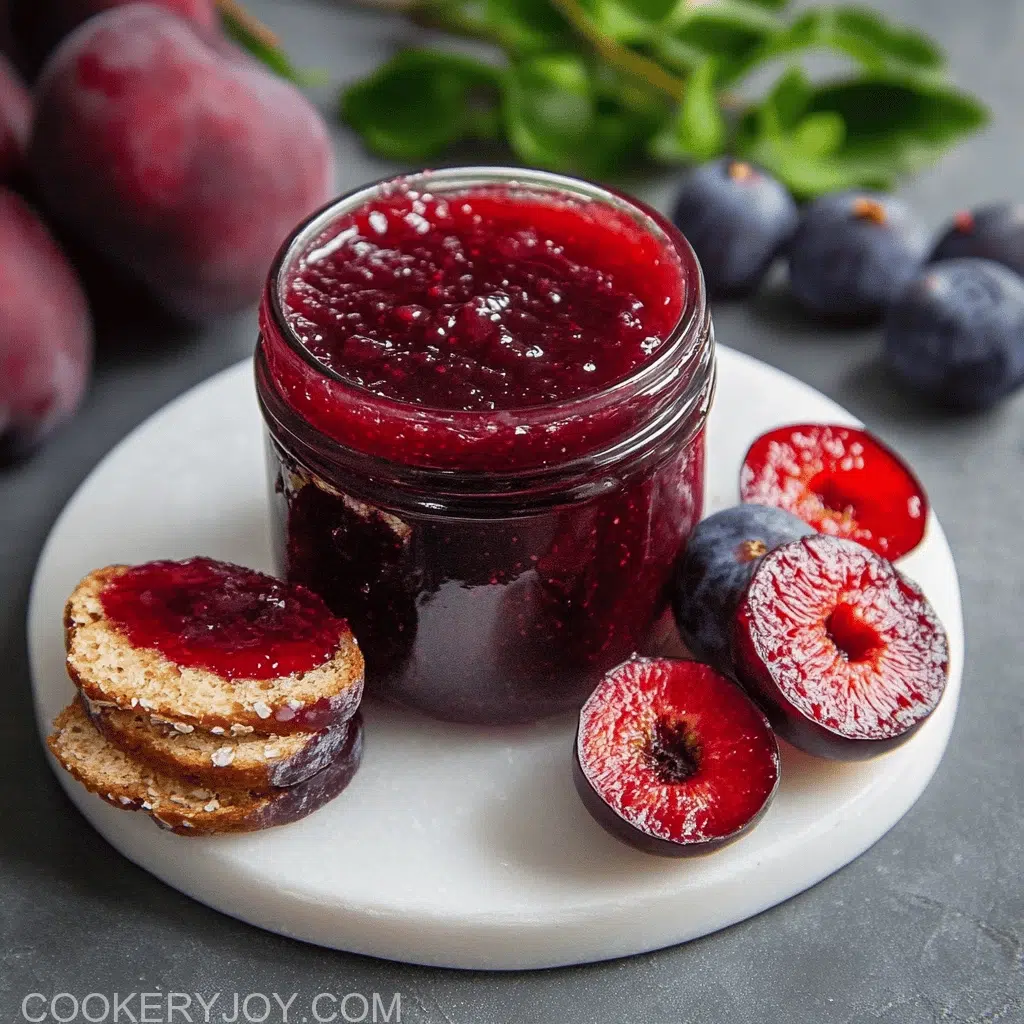
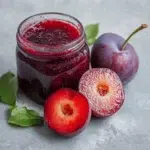
There’s nothing quite like the sweetness of summer captured in a jar. This homemade plum jam is an absolute dream, bursting with vibrant fruit flavor. It’s wonderfully simple to make, yet it feels so special, a true taste of sunshine.
I simply adore slathering this on my morning toast. It keeps beautifully in the fridge too, ready for those busy mornings or an unexpected visitor. Your family will beg for more of this delightful homemade plum jam.
Why I Love This Recipe
Honestly, I just adore this homemade plum jam! For busy women like us, it’s a lifesaver. It’s so quick to whip up. Plus, the warm spices just sing, making it feel extra special. It truly elevates a simple breakfast or even a cheese board. This homemade plum jam is pure comfort in a jar!
Homemade Plum Jam Ingredients
Creating this delicious homemade plum jam starts with just a few simple things. Each ingredient plays its part, beautifully combining for that perfect taste. It’s like a little bit of kitchen magic.
- Plums: These lovely fruits are the star. They bring natural sweetness and a beautiful tartness.
- Sugar: Just enough to bring out the plums’ flavor. It helps achieve that lovely jam consistency.
- Lemon Juice: A splash of this brightens everything up. It also helps the jam set just right.
- Cinnamon, Ground Cloves, and Ground Ginger: These warm spices are my secret touch. They add depth and a cozy aroma to your homemade plum jam.
Substitutions and Tips
Don’t be afraid to make this recipe your own. You can absolutely play around with the spices here. Cardamom or even a tiny pinch of allspice work beautifully too. Just keep them warm for that comforting vibe. Remember, the exact amounts are in the recipe card below. Happy jamming!
How to Make Homemade Plum Jam
Making your own homemade plum jam is super easy. Just follow these steps. You’ll be enjoying delicious, fresh jam in no time. It’s truly a kitchen adventure.
Preparing Your Plums
First, grab your beautiful plums. Halve them carefully. Then, remove those stubborn stones. Next, roughly dice the plum halves. If you prefer a smoother jam, make the pieces smaller now. This saves effort later. It’s a smart little shortcut.
Combining Ingredients and Simmering
Now, put the diced plums into a small saucepan. Add your sugar and fresh lemon juice. Don’t forget your warm spices. Stir it all together. Place the pan over medium heat. Keep stirring until the sugar completely dissolves. This creates a lovely base for your homemade plum jam.
Mashing and Thickening the Jam
Bring the mixture to a gentle simmer. Reduce the heat just a bit. Let it simmer for about 5 to 10 minutes. As the plums soften, gently mash them. This helps them break down. You’ll see it start to thicken nicely. This is how your homemade plum jam gets its body.
Cooling and Storing Your Homemade Plum Jam
Take the pan off the heat. Let it cool for a minute or two. Skim off any foam that rises. Then, spoon your hot jam into clean jars. Put the lid on tightly. Let the jars cool completely. They are now ready for enjoyment. This homemade plum jam tastes amazing.
Optional: Straining for a Smoother Jam
Want a really smooth jam? You absolutely can strain it. Do this once the fruit is broken down. Then, put it back in the pan. Heat it a bit more. It will thicken further. This extra step gives you that perfect, silky texture. It makes your homemade plum jam extra special.
How to Store Homemade Plum Jam
Storage is super important for your delicious homemade plum jam. Since this is a smaller batch, I usually keep it in the fridge. It stays fresh and ready for spontaneous toast cravings. I aim to use it up fairly quickly. Proper canning will extend its life. However, for a small batch, a clean jar in the refrigerator works perfectly. It will be safe and tasty for several weeks. This makes homemade plum jam so convenient.
Tips for Success
- Choose ripe plums for best flavor.
- Don’t overcrowd your saucepan.
- Stir constantly to prevent sticking.
- Test for thickness, remember it sets more as it cools.
- Cool jars upside down briefly to seal.
- Enjoy your homemade plum jam quickly.
- Share with friends, they’ll love it!
Kitchen Tools You’ll Need
- Small-Medium Saucepan: Any trusty pan works.
- Wooden Spoon or Spatula: Great for stirring.
- Fork or Potato Masher: Helps break down plums.
- Clean Jars with Lids: Mason jars are perfect.
- Ladle: For easy transfer.
- Cutting Board: Keep your counters clean.
- Sharp Knife: For halving plums.
Serving Suggestions
- Spread generously on warm toast or scones.
- Swirl into plain yogurt for a quick breakfast.
- Serve with soft cheeses on a cracker.
- Use as a filling for tarts or pastries.
- Drizzle over pancakes or waffles.
- Mix into oatmeal for a fruity twist.
- Enjoy spooned over vanilla ice cream.
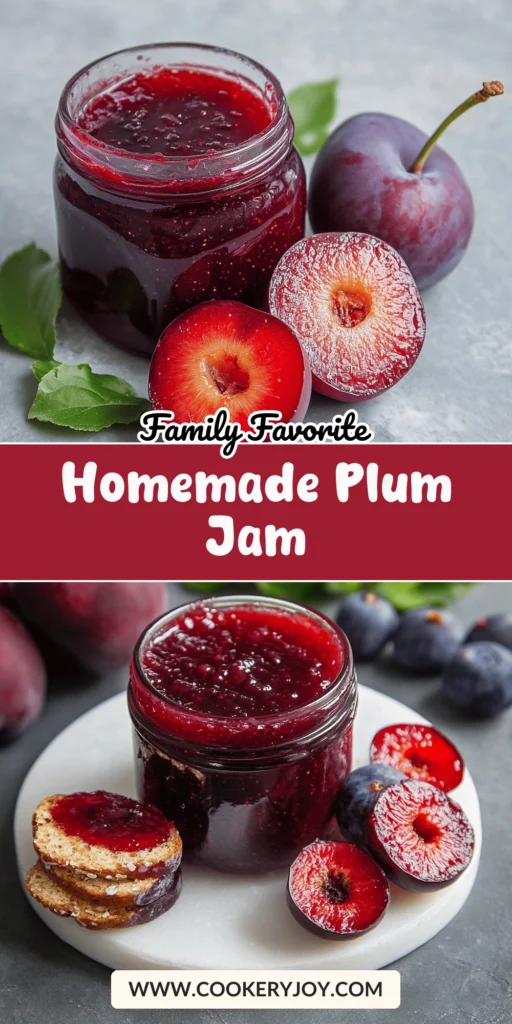
Homemade Plum Jam
- Cook Time: 5-10 minutes
- Total Time: 0 hours
- Category: Jam
- Method: Stovetop
- Diet: Vegetarian
Description
This recipe outlines how to make a small batch of homemade plum jam with warm spices, suitable for quick consumption.
Ingredients
- 9 oz plums (de-stoned weight, approximately 9 ½ oz with stones)
- ½ cup sugar
- 1 tablespoon lemon juice
- 1 pinch cinnamon
- 1 pinch ground cloves
- 1 pinch ground ginger
Instructions
- Halve the plums and remove the stones then roughly dice the plums. If you don’t plan to strain the jam, make the pieces relatively small so any pieces of skin are small.
- Put the plum pieces, sugar and lemon juice in a small-medium saucepan along with the cinnamon, cloves and ginger. Place over a medium heat and stir to dissolve the sugar.
- Bring the jam to a simmer, reduce the heat a little and simmer for approximately 5-10 minutes. Mash the plums as they soften to break them up more.
- Remove the pan from the heat, allow to cool a minute or two then skim off any foam. Transfer to your prepared clean jar(s) and put lid on while still hot. Leave to cool.
- If you choose to strain the jam to remove the skins, do so once the fruit is well broken up then return the mixture to the pan and heat further until it thickens. Being lower sugar, it may not fully set and work in the ‘wrinkle test’ (when you put a small amount on a plate you have chilled ahead of time and as it cools, the jam wrinkles on top when you nudge it). However, it will noticeably thicken eg when you stir a spoon/spatula through, it will take a bit longer to close in behind.
- Transfer the jam to a clean (ideally sterile) jar and cover. Allow to cool.
Notes
- Since this is a smaller batch, lower sugar jam, I tend to store in the fridge and use quickly so I am less strict about using sterile jars and canning than a jam I would store longer on a shelf. But proper canning is still recommended.
- You can adjust the spices you add to this to taste/what you have but I suggest keeping them warm spices – others that would work are cardamom and allspice.
Frequently Asked Questions
Can I make a larger batch of Homemade Plum Jam?
Yes, you certainly can. However, for a larger batch, you might need to adjust cooking times. Also, make sure you use a bigger pot to avoid boil-overs. Proper canning methods become more critical for shelf-stable homemade plum jam.
What if my Homemade Plum Jam doesn’t set?
Don’t worry too much if your homemade plum jam seems a bit loose. This recipe is lower in sugar, so it might not set as firm. You can always cook it a little longer. It will still taste wonderful on toast or yogurt.
Can I use different spices in my Homemade Plum Jam?
Absolutely! This is your jam adventure. Try adding a pinch of cardamom for an exotic twist. A tiny amount of star anise can also be lovely. Feel free to experiment with your favorite warm spices in this homemade plum jam.
How long does Homemade Plum Jam last in the refrigerator?
Because this is a low-sugar, small batch, it’s best enjoyed fresh. It will typically last about 2-3 weeks in the refrigerator. Store your homemade plum jam in a well-sealed, clean jar for optimal freshness.


