That late-night craving hits, or maybe it’s a sudden wave of nostalgia for simpler times and drive-thru delights. Remember the iconic Taco Bell Meximelt? That perfect handful of warm tortilla, savory seasoned beef, gooey melted cheese, and a kick of fresh pico de gallo – it was a masterpiece of fast-food simplicity.
For years, the Meximelt was a beloved staple on the menu, a go-to for a quick, satisfying bite. Its disappearance left a cheesy, beefy void in many hearts (and stomachs!). But what if I told you that you can recreate this legendary item right in your own kitchen, and dare I say, make it even better?
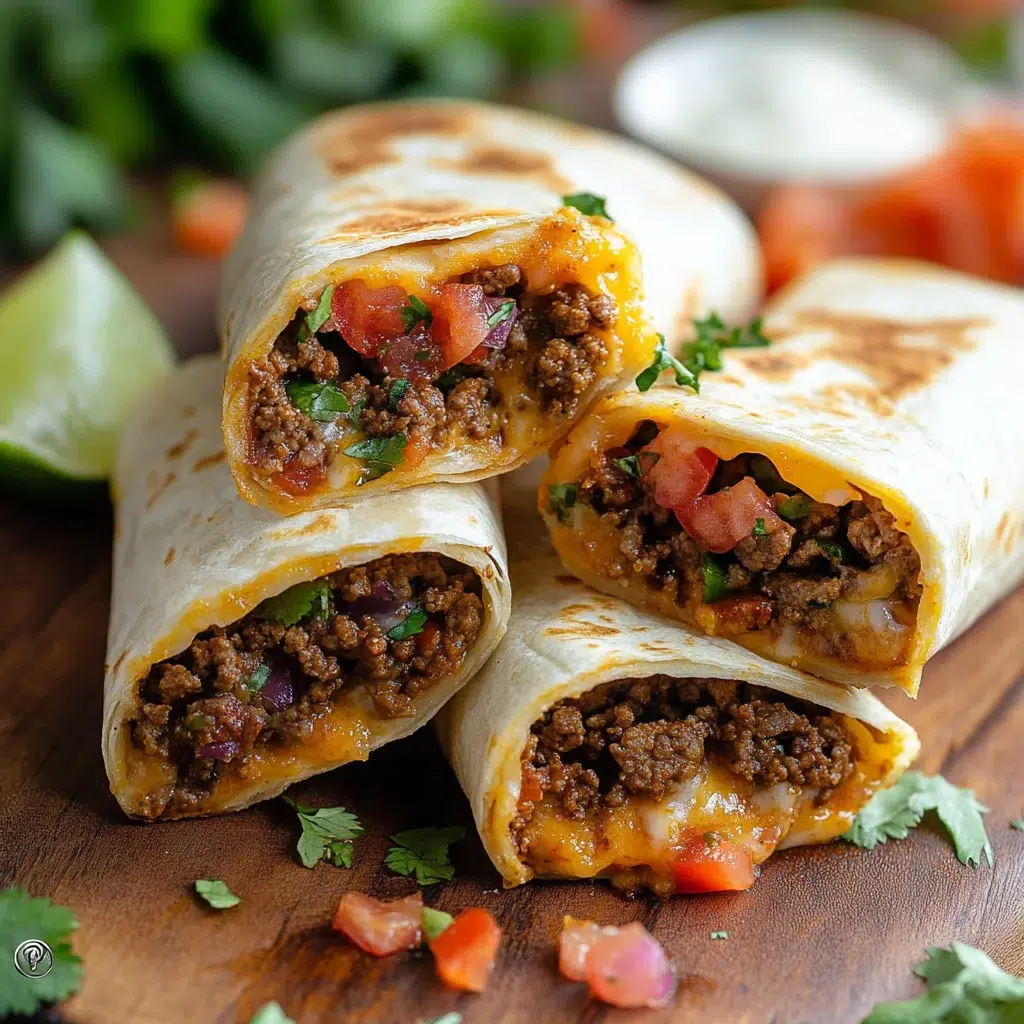
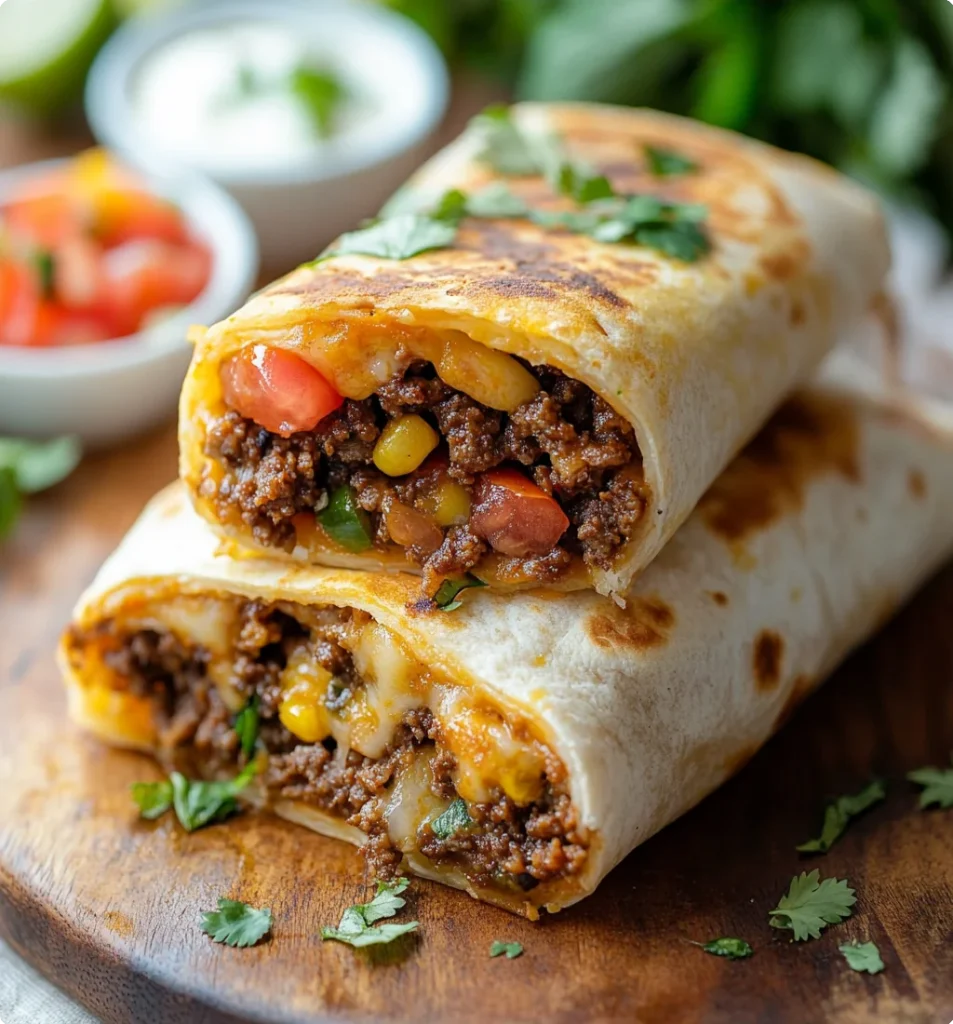
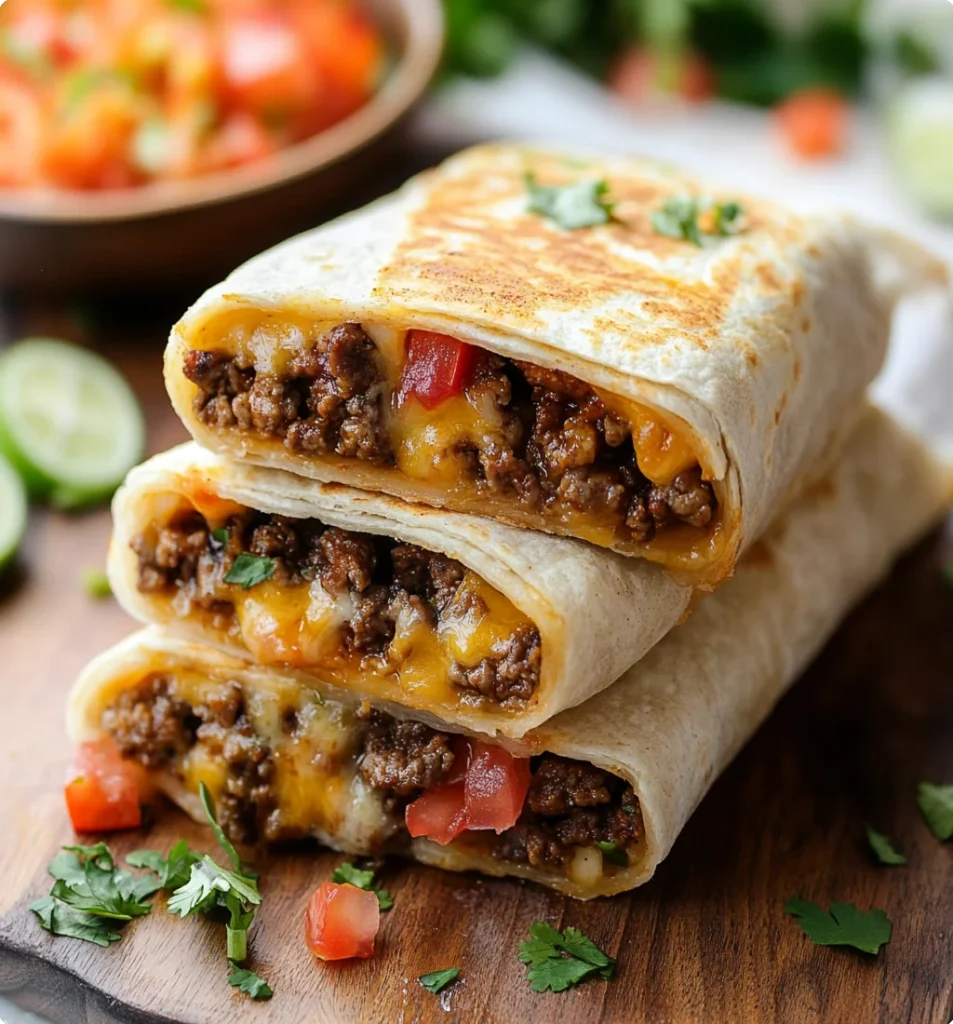
This homemade Meximelt recipe is your ticket to reliving those glory days. It’s a celebration of simple, delicious ingredients coming together in the most comforting way. We’re talking perfectly seasoned ground beef, gloriously melty cheese, and vibrant, fresh pico de gallo all cozied up in a soft, warm flour tortilla. It’s ideal for a speedy weeknight dinner the whole family will adore, a fun addition to your weekend fakeaway lineup, or even as a crowd-pleasing appetizer for your next get-together. I’ve tweaked and perfected this over time, aiming for that authentic taste with the added bonus of knowing exactly what goes into it. Trust me, one bite of this homemade Meximelt, and you’ll be transported.
Why You’ll Love This Recipe
This isn’t just another copycat recipe; it’s a gateway to deliciousness! Here’s why this particular Meximelt recipe will become a fast favorite:
- Spot-On Flavor: We’re aiming for that authentic Taco Bell Meximelt taste you remember, with the freshness dialled way up!
- Incredibly Quick & Easy: From browning the beef to that first cheesy bite, you can have these ready in under 30 minutes. It’s a true time-saver.
- Totally Customizable: You’re the chef here! Amp up the spice, sneak in extra cheese, or even add a dollop of sour cream. Make your perfect Meximelt.
- Budget-Friendly Feasting: Enjoy this fast-food favorite without the fast-food price tag. Making your own Meximelt at home is significantly more economical.
- Perfect For: Busy parents needing a quick meal solution, Taco Bell aficionados, anyone craving comfort food, and those who love a good, easy-to-make snack.
Ingredients for Meximelt Recipe (Taco Bell Copycat)
Core Ingredients
- 1 pound lean ground beef: I prefer 85/15 or 90/10 for good flavor with less grease.
- 2 tablespoons taco seasoning (or 1 1-ounce packet): Your favorite store-bought brand works great, or use a homemade blend. This is the heart of the Meximelt flavor.
- ½ cup water: This helps the taco seasoning fully bloom and coat the beef, creating a slightly saucy consistency.
- Flour tortillas (soft taco size): These are the classic wrapper for a Meximelt, providing that signature soft bite.
- 8 ounces sharp cheddar cheese, freshly grated: Freshly grated cheese is non-negotiable for the best melt! It makes a huge difference compared to pre-shredded.
- Pico de Gallo (or use premade):
- 4 medium Roma tomatoes, seeded and diced: Roma tomatoes are sturdy and less watery, perfect for pico.
- ½ cup finely chopped white onion: Provides a classic, zesty bite.
- 1 small jalapeno, seeded and membranes removed: For a gentle kick. Adjust to your heat preference.
- 2 tablespoons cilantro leaves, chopped: Adds essential freshness.
- Juice of 1 lime: Brightens all the flavors. Always use fresh!
- ¼ teaspoon salt: Or to taste.
Substitutions and Tips
- Beef Swap: Ground turkey or ground chicken are excellent leaner alternatives. For a vegetarian Meximelt, try plant-based crumbles, seasoned lentils, or black beans.
- Cheese Varieties: Monterey Jack, Colby Jack, or a Mexican three-cheese blend would also be delicious.
- Tortilla Options: While flour is traditional for a Meximelt, corn tortillas can be used if you prefer, though the texture will be different and they are more prone to tearing, so you might want to double them up.
- Spice it Up or Down: For more heat, add a pinch of cayenne pepper to the beef, or leave a few seeds in your jalapeno for the pico. For a milder Meximelt, use a small, diced green bell pepper in the pico instead of jalapeno.
- Pico Shortcut: No shame in using good quality, store-bought pico de gallo if you’re short on time! It’s a great way to get your Meximelt fix even faster.
Best Type of Ground Beef to Use
For the most authentic and delicious Meximelt, lean ground beef is your best bet. I typically reach for 85/15 or 90/10 ground beef. This ratio provides enough fat to keep the beef moist and flavorful, but not so much that your Meximelt becomes greasy. Ground chuck also works well and offers great flavor.
If you opt for a higher fat content, like 80/20, just be sure to drain the excess grease thoroughly after browning. For a leaner version of the Meximelt, ground sirloin can be used, though it may result in a slightly drier filling. And as mentioned, ground turkey or chicken are fantastic leaner alternatives that readily absorb the taco seasoning.
Kitchen Tools You’ll Need
Must-Have Tools
- Large Skillet: Essential for browning the ground beef.
- Mixing Bowls: For preparing the pico de gallo and holding other ingredients.
- Sharp Knife and Cutting Board: For dicing the pico ingredients.
- Cheese Grater: For that beautifully melting freshly grated cheese.
- Measuring Cups and Spoons: For accurate seasoning and ingredient quantities.
Nice-to-Have Extras
- Citrus Juicer: Makes juicing the lime for the pico a breeze.
- Food Processor: While hand-dicing gives the best texture for pico, a food processor can speed things up if you’re in a pinch (just be careful not to over-process).
- Tortilla Warmer: Keeps your tortillas warm and pliable while you assemble your Meximelt treats.
How to Make Meximelt Recipe (Taco Bell Copycat)
Get ready to create some magic! Here’s how to bring your homemade Meximelt to life:
Step 1: Prepare the Pico de Gallo.
In a medium bowl, combine the diced Roma tomatoes, finely chopped white onion, minced jalapeno, chopped cilantro, fresh lime juice, and salt. Gently mix everything together. Pro-chef tip: Make the pico de gallo first! This gives the flavors a chance to meld and marry, making your Meximelt even more delicious. Set it aside while you prepare the beef.
Step 2: Cook the Ground Beef.
Place a large skillet over medium-high heat. Add the ground beef and cook, breaking it apart with a spoon or spatula, until it’s nicely browned and no longer pink. Once cooked, carefully drain off any excess grease from the skillet. Sensory cue: You’re looking for well-crumbled, savory-smelling beef.
Step 3: Season the Beef.
Return the skillet with the drained beef to the heat. Stir in the taco seasoning and the ½ cup of water. Bring the mixture to a gentle simmer and let it cook for about 3-5 minutes. You’ll see the liquid reduce and the mixture thicken into a beautifully seasoned, saucy beef filling. This step is key for developing that deep, characteristic Meximelt flavor.
Step 4: Warm the Tortillas.
Warm your flour tortillas one at a time. You can do this in a dry skillet over medium heat for about 15-30 seconds per side, just until they’re soft and pliable. Alternatively, wrap them in a slightly damp paper towel and microwave for 20-30 seconds. Sensory cue: Warm, soft tortillas are essential for the perfect Meximelt fold.
Step 5: Assemble the Meximelt.
Lay a warm tortilla flat on your work surface. Spoon a generous line of the seasoned ground beef down the center of the tortilla. Top the beef with a good sprinkle of your freshly grated sharp cheddar cheese, followed by a spoonful of the fresh pico de gallo. Don’t skimp on the cheese – it’s what makes a Meximelt!
Step 6: Fold and Serve.
Carefully fold the tortilla in half over the filling, creating that classic Meximelt shape. Serve immediately while the tortilla is warm, the beef is savory, and the cheese is perfectly gooey. Prepare for applause!
Tips for Success
A few little pointers can elevate your homemade Meximelt from good to great:
- Freshly Grated Cheese is Key: I can’t stress this enough! Pre-shredded cheese contains anti-caking agents that hinder smooth melting. Grate your own for the ultimate gooey Meximelt.
- Don’t Crowd the Pan: When browning your beef, give it space. If your skillet is too crowded, the beef will steam rather than brown, and you’ll miss out on flavor development. Cook in batches if necessary.
- Warm Those Tortillas: This makes them more pliable, preventing them from cracking when you fold your Meximelt. It also just makes for a better eating experience.
- Taste and Adjust: Before you start assembling, give your seasoned beef and pico de gallo a little taste. Need more salt? A bit more lime in the pico? Now’s the time to perfect it for your Meximelt.
- Mind the Filling Ratio: It’s tempting to overstuff your Meximelt, but this can lead to a messy meal. Aim for a balanced amount of beef, cheese, and pico so it’s easy to fold and eat.
How to Store Meximelt Recipe (Taco Bell Copycat)
While a freshly made Meximelt is always best, here’s how to handle leftovers:
- Room Temperature: Assembled Meximelt servings should be eaten promptly. Due to the meat and dairy, don’t leave them at room temperature for longer than 2 hours.
- In the Refrigerator:
- For the best results, store the components separately. Keep the cooked seasoned beef in an airtight container for up to 3-4 days. The pico de gallo can be stored in its own airtight container for 2-3 days (it may become a bit more watery as it sits, so drain any excess liquid). Grated cheese should also be kept in a separate container or resealable bag.
- If you have already assembled a Meximelt, wrap it individually in plastic wrap or foil and store it in an airtight container in the fridge for up to 2 days. Be aware the tortilla might get a little soft.
- Reheating: To reheat an assembled Meximelt, gently warm it in a skillet over medium-low heat until the filling is hot and the cheese is remelted. The microwave can also be used, but the tortilla tends to get softer.
- Freezing Tips:
- The seasoned beef mixture freezes beautifully! Allow it to cool completely, then transfer it to a freezer-safe container or heavy-duty freezer bag, removing as much air as possible. It will keep well for up to 3 months. Thaw overnight in the refrigerator before using in your Meximelt.
- Pico de gallo doesn’t freeze well; the texture of the tomatoes changes significantly upon thawing, becoming mushy. It’s always best to make pico de gallo fresh for your Meximelt.
- While you can freeze assembled Meximelt units (wrapped individually in plastic wrap then foil, and stored in a freezer bag for up to 1-2 months), the texture of the tortilla and pico will be compromised upon reheating. It’s much better to freeze the beef and assemble fresh.
Frequently Asked Questions (FAQs)
Can I make this Meximelt recipe vegetarian?
Absolutely! To create a delicious vegetarian Meximelt, simply substitute the ground beef with your favorite plant-based ground alternative, seasoned cooked lentils, or even a hearty black bean mixture. Just season it with the taco seasoning as you would the beef.
What’s the difference between a Meximelt and a Cheesy Gordita Crunch?
While both are Taco Bell favorites, they are distinct. The Meximelt is a simpler creation: a soft flour tortilla folded over seasoned beef, a three-cheese blend (in the original, though we use cheddar here for better home results), and pico de gallo. A Cheesy Gordita Crunch is more complex, featuring a hard taco shell wrapped in a soft gordita flatbread with a layer of melted cheese between them, filled with seasoned beef, a spicy ranch-style sauce, lettuce, and shredded cheddar cheese. The Meximelt is cherished for its straightforward, melty goodness.
How can I make my Meximelt spicier?
If you like a bit more fire in your Meximelt, you have a few options! Add a pinch of cayenne pepper or red pepper flakes to the ground beef along with the taco seasoning. When making your pico de gallo, leave some (or all) of the seeds and membranes in the jalapeno. You can also add a dash of your favorite hot sauce when assembling your Meximelt.
Conclusion
There’s something truly special about recreating a fast-food icon like the Meximelt in your own kitchen. This Meximelt recipe isn’t just about nostalgia; it’s about enjoying fresh, flavorful ingredients and sharing a meal that’s both incredibly easy to make and universally loved. Whether it becomes your new go-to for Taco Tuesday, a quick weeknight dinner, or a fun snack, this homemade Meximelt is sure to satisfy those cravings and bring a smile to everyone’s face.