
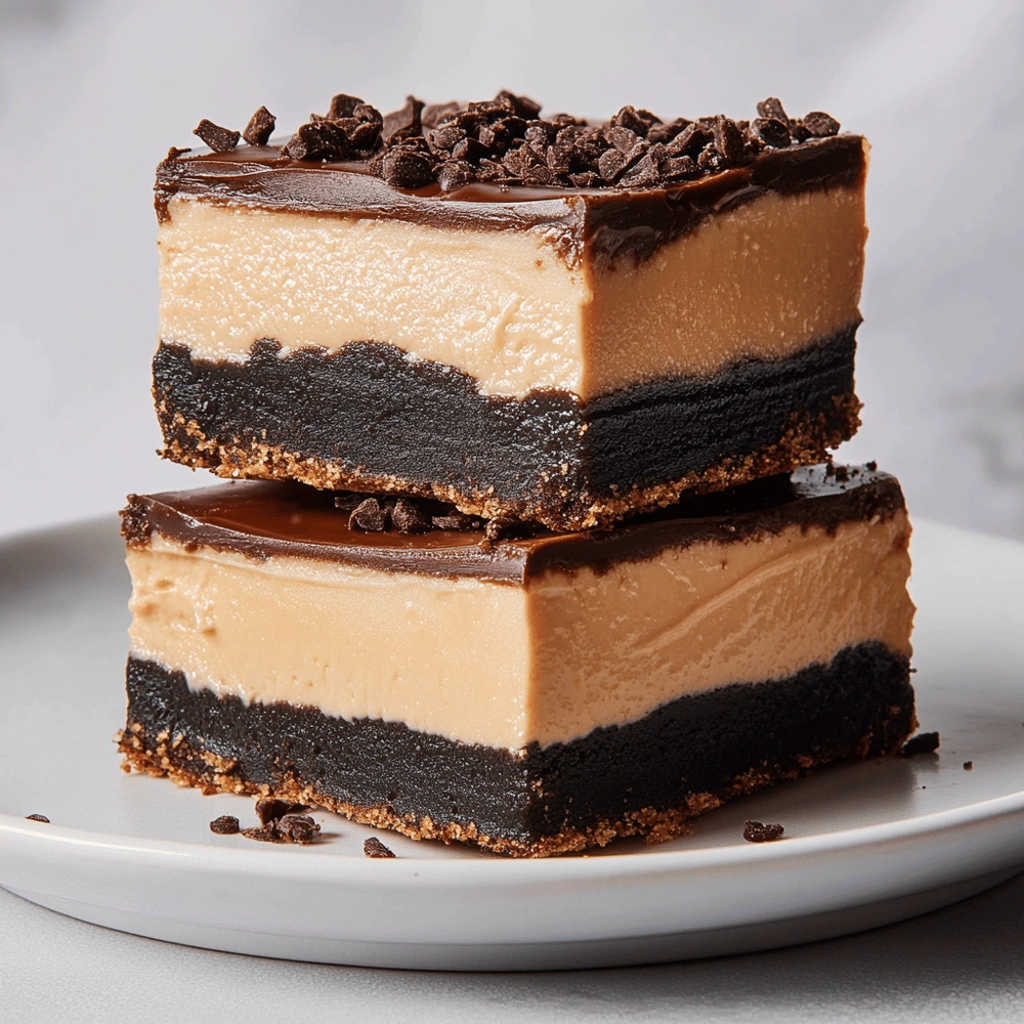
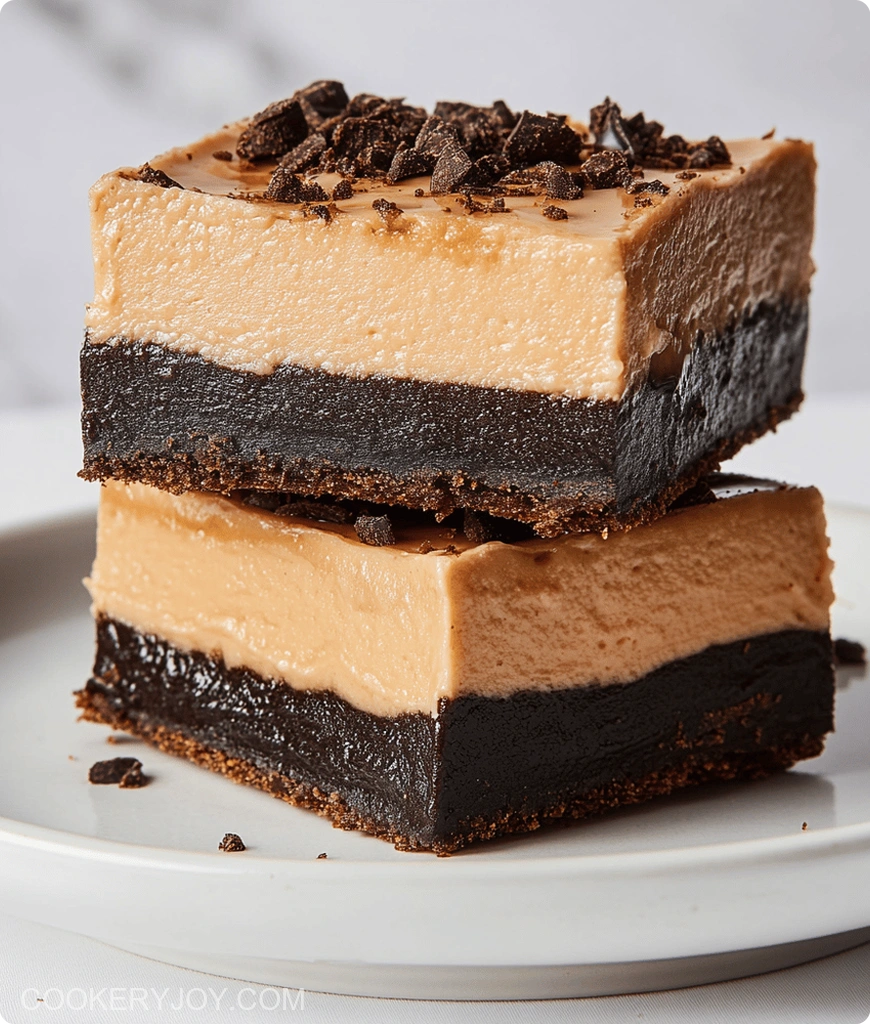
There’s something truly special when two classic desserts unite. Imagine the smooth, creamy indulgence of cheesecake meeting the undeniable allure of chocolate and peanut butter. That’s exactly what you get with these wonderful No-Bake Buckeye Cheesecake Bars. They feature a luscious peanut butter filling, cradled by a rich chocolate cookie crust, and finished with a glossy chocolate topping. Assembling them is quite simple, making them a fantastic treat for any occasion at all.
I always reach for these bars when weeknights feel hectic. They are also perfect for those moments when company drops by unexpectedly. Simply store them in the fridge. You can prepare them ahead of time. Then, you’ll have a popular dessert ready whenever needed. People always compliment the delightful balance of sweet and salty flavors. They also love how wonderfully creamy the texture is.
Why I Love This Recipe
I adore this recipe for so many reasons. It’s genuinely effortless because there’s no oven involved! The prep is incredibly quick, too. You can have these ready for chilling in just minutes. The flavor is just unbeatable, a classic buckeye combo that everyone adores. They are absolutely perfect for sharing. These bars are always a guaranteed hit at parties and gatherings. Plus, the make-ahead magic means you can enjoy them fresh from the fridge anytime.
No-Bake Buckeye Cheesecake Bars Ingredients
The magic of these No-Bake Buckeye Cheesecake Bars truly shines. It’s a simple combination. Yet, it creates incredibly satisfying textures and flavors. We’re talking a crunchy chocolate base. There’s also a smooth, creamy peanut butter filling. And don’t forget the rich chocolate topping! All these elements make for a decadent experience.
- Crushed Chocolate Cookies (like Oreos): These create our delicious, slightly crunchy foundation. They form the perfect base for creamy layers.
- Butter: Melts the cookies. It creates a firm crust that’s easy to slice.
- Cream Cheese: This is the star of our cheesecake filling. It provides signature creamy, tangy richness. Soften it for a smooth texture.
- Creamy Peanut Butter: This brings that beloved “buckeye” flavor. It also makes the filling wonderfully smooth.
- Confectioners’ Sugar: This sweetens the filling. It also helps create the velvety texture.
- Vanilla Extract: It enhances all the other flavors. It also adds subtle depth and richness.
- Semisweet Chocolate Chips: Melted into a glossy topping. These give the crucial final touch of chocolatey goodness.
Substitutions and Tips:
- For the crust, any chocolate sandwich cookie works. You can also try graham crackers for a different flavor.
- If you prefer a less sweet filling, reduce the confectioners’ sugar a bit.
- Want an extra peanut butter kick? Add a tablespoon of peanut butter powder.
- Make sure cream cheese is very soft. This ensures the smoothest filling.
- Milk or dark chocolate chips are great for the topping too. Use what you love most!
How to Make No-Bake Buckeye Cheesecake Bars
Step 1: Prepare the Crust
First, line a 9×9 inch baking pan. Use parchment paper for this. Leave a good 2-inch overhang. This makes lifting easier later. Combine crushed chocolate cookies and melted butter. Mix them in a medium bowl. Stir until the crumbs look like wet sand. Pour this mixture into the pan. Press it down evenly. A cup or spoon works well. Put the pan in the fridge. It needs to chill while you make the filling.
Step 2: Make the Creamy Filling
Next, get a large bowl. Add your softened cream cheese and creamy peanut butter. Use a handheld mixer on medium-high speed. Beat them until very smooth. No one likes lumps in their cheesecake! Now, add the confectioners’ sugar. Don’t forget the vanilla extract. Beat again until creamy. Scrape down the bowl sides often. This ensures all ingredients are well incorporated.
Step 3: Assemble the Bars
Take the chilled crust out of the refrigerator. Spoon the peanut butter filling over the crust. Spread it out evenly with a spatula. Make sure it reaches all the corners nicely. This creates a uniform layer. Put the pan back into the fridge. It needs to chill for at least 2 hours. Overnight is even better. This makes the bars set up perfectly.
Step 4: Add the Chocolate Topping
Once the cheesecake filling is firm, prepare the chocolate. Place semisweet chocolate chips in a heatproof bowl. Microwave them for 30 seconds. Stir well after each interval. Continue until the chocolate is smooth and melted. Quickly pour this over the chilled cheesecake layer. Use a spatula to spread it. Create a beautiful, glossy finish all over the top.
Step 5: Chill and Serve
Put the pan back into the refrigerator one more time. Let it chill until the chocolate topping is hard. This usually takes about 30 minutes. Once set, use the parchment overhangs. Lift the whole cheesecake out of the pan. Place it on a cutting board. Cut it into neat squares. These easy dessert bars are now ready to enjoy!
How to Store No-Bake Buckeye Cheesecake Bars
Store leftoverNo-Bake Buckeye Cheesecake Bars in an airtight container. Keep them in the refrigerator. They stay fresh and delicious for up to 4-5 days. For longer storage, freeze individual bars. Wrap them tightly first. Then, place them in a freezer-safe bag. Frozen bars last up to 2 months. Thaw them overnight in the fridge before serving those tasty treats.
Tips for Success
- Make sure cream cheese is soft. This creates a smooth, lump-free filling.
- Press the cookie crust down firmly. It makes a solid base for the bars.
- Chill the bars well between steps. This aids in easy slicing later.
- Use a sharp knife. Wipe it clean after each cut. This gives neat squares.
- Drizzle extra melted chocolate over the top. This adds a professional look.
Kitchen Tools You’ll Need
You don’t need a lot of fancy equipment. Here’s what helps make these No-Bake Buckeye Cheesecake Bars:
- A 9×9 inch baking pan is perfect.
- Parchment paper is great for lining the pan. Foil or plastic wrap can work too.
- You’ll need medium and large mixing bowls.
- A handheld electric mixer is very helpful. It makes the filling smooth.
- Measuring cups and spoons are essential.
- A spatula helps spread layers evenly.
- A small heatproof bowl is needed for melting chocolate.
- A sharp knife slices the chilled bars cleanly.
Serving Suggestions
- Serve these chilled bars cut into neat squares.
- A cool glass of milk or a warm cup of coffee pairs wonderfully.
- Garnish with whipped cream or chopped peanuts.
- These bars are perfect for potlucks and parties.
Frequently Asked Questions
Can I make the No-Bake Buckeye Cheesecake Bars ahead of time?
Oh yes, you absolutely can! These cheesecake bars are fantastic for making ahead. Prepare them up to two days prior. Store them covered in the refrigerator. They are a brilliant option for parties or busy schedules.
What if I don’t have chocolate sandwich cookies for the crust?
No worries at all. You can easily swap graham crackers for the chocolate cookie crust. Just crush them finely. Mix them with melted butter as directed. This gives a slightly different, yet still delicious, base for your peanut butter cheesecake bars.
How do I get clean cuts on my cheesecake bars?
For the cleanest cuts, ensure the bars are well-chilled. Use a large, sharp knife. Wipe the blade clean with a damp cloth between each cut. This prevents chocolate and filling smears. It gives beautifully defined squares.
Can I use a different type of peanut butter?
Creamy peanut butter is best for a smooth texture. You can try natural peanut butter, though. Natural kinds can sometimes separate. Stir it very well before using. The flavor of your No-Bake Buckeye Cheesecake Bars will vary slightly. It will still be delightful.
Print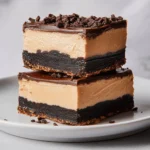
No-Bake Buckeye Cheesecake Bars
- Prep Time: 25 minutes
- Cook Time: 5 minutes (for melting chocolate)
- Total Time: 2 hours 35 minutes (including chilling)
- Yield: 16-20 servings
- Category: Dessert
- Method: No-Bake
- Cuisine: American
- Diet: Vegetarian
Description
Delicious no-bake cheesecake bars with a creamy peanut butter filling and a chocolate topping, all on a chocolate cookie crust.
Ingredients
- 2 cups finely crushed Oreos (from about 22 cookies)
- 6 tbsp. unsalted butter, melted
- 2 (8-oz.) blocks cream cheese, softened
- 1 cup creamy peanut butter
- 1 cup (115 g) confectioners’ sugar
- 1 tsp. pure vanilla extract
- 3/4 cup semisweet chocolate chips
Instructions
- Line a 9″x9″ pan with parchment, leaving a 2″ overhang on 2 opposite sides.
- In a medium bowl, mix Oreos and butter until combined.
- Pour into prepared pan and spread in an even layer, pressing with a measuring cup or spoon.
- Refrigerate until ready to use.
- In a large bowl, using a handheld mixer on medium-high speed, beat cream cheese and peanut butter until smooth.
- Add confectioners’ sugar and vanilla and beat until combined.
- Spoon over crust and spread in an even layer. Refrigerate until well chilled, at least 2 hours or up to overnight.
- In a small heatproof bowl, microwave chocolate chips in 30-second increments, stirring between each, until melted and smooth.
- Pour chocolate over cheesecake and spread in an even layer, working quickly so chocolate doesn’t harden.
- Refrigerate until chocolate is hardened, about 30 minutes.
- Using parchment overhang, remove cheesecake from pan and cut into squares.
Notes
- For an even smoother crust, pulse the Oreos in a food processor until finely ground.
- Ensure the cream cheese is fully softened for a lump-free filling.
- If you don’t have parchment paper, you can grease and flour the pan, but removal will be more difficult.
- The longer you refrigerate the cheesecake, the firmer it will be, making it easier to cut.


