
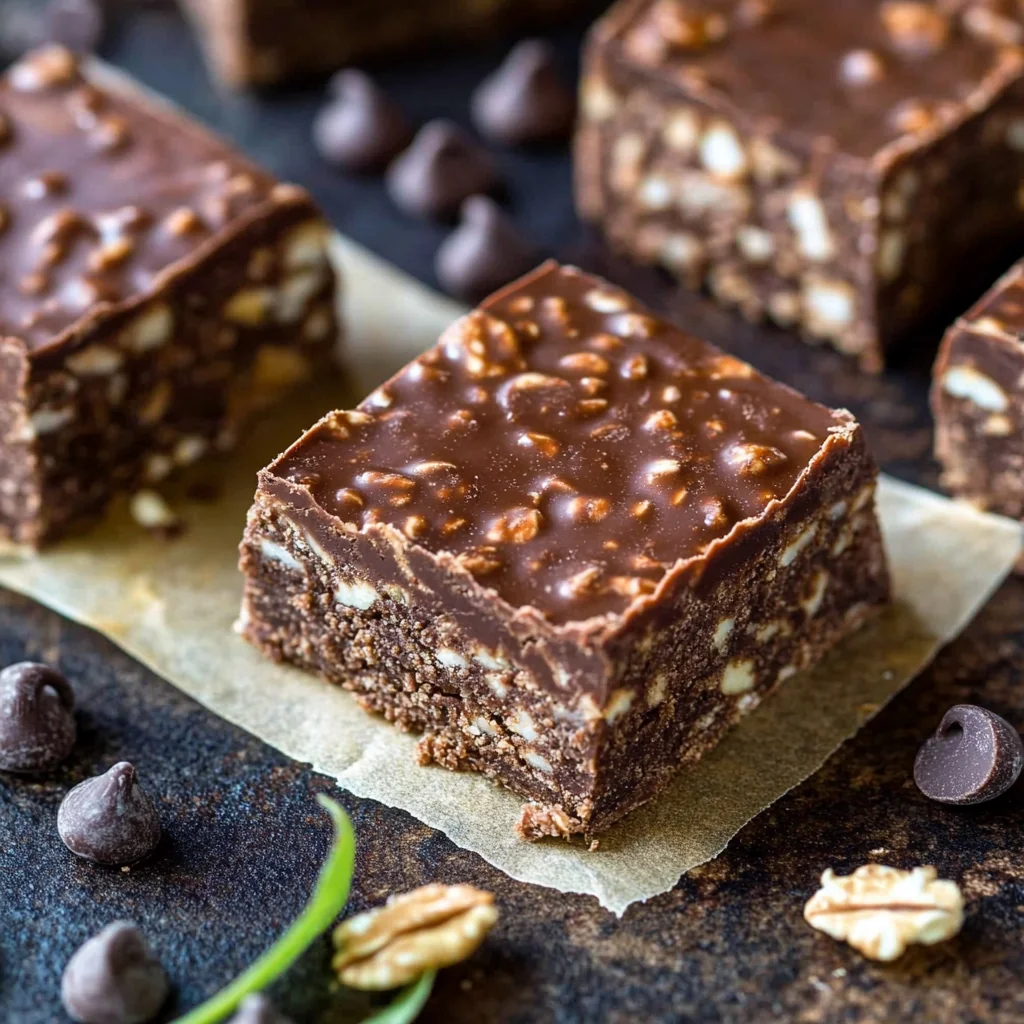
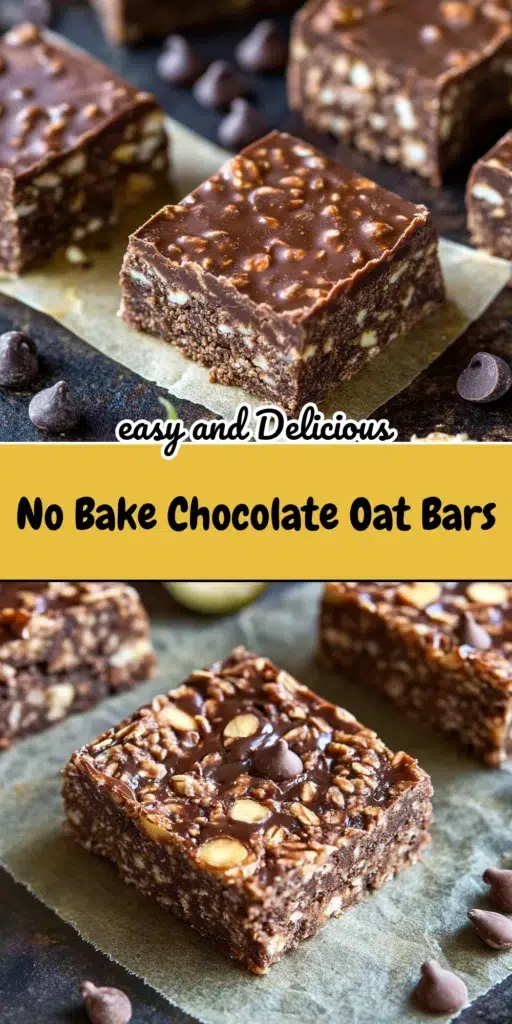
The scent of melted chocolate and peanut butter instantly transports me back to my grandma’s kitchen, where a batch of some no-bake treat was always cooling on the counter, especially on warm afternoons when turning on the oven felt like a crime. These No Bake Chocolate Oat Bars capture that same effortless magic – a simple, satisfying concoction that comes together in minutes, promising a delightful chew and a rich, comforting flavor.
These bars are a true lifesaver for busy days, a guaranteed crowd-pleaser for potlucks, or just a wonderfully wholesome snack to have on hand when a sweet craving hits. They perfectly balance a nutty, oaty base with a luscious chocolatey topping, making them a go-to for a quick dessert or an energy-boosting bite, proving that sometimes the best treats require no baking at all.
Why You’ll Love This Recipe
- Incredibly Quick & Easy: Seriously, these come together in about 15 minutes of active time. No oven, no fuss! Perfect for when you need a treat, stat.
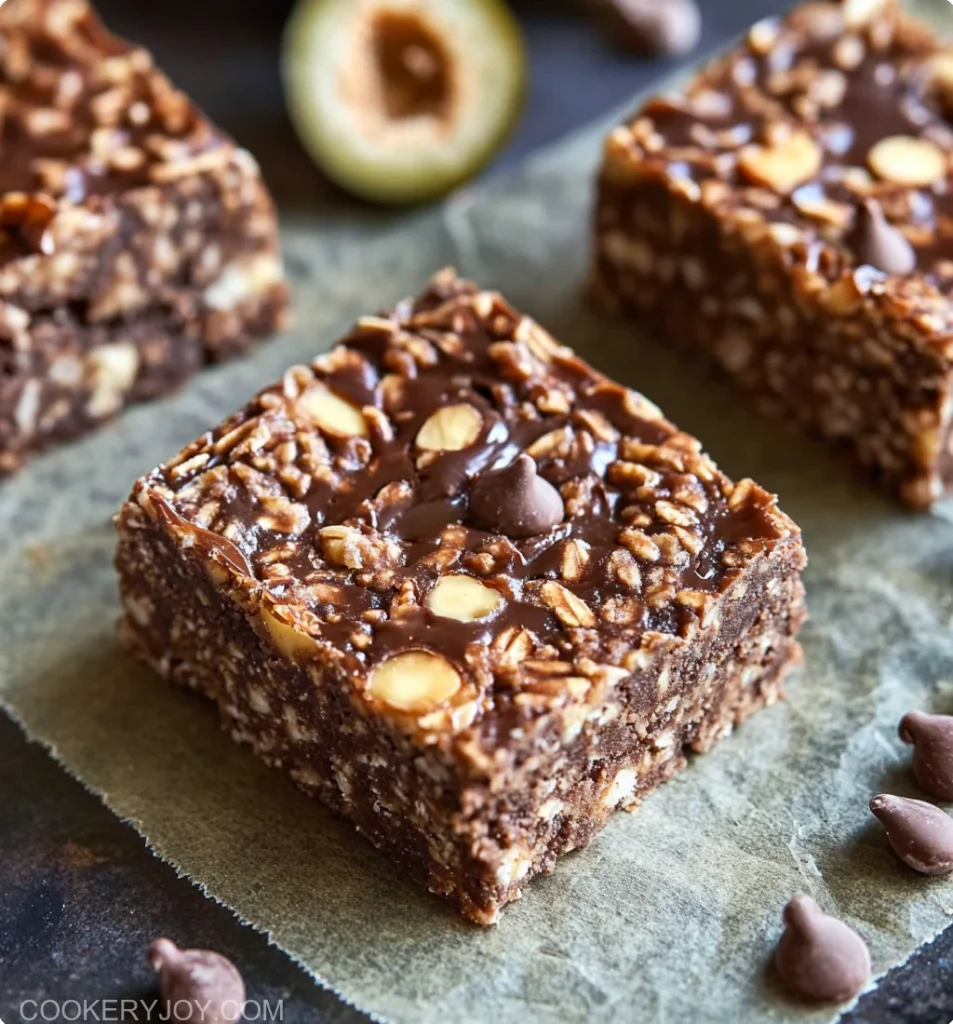
- Wholesome Ingredients: Packed with rolled oats and peanut butter, these bars offer a good dose of fiber and protein, making them a more satisfying option than many other sweets.
- Utterly Delicious: The classic combination of chocolate and peanut butter is a winner every time, and the chewy texture from the oats is simply irresistible.
- Customizable: Easily adaptable to different dietary needs or preferences. You can switch up the nut butter, chocolate type, or even add in extras like nuts or dried fruit.
- Perfect for Any Occasion: From after-school snacks to casual get-togethers, these No Bake Chocolate Oat Bars are always a hit. They travel well, too!
Ingredients for No Bake Chocolate Oat Bars
Core Ingredients
- 3 cups rolled oats: (Old-fashioned oats work best for a chewy texture. Instant oats can become too soft.)
- 1 1/2 cups chocolate chips: (Semi-sweet or dark chocolate chips are fantastic here, but milk chocolate works if you prefer a sweeter bar.)
- 1 cup peanut butter: (Creamy or crunchy, your choice! Natural peanut butter works well, just make sure it’s well-stirred.)
- 1/2 cup maple syrup: (Pure maple syrup lends a lovely, nuanced sweetness. Honey can also be used.)
- 1/4 cup coconut oil (can substitute with butter): (This helps bind the bars and adds richness. Unsalted butter is a good alternative.)
Substitutions and Tips
- Nut Butter Swap: Feel free to use almond butter, cashew butter, or sunflower seed butter if you have a peanut allergy or just prefer a different flavor.
- Sweetener Options: While maple syrup is my go-to for its flavor, honey or agave nectar can be substituted in a 1:1 ratio. Keep in mind this will slightly alter the taste.
- Chocolate Varieties: Experiment with different types of chocolate! White chocolate chips, butterscotch chips, or a mix can create unique flavor profiles for your No Bake Chocolate Oat Bars.
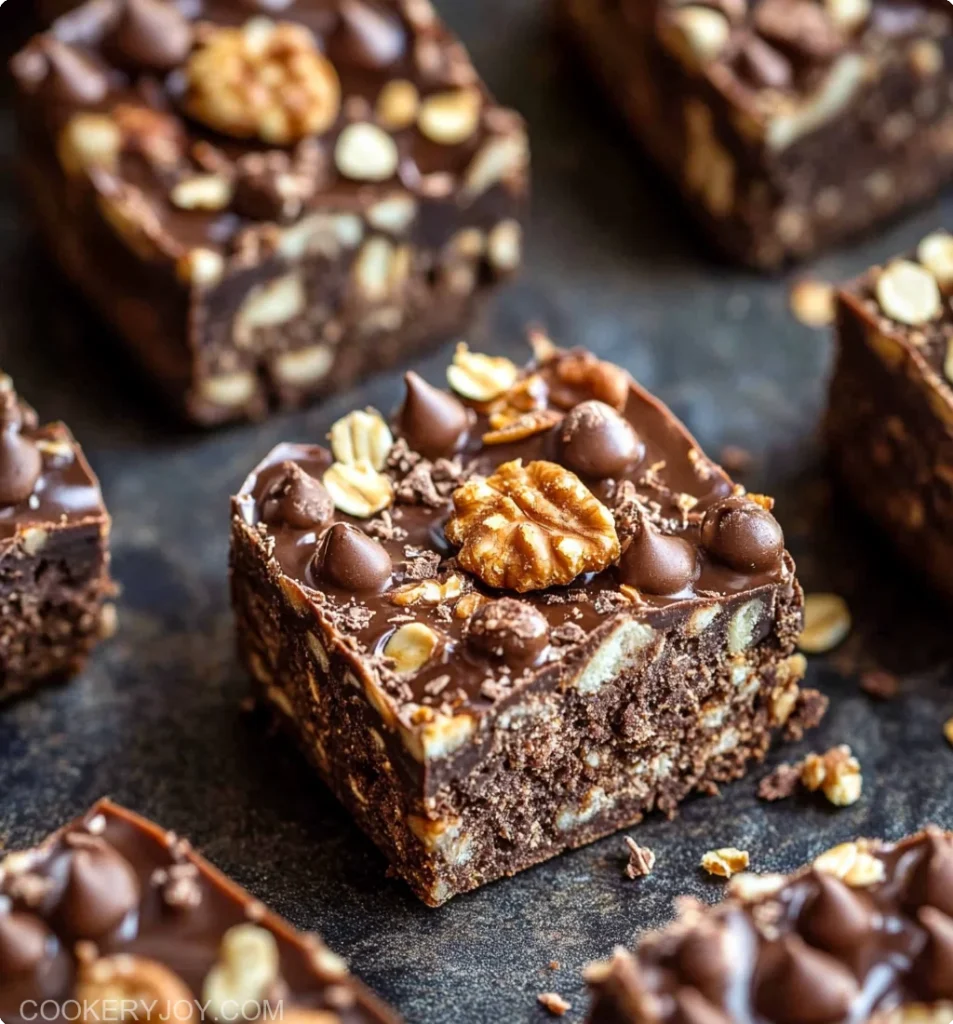
- Add-Ins: Get creative! A handful of chopped nuts (walnuts, pecans, almonds), shredded coconut, or dried fruit (like cranberries or cherries) can be stirred into the oat mixture for extra texture and flavor.
- Vegan Option: Ensure your chocolate chips are dairy-free to keep these bars vegan. Most dark chocolate chips are, but always check the label.
Best Type of Oats to Use
For these No Bake Chocolate Oat Bars, rolled oats (also known as old-fashioned oats) are definitely the way to go. They provide the best texture – chewy and substantial – which holds up well when mixed with the other ingredients and chilled. They absorb the liquid ingredients without becoming mushy, ensuring your bars have a pleasant bite.
While you can use quick-cooking oats (instant oats) in a pinch, be aware that the texture will be softer and less defined. They tend to break down more easily and can result in a slightly pastier bar. Steel-cut oats are not suitable for this no-bake recipe as they require cooking to become palatable.
Best Type of Chocolate Chips to Use
The best type of chocolate chips really comes down to personal preference, but semi-sweet chocolate chips are a fantastic all-around choice for No Bake Chocolate Oat Bars. They provide a lovely balance of sweetness and rich chocolate flavor that complements the peanut butter and oats perfectly.
Dark chocolate chips (60-70% cacao) are another excellent option if you prefer a more intense, less sweet chocolate flavor. Milk chocolate chips can be used for a sweeter, creamier result, which kids often love. For a fun twist, you could even use a mix of different chocolate chips or try mini chocolate chips for better distribution. If you’re feeling fancy, a good quality chocolate bar, chopped into small pieces, will also melt beautifully and add a gourmet touch.
Kitchen Tools You’ll Need
Must-Have Tools
- Large Mixing Bowl: For combining the oat mixture.
- Saucepan (medium-sized): For melting the peanut butter, maple syrup, and coconut oil. Alternatively, a microwave-safe bowl can be used.
- 9×9 inch Baking Pan (or 8×8 inch for thicker bars): To press and chill the bars. A 9×13 inch pan can be used for thinner bars.
- Parchment Paper: Essential for lining the pan. This prevents sticking and makes it super easy to lift the bars out for cutting.
- Spatula or Large Spoon: For mixing and spreading.
Nice-to-Have Extras
- Measuring Cups and Spoons: Accurate measurements are key for the right consistency.
- Offset Spatula: Makes spreading the chocolate topping smooth and even.
- Sharp Knife: For cutting the chilled bars neatly.
How to Make No Bake Chocolate Oat Bars
Step 1: Prepare the Pan
Line your 9×9 inch baking pan (or chosen size) with parchment paper, leaving a slight overhang on two sides. This will act as handles to easily lift the bars out later. Set aside.
Step 2: Combine Wet Ingredients
In a medium saucepan, combine the peanut butter, maple syrup, and coconut oil (or butter). Place over medium-low heat. Stir frequently until the mixture is completely melted and smooth. Don’t let it boil – you just want it warm enough to combine. Once smooth, remove from heat. You should smell that wonderful aroma of warm peanut butter!
Step 3: Mix with Oats
Pour the melted peanut butter mixture into the large mixing bowl containing the 3 cups of rolled oats. Use a sturdy spatula or spoon to stir everything together until all the oats are evenly coated. The mixture will be thick and sticky.
Step 4: Press into Pan (Base Layer)
Transfer the oat mixture to your prepared pan. Using the back of the spatula or your (clean) hands, press the mixture down firmly and evenly to create a compact base layer. This is important for ensuring your No Bake Chocolate Oat Bars hold together well. Pop this in the refrigerator to chill for about 15-20 minutes while you prepare the chocolate topping.
Step 5: Melt the Chocolate
While the base is chilling, prepare the chocolate topping. You can do this in a couple of ways:
- Microwave Method: Place 1 cup of the chocolate chips in a microwave-safe bowl. Microwave in 30-second intervals, stirring well after each, until the chocolate is mostly melted. Continue stirring until completely smooth. Be careful not to overheat, as chocolate can seize.
- Double Boiler Method (or makeshift): If you don’t have a double boiler, place the chocolate chips in a heatproof bowl. Set the bowl over a saucepan filled with about an inch of simmering (not boiling) water. Ensure the bottom of the bowl doesn’t touch the water. Stir constantly until the chocolate is melted and smooth.
Step 6: Add Remaining Chocolate Chips to Base (Optional but Recommended!)
Remove the chilled oat base from the refrigerator. Sprinkle the remaining 1/2 cup of chocolate chips evenly over the surface of the oat layer. This adds a nice textural contrast with some unmelted chocolate bits in the final bars.
Step 7: Pour and Spread Chocolate Topping
Pour the melted chocolate over the oat base (and the sprinkled chocolate chips, if using). Use an offset spatula or the back of a spoon to spread the chocolate into an even layer, covering the entire surface.
Step 8: Chill to Set
Place the pan back into the refrigerator and chill for at least 1-2 hours, or until the chocolate topping is firm and the bars are set. For a quicker set, you can place them in the freezer for about 30-45 minutes. You’ll know they’re ready when the chocolate is hard to the touch.
Step 9: Cut and Serve
Once firm, use the parchment paper overhangs to lift the entire slab of No Bake Chocolate Oat Bars out of the pan and onto a cutting board. Using a sharp knife, cut into squares or bars. If the chocolate is very hard, you can let them sit at room temperature for 5-10 minutes to make cutting easier, or run your knife under hot water.
Tips for Success
- Press Firmly: Don’t skip pressing the oat mixture firmly into the pan. This is crucial for ensuring your No Bake Chocolate Oat Bars don’t crumble when you cut them. Use the bottom of a glass or measuring cup for extra pressure.
- Don’t Overheat Chocolate: When melting your chocolate, go low and slow. Overheated chocolate can become grainy or seize, making it difficult to spread.
- Line Your Pan: Always use parchment paper and leave an overhang. This makes removal and cleanup so much easier.
- Chill Adequately: Be patient and let the bars chill completely. This allows them to firm up properly so they can be cut neatly.
- Customize Your Sweetness: If you prefer a less sweet bar, you can slightly reduce the maple syrup, or use unsweetened peanut butter and dark chocolate. Conversely, for a sweeter treat, milk chocolate is a great choice.
How to Store No Bake Chocolate Oat Bars
Room Temperature:
These No Bake Chocolate Oat Bars can be stored in an airtight container at room temperature for up to 3 days, especially if your kitchen isn’t too warm. If they contain coconut oil and your room is quite warm, they might soften, so the fridge is often a better bet.
In the Refrigerator:
For longer storage and to keep them firm, storing them in the refrigerator is ideal. Place the cut bars in an airtight container, or on a plate tightly wrapped with plastic wrap. They will keep well for up to 1 week. They are delicious chilled!
Freezing Tips:
Yes, these No Bake Chocolate Oat Bars freeze beautifully!
- How to Freeze: Once cut, you can place the bars in a single layer on a baking sheet lined with parchment paper and freeze until solid (about 1-2 hours). Then, transfer the frozen bars to a freezer-safe bag or airtight container, separating layers with parchment paper to prevent sticking.
- Storage Time: They can be stored in the freezer for up to 3 months for best quality.
- Reheating/Thawing: Simply take out the desired number of bars and let them thaw at room temperature for about 15-30 minutes, or in the refrigerator for a couple of hours. They are great straight from the fridge too if you like them extra firm!
Frequently Asked Questions (FAQs)
Can I use quick oats instead of rolled oats?
You can, but rolled oats (old-fashioned oats) are recommended for the best chewy texture. Quick oats will result in a softer, slightly pastier bar.
Are these No Bake Chocolate Oat Bars gluten-free?
If you use certified gluten-free rolled oats and ensure your chocolate chips are also gluten-free, then yes, these bars can be made gluten-free. Oats are naturally gluten-free but can be contaminated during processing.
Can I make these nut-free?
Yes! Substitute the peanut butter with sunflower seed butter or tahini. Also, ensure your chocolate chips are nut-free and omit any optional nut add-ins.
My bars are crumbly, what went wrong?
This usually happens if the oat mixture wasn’t pressed firmly enough into the pan, or if the ratio of wet to dry ingredients was slightly off. Make sure to pack it down tightly next time! Using slightly more melted coconut oil or peanut butter can also help them bind better.
How do I get clean cuts on my bars?
For the cleanest cuts, ensure the bars are thoroughly chilled. Use a large, sharp knife. You can wipe the knife clean between cuts, or even run it under hot water, then dry it, before each cut for super smooth edges.
Can I reduce the amount of sugar?
Yes, you can slightly reduce the maple syrup. However, it does contribute to binding as well as sweetness. You could also use unsweetened peanut butter and dark chocolate chips (70% cacao or higher) to lower the overall sugar content of your No Bake Chocolate Oat Bars.
Conclusion
These No Bake Chocolate Oat Bars are truly a fantastic recipe to have in your repertoire. They’re incredibly simple to whip up, require minimal effort, and deliver maximum flavor and satisfaction. Whether you need a quick snack, an easy dessert for guests, or a healthier treat to pack in lunchboxes, these chewy, chocolatey, peanut buttery delights are a guaranteed winner. Give these No Bake Chocolate Oat Bars a try – you’ll be amazed at how quickly they become a family favorite!


