

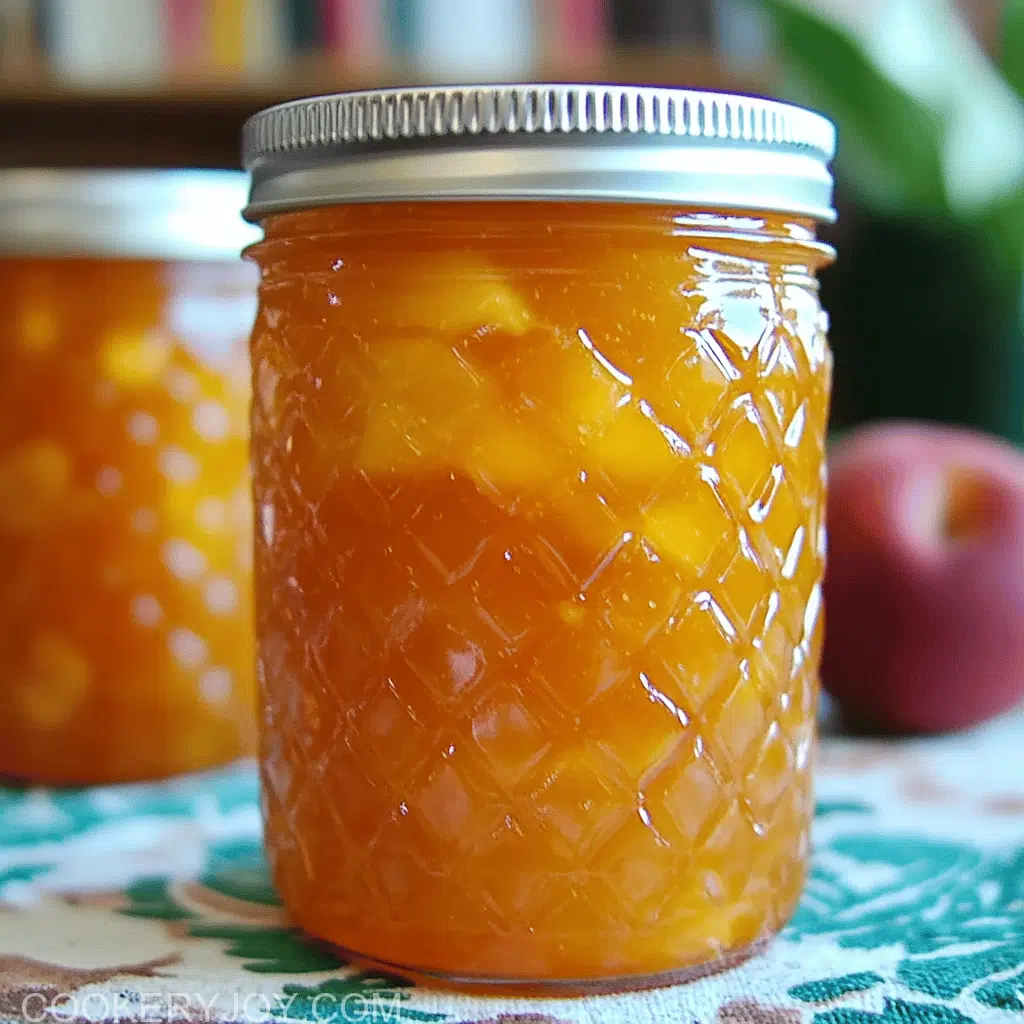
There’s a special kind of magic in preserving summer’s bounty. This Peach Jam With Beginning Canning recipe captures that sun-kissed sweetness, locking it into beautiful jars. It’s a simple process, yielding a vibrant, fruity spread that tastes like pure sunshine.
I love keeping a few jars on hand for impromptu brunch spreads. My family always raves about its fresh peach flavor. This jam truly brightens any morning. It brings a cozy warmth to your kitchen, too.
Why I Love This Recipe
This Peach Jam With Beginning Canning recipe is truly a gem in my kitchen. It’s so simple to follow. The process feels almost therapeutic. I just adore the fresh, bright peach flavor it delivers. It makes ordinary toast feel gourmet. Plus, sharing homemade jam with loved ones brings me so much joy. Friends and family always ask for more jars. It’s perfect for busy moms and professionals like you. You can whip up a batch on a weekend afternoon. Then you’ll enjoy a taste of summer, all year long.
Peach Jam With Beginning Canning Ingredients
Crafting this delightful peach jam feels like painting with nature’s palette. Each ingredient plays a vital role. They all come together for that perfect sweet-tart balance. It truly creates a flavor symphony in every spoonful.
- Peaches: These are the star of our show. Fresh, ripe peaches give us that amazing flavor. They provide the sweet, juicy base for your jam.
- Lemon Juice: A little lemon juice brightens our jam. It adds a lovely tartness. It also helps with the canning process. This ensures everything stays safe and delicious.
- Butter: Just a tiny bit of butter does wonders. It helps reduce foaming during cooking. This makes for a clearer, prettier jam.
- Powdered Pectin: This is our jam’s little helper. Pectin helps the jam set. It gives it that wonderful, spreadable texture.
- Granulated Sugar: Sugar sweetens our peaches, of course. It also acts as a natural preservative. This keeps our jam fresh.
Substitutions and Tips
Sometimes you need to get creative in the kitchen! If fresh peaches aren’t available, you could try high-quality frozen ones. Just make sure they are fully thawed. Drain any extra liquid before using them. For an extra hint of warmth, a pinch of cinnamon or a dash of vanilla extract can be lovely. You can also experiment with different types of sugar. Just know it might change the final texture a bit. Remember, exact measurements are always in the recipe card. That’s found at the very end of this post.
How to Make Peach Jam With Beginning Canning
Making homemade peach jam is such a rewarding experience. I promise you, it’s easier than it looks! Just follow these steps. You’ll make delicious Peach Jam With Beginning Canning in no time. Let’s get cooking!
Preparing Your Peaches and Jars
First, get your jars ready. Wash them well. I like to use pint or half-pint jars. Set your water bath canner on the stove. Fill it about halfway with water. Put a metal spoon in your freezer. This spoon will help us check the jam’s thickness later. Now, for the peaches! Blanch them quickly. Dip them into boiling water. Then plunge them into an ice bath. This makes peeling a breeze. Slip off those skins easily. Chop your peeled peaches into small chunks. As you chop, add a cup of sugar. This stops them from browning. A Vidalia Chop Wizard is a great tool here. It ensures uniform pieces. This makes for beautiful homemade jam.
Cooking the Peach Jam
Measure your pectin into one bowl. Put the rest of the sugar in another. Now, combine the chopped peaches. Add lemon juice and butter to a large pot. Place this pot over medium-high heat. Use an immersion blender here. Or a potato masher works too. Puree the peaches to your liking. If you like chunky jam, blend less. Turn up your water bath canner. Bring that water to a boil. Slowly add the pectin to the fruit mix. Stir constantly as you do this. Bring the fruit mixture to a full boil. Then, stir in the sugar. Return it to a boil. Boil for one minute. Remember to keep stirring constantly. The jam will look thin. Don’t worry, it’s ready! Get that frozen spoon. Dip it into the hot jam. Run your finger down the back. This shows you the final consistency. It’s a neat trick for perfect Peach Jam With Beginning Canning.
Canning Your Homemade Jam
Now, it’s time to can your jam. Use a wide canning funnel. Fill your hot jars. Leave about 1/4 to 1/2 inch of space. This is called headspace. Wipe the jar rims clean. Use a damp towel for this. A clean rim helps seals form. Place a lid and ring on each jar. Tighten them finger-tip tight. Gently place your filled jars into the canner. Make sure the water covers them by two inches. Bring the water back to a boil. Process the jars for 10 minutes. Adjust time for your altitude. Higher altitudes need more processing time. Check your specific altitude needs. After processing, carefully remove the jars. Place them on clean towels. Listen for the “pop”! That sound means they’ve sealed. Any jars that don’t seal? Pop them in the fridge. Or re-process them. You’ve just made wonderful Peach Jam With Beginning Canning!
How to Store Peach Jam With Beginning Canning
Once your Peach Jam With Beginning Canning is cool and sealed, storage is easy. Store your beautiful jars in a cool, dark place. A pantry or cupboard works great. Keep them out of direct sunlight. Sunlight can fade the color of your jam. It can also affect the flavor over time. Properly sealed jars of homemade jam can last for up to two years. That’s right, two years! Just imagine, summer’s sweetness, preserved for so long. Make sure the lids are still sealed tightly before opening. If a jar doesn’t seal, don’t worry. Just pop it in the refrigerator. Use that unsealed jam within a few weeks. It will still be absolutely delicious. This way, you enjoy perfect peach jam any time!
Tips for Success
- Choose ripe but firm peaches.
- Don’t skip the lemon juice.
- Use the butter trick to reduce foam.
- Measure pectin and sugar precisely.
- Stir constantly for best results.
- Process jars correctly for safety.
- Adjust canning time for your altitude.
- Always check for a proper seal.
Kitchen Tools You’ll Need
- Large Pot: A deep pot is essential for cooking the jam safely.
- Water Bath Canner: You’ll need this for safe canning. A very large stockpot with a rack works as a substitute.
- Canning Funnel: This helps fill jars without mess.
- Ladle: For scooping hot jam.
- Jar Lifter: Essential for safely moving hot jars.
- Immersion Blender: Great for crushing peaches. A potato masher also works well.
- Jars, Lids, and Rings: Make sure they are canning-specific.
Serving Suggestions
- Spread on warm, buttery toast.
- Dollop over creamy yogurt or oatmeal.
- Use as a filling for tarts or pastries.
- Serve with fresh scones and clotted cream.
- Pair with blue cheese on a cracker.
- Whisk into vinaigrette for a fruity dressing.
- Stir into sparkling water for a refreshing drink.
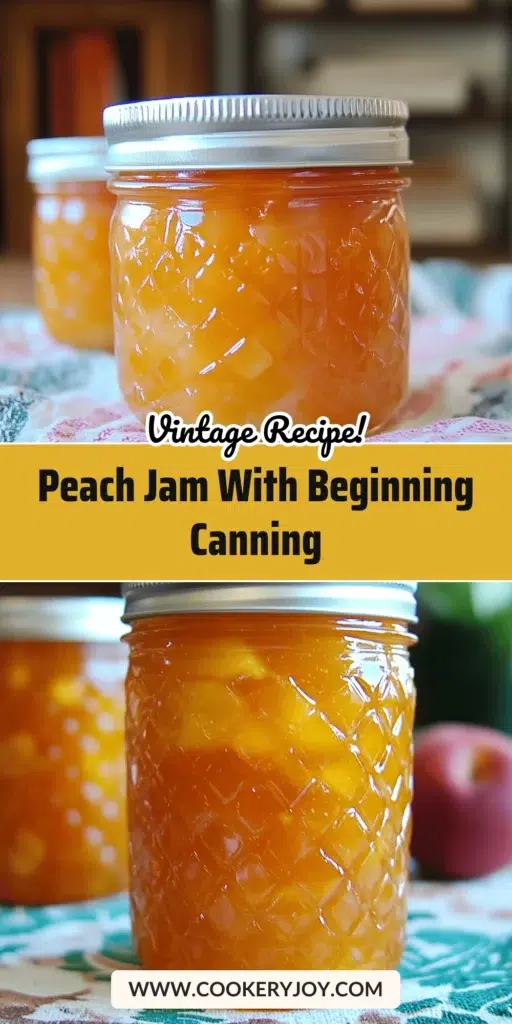
Peach Jam With Beginning Canning
- Prep Time: Not specified
- Cook Time: Not specified
- Total Time: Not specified
- Yield: Not specified
- Category: Preserves
- Method: Water Bath Canning
- Cuisine: Not specified
- Diet: Vegetarian
Description
A delightful recipe for homemade peach jam, perfect for canning and preserving the sweet taste of fresh peaches.
Ingredients
- 7 cups peaches, chopped (about 4 lbs)
- 5 Tablespoons lemon juice
- 1 Tablespoon butter
- 7 1/2 Tablespoons powdered pectin (Ball brand RealFruit classic pectin recommended)
- 5 cups granulated sugar
Instructions
- Prepare the Jars and Peaches: Wash the jars you are going to use. Fill your water bath canner about halfway with water and set aside. Put a metal kitchen spoon in the freezer to check consistency of jam later.
- Blanch peaches in boiling water for 30-45 seconds per batch. Plunge them into an ice water bath as each batch finishes. Slip skins from the fruit.
- Peel peaches and chop into medium-small chunks. As you chop, stir in 1 cup of the sugar to keep peaches from browning. (Tip: A Vidalia Chop Wizard tool can be used for uniform, small dice.)
- Make the Peach Jam: Measure pectin into one small bowl and the remaining 4 cups of sugar into another. Place peaches, lemon juice, and butter in a large pot on medium-high heat.
- Use an immersion blender or potato masher to puree jam until it reaches the consistency you desire. (If using a chop wizard, blending may not be necessary for chunky jam.)
- Turn water bath canner on high to bring to a boil.
- Slowly add pectin to fruit, stirring constantly.
- Bring fruit mixture to a full boil, then add the sugar. Stir until it returns to a boil, then boil for 1 minute, continuing to stir constantly. The jam will look thin even though it is ready.
- To check the consistency of the jam, dip the frozen spoon into the pot. Run your finger down the back of the spoon – the consistency on the cold spoon is the consistency of the jam as it sets.
- Can the Jam: Fill pint or half-pint jars with a wide canning funnel. Leave 1/4″ – 1/2″ headspace. Wipe the rim of each jar down with a clean, damp towel to make sure it is perfectly clean.
- Place a lid and ring on the jar.
- Place your jars in the water bath canner. Make sure there is enough hot water to cover the jars by 2″. Bring the water back up to a full boil and process for the recommended processing time.
- Pints and half-pints should be processed a minimum of 10 minutes in a water bath canner. Adjust for altitude: 1,001 – 3,000 feet add 5 minutes; 3,001 – 6,000 feet add 10 minutes; 6,001 – 8,000 feet add 15 minutes; 8,001 – 10,000 feet add 20 minutes.
- Remove jars to towels after processing and allow the lids to pop down – no poking!
- When the lids have sealed, the jam is ready to store. Any jars that don’t seal should be refrigerated or processed again.
Notes
- The Vidalia Chop Wizard tool can help achieve uniform, small dice for the peaches.
- The jam will appear thin when hot but will set as it cools.
- Ensure proper headspace and clean jar rims for a good seal.
- Adjust processing time based on your altitude.
- Canned jam can be stored out of direct sunlight for up to two years.
Frequently Asked Questions
Can I make this Peach Jam With Beginning Canning without a water bath canner?
While you can make the jam itself without a water bath canner, true “canning” for shelf stability needs one. Without a canner, your Peach Jam With Beginning Canning must be stored in the refrigerator. It will last about three weeks this way.
How do I know if my Peach Jam With Beginning Canning has set properly?
The best way to check is with the frozen spoon test. The consistency of the jam on the cold spoon, after you run your finger through it, shows how it will set. It should form a distinct line that doesn’t immediately flow back together.
Can I use frozen peaches for this Peach Jam With Beginning Canning recipe?
Yes, you absolutely can use frozen peaches! Just make sure to thaw them completely before starting. Drain off any excess liquid from the thawed peaches. This helps to maintain the right consistency for your Peach Jam With Beginning Canning.
What are the best peaches for making Peach Jam With Beginning Canning?
Freestone peaches are often preferred for their easy-to-remove pits. Look for ripe, fragrant, and slightly soft peaches. Varieties like Elberta, Reliance, or Red Haven work wonderfully. Their natural sweetness and juicy texture make the best Peach Jam With Beginning Canning.
Conclusion
Making this homemade Peach Jam With Beginning Canning is more than just cooking. It’s an act of love, for yourself and for those you feed. Each jar encapsulates the warm, sweet essence of summer. It’s truly a little piece of sunshine. This recipe shows you how simple preserving can be. You get to recapture those precious sunny days. Every spoonful brings a sweet reminder. You did this! You created something special. So, go on, embrace the joy of canning. Fill your pantry with these delicious, gleaming jars. Your family, and your taste buds, will thank you.


