
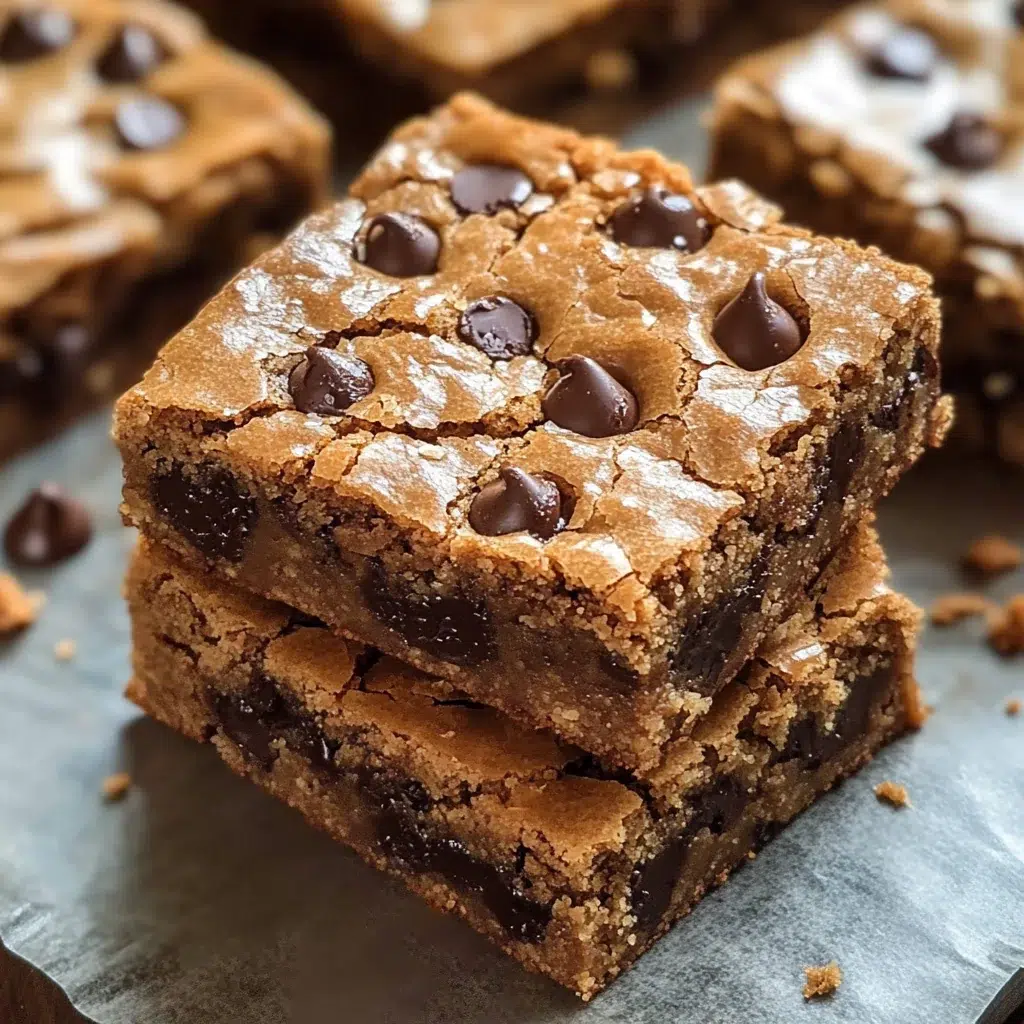
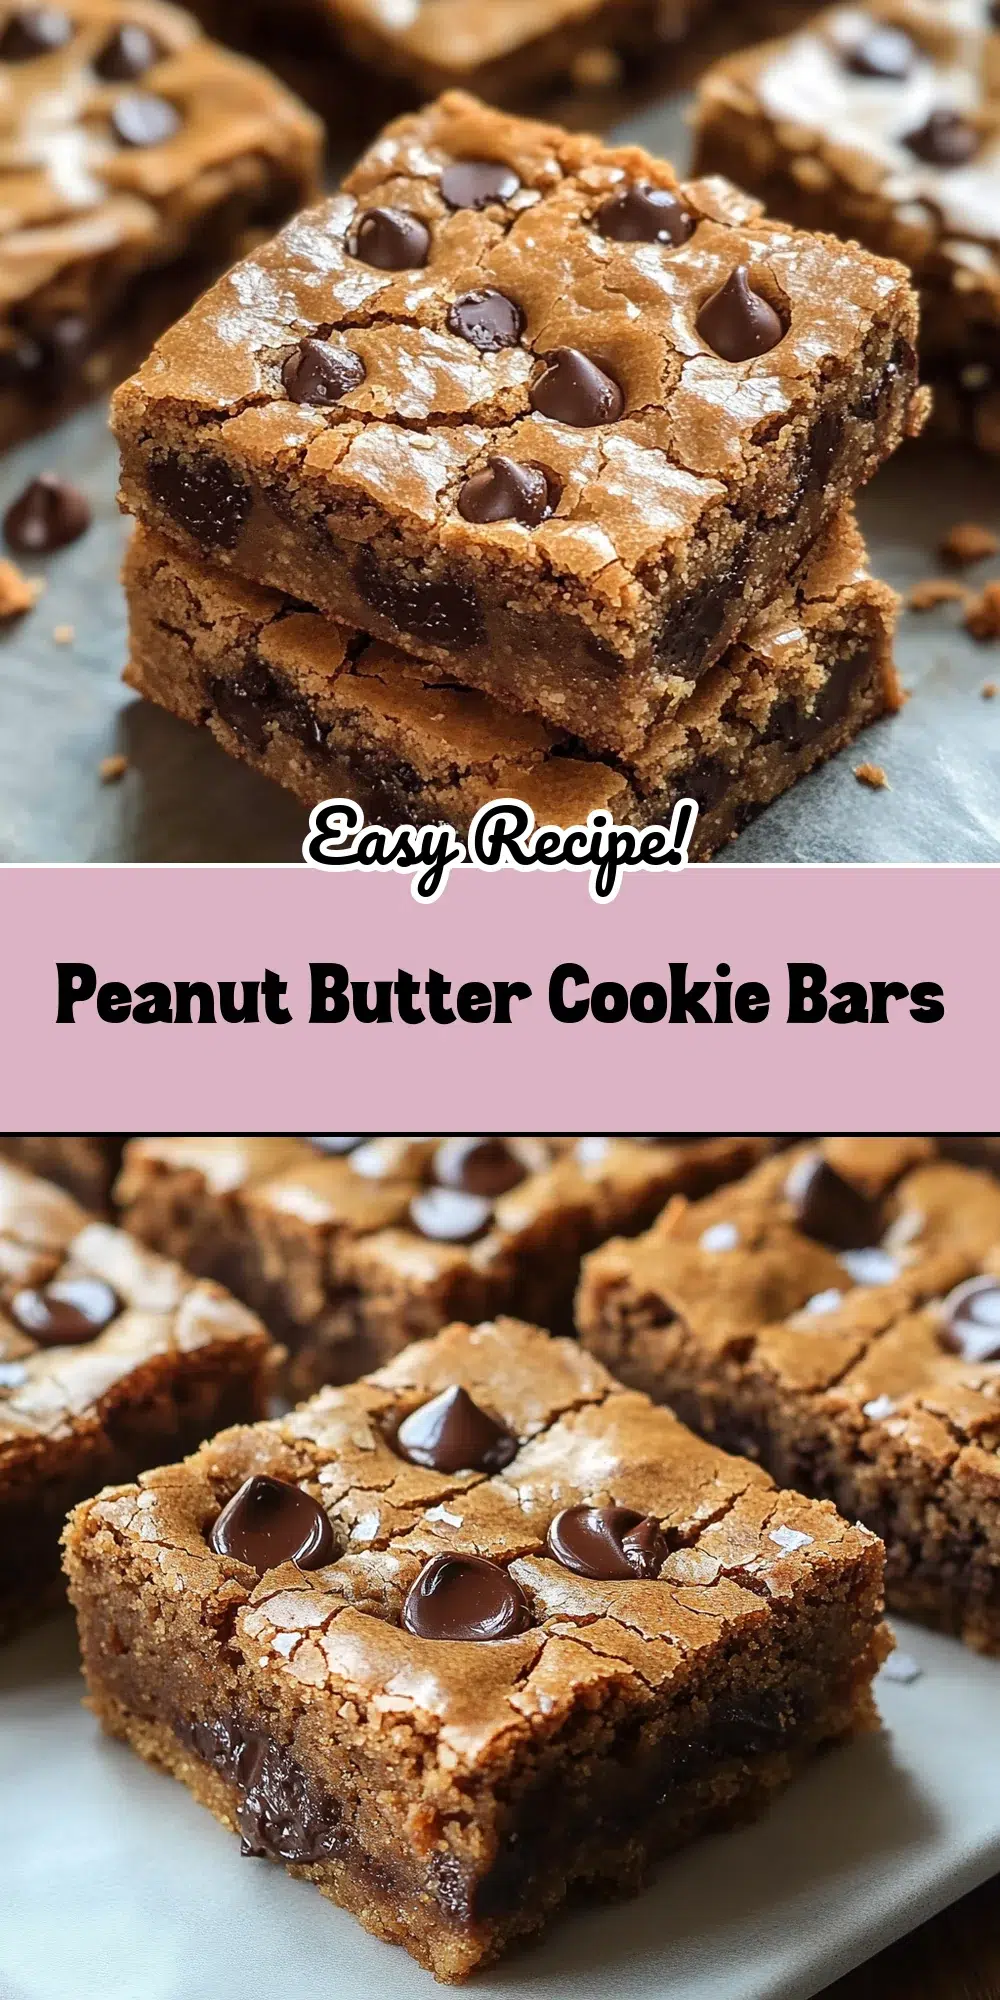
That unmistakable aroma of peanut butter baking in the oven—it’s a scent that instantly transports me back to childhood afternoons spent with my grandmother, her kitchen always a haven of sweet creations. These Peanut Butter Cookie Bars capture that same comforting magic, but in a wonderfully straightforward, bake-in-a-pan kind of way.
Imagine the classic, irresistible flavor of a peanut butter cookie, transformed into a soft, chewy bar that’s generously studded with chocolate chips. They’re the kind of treat that disappears quickly from a potluck table, brings smiles at a family gathering, and makes any ordinary Tuesday feel a little more special. Whether you’re a seasoned baker or just starting out, these Peanut Butter Cookie Bars are a guaranteed win.
Why You’ll Love This Recipe
These Peanut Butter Cookie Bars are a staple in my kitchen for so many reasons, and I know they’ll become a favorite in yours too!
- Incredibly Easy to Make: Forget rolling individual cookies. This recipe comes together quickly in one bowl, and then you just press the dough into a pan. It’s practically foolproof!
- Classic, Crowd-Pleasing Flavor: The combination of rich peanut butter and sweet chocolate is a timeless classic for a reason. These bars are loved by kids and adults alike.
- Perfectly Soft and Chewy Texture: If you love a cookie bar that’s tender in the middle with slightly crisp edges, this recipe delivers. Each bite is pure comfort.
- Versatile for Any Occasion: Pack them in lunchboxes, serve them at casual get-togethers, bring them to bake sales, or enjoy them as a simple weeknight dessert. These Peanut Butter Cookie Bars fit in anywhere.
- Customizable: While delicious as is, you can easily add your own spin with different mix-ins like other candies or nuts. (More on that later!)
This recipe is especially perfect for busy parents looking for a quick treat, beginner bakers wanting a confidence-boosting success, and anyone who simply adores that unbeatable peanut butter and chocolate pairing.
Ingredients for Peanut Butter Cookie Bars
The beauty of these Peanut Butter Cookie Bars lies in their simple, wholesome ingredients. You likely have many of these on hand already!
Core Ingredients
- 1/2 cup butter, softened: Using softened, not melted, butter is key for the right texture. I prefer unsalted butter so I can control the saltiness, but salted will work too; just consider slightly reducing any added salt if your peanut butter is also salted.
- 1/2 cup coconut sugar or brown sugar, packed: Both add moisture and a lovely depth of flavor. Coconut sugar offers a slightly more caramel-like note, while brown sugar (light or dark) gives that classic cookie taste.
- 2 tablespoons maple syrup: This adds a subtle sweetness and helps create that chewy texture we’re aiming for. Use pure maple syrup for the best flavor.
- 1/2 cup peanut butter: Creamy peanut butter works best for a smooth, consistent dough. See notes below for choosing the best type!
- 1 large egg: This binds the ingredients together. For best results, use a room temperature egg.
- 1 teaspoon vanilla extract: A good quality vanilla enhances all the other flavors.
- 1 cup self-rising flour: This is our shortcut! Self-rising flour already contains baking powder and salt, making the recipe even simpler. If you don’t have self-rising flour, see the substitutions below.
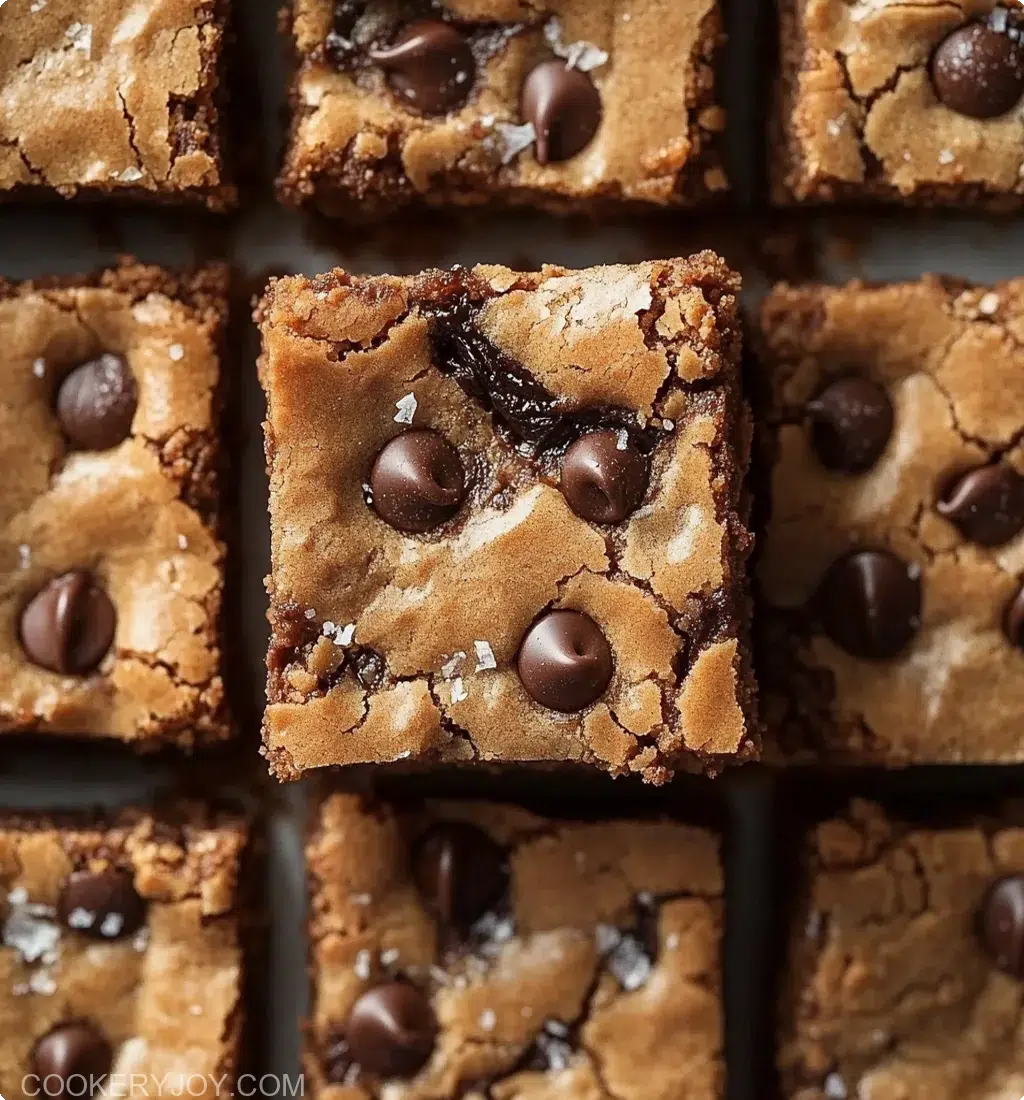
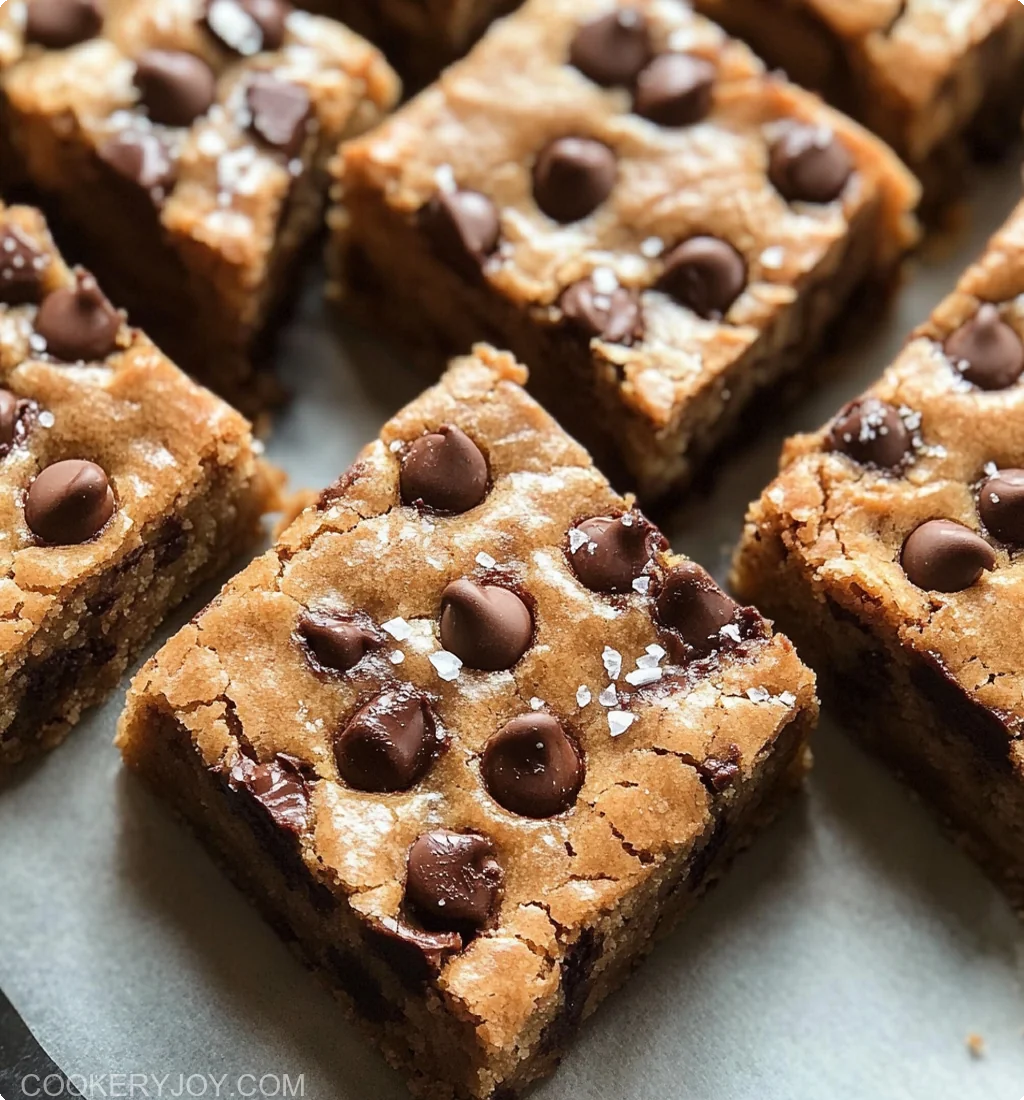
- 1/2 cup chocolate chips: Semi-sweet or milk chocolate chips are classic choices. Feel free to use chunks or mini chips too!
Substitutions and Tips
- Flour Power: If you don’t have self-rising flour, you can make your own! For every 1 cup of all-purpose flour, whisk in 1 ½ teaspoons of baking powder and ¼ teaspoon of salt.
- Sugar Swaps: Granulated sugar can be used in place of coconut or brown sugar, but the texture might be slightly less moist and chewy.
- Egg Alternatives: For a vegan version, a flax egg works beautifully. Mix 1 tablespoon of ground flaxseed with 3 tablespoons of water and let it sit for 5-10 minutes to thicken before adding to the recipe.
- Butter Options: Vegan butter sticks can be substituted for dairy butter. Ensure it’s a brand that performs well in baking.
- Nut Butter Variations: Feel free to experiment with other nut or seed butters! Almond butter, cashew butter, or even sunflower seed butter can be used for a different flavor profile. Keep in mind that natural, drippy nut butters might slightly alter the texture; you may need a touch more flour if the dough seems too wet.
- Mix-In Magic: This is where you can get creative!
- Candy Overload: Add 1/2 cup of Reese’s Pieces or M&Ms along with or instead of chocolate chips.
- Nutty Crunch: Mix in 1/4 to 1/2 cup of chopped peanuts, walnuts, or pecans.
- Extra Peanut Butter Punch: Swirl in a tablespoon or two of extra peanut butter on top before baking, or use peanut butter chips.
- Frosted Finish: Once cooled, top your Peanut Butter Cookie Bars with your favorite chocolate frosting for an extra decadent treat.
Best Type of Peanut Butter to Use
For these Peanut Butter Cookie Bars, I highly recommend using a standard commercial creamy peanut butter, like Jif or Skippy. These types of peanut butter contain stabilizers that help the bars maintain their structure and chewy texture. They provide that nostalgic, classic peanut butter cookie flavor that many of us crave.
Natural peanut butters, where the oil separates, can be used, but they may result in a slightly drier or crumblier bar. If you opt for natural peanut butter, ensure it’s extremely well-stirred to reincorporate all the oil. You might also find the dough a bit softer, and adding an extra tablespoon or two of flour could help achieve the right consistency. Avoid crunchy peanut butter unless you specifically want larger nut pieces throughout your bars, as it can sometimes make the bars feel a bit gritty.
Ultimately, the “best” type depends on your preference, but for the most reliable and classic Peanut Butter Cookie Bars, go with a no-stir creamy variety.
Kitchen Tools You’ll Need
You don’t need any fancy equipment to whip up a batch of these delightful Peanut Butter Cookie Bars. Here’s what I recommend:
Must-Have Tools
- 8×8 inch baking pan: This is the ideal size for perfectly thick and chewy bars. Glass or light-colored metal pans are best. If you use a dark metal pan, you might need to reduce the baking time slightly as they tend to conduct heat more intensely.
- Mixing Bowl: A large bowl is needed to combine all the ingredients without making a mess.
- Electric Mixer (Handheld or Stand): While you can mix this by hand, an electric mixer makes creaming the butter and sugar much easier and ensures a lighter texture.
- Measuring Cups and Spoons: Accurate measurements are key to successful baking.
- Spatula: A rubber or silicone spatula is essential for scraping down the sides of the bowl and spreading the dough evenly in the pan.
Nice-to-Have Extras
- Parchment Paper: Lining the baking pan with parchment paper, leaving an overhang on two sides, makes lifting the bars out of the pan a breeze and ensures they don’t stick. It also makes cleanup much easier!
- Whisk: Useful for combining dry ingredients if you’re making your own self-rising flour.
- Cooling Rack: Allowing the Peanut Butter Cookie Bars to cool on a wire rack prevents the bottoms from becoming soggy.
How to Make Peanut Butter Cookie Bars
Get ready to fill your kitchen with the irresistible aroma of baking Peanut Butter Cookie Bars! Follow these simple steps for a perfect batch every time.
Step 1: Prep Your Pan and Preheat
First things first, preheat your oven to 350°F (175°C). Grease and flour your 8×8 inch baking pan, or better yet, line it with parchment paper, allowing two sides to overhang like handles. This little trick makes removing the bars so much easier later on. Set the prepared pan aside.
Step 2: Cream Butter and Sugars
In a large mixing bowl, combine the softened butter, coconut sugar (or brown sugar), and maple syrup. Using an electric hand mixer or a stand mixer fitted with the paddle attachment, beat these together on medium speed for about 1-2 minutes. You’re looking for the mixture to become light and fluffy. Pro-chef tip: Don’t skip this creaming step! It incorporates air into the batter, which contributes to a tenderer crumb in your finished Peanut Butter Cookie Bars.
Step 3: Add Peanut Butter, Egg, and Vanilla
Add the peanut butter, large egg, and vanilla extract to the creamed butter mixture. Beat again on medium speed until everything is well combined and smooth. Scrape down the sides of the bowl with a spatula as needed to ensure all ingredients are incorporated evenly. The mixture should look creamy and smell wonderfully of peanut butter.
Step 4: Introduce the Flour
Gradually add the self-rising flour to the wet ingredients. Mix on low speed, or by hand with a spatula, until the flour is just combined. Be careful not to overmix at this stage. Overmixing can lead to tougher bars. Mix only until you no longer see streaks of flour. The dough will be thick and slightly sticky.
Step 5: Fold in Chocolate Chips
Gently fold in the chocolate chips using your spatula. If you’re adding any optional mix-ins like Reese’s Pieces or chopped nuts, now is the time to add them too. Distribute them evenly throughout the dough.
Step 6: Press Dough into Pan
Transfer the dough into your prepared baking pan. Because the dough is thick, you’ll need to press it down evenly. You can use your spatula, or lightly grease your fingertips or the back of a spoon to make this easier. Try to get the surface as level as possible for even baking. Sensory cue: The dough will feel soft and pliable, and you’ll see those tempting chocolate chips peeking through.
Step 7: Bake to Perfection
Bake in the preheated oven for 20-25 minutes. The Peanut Butter Cookie Bars are done when the edges are lightly golden brown and a toothpick inserted into the center comes out with a few moist crumbs attached, but not wet batter. Keep a close eye on them towards the end of the baking time, as oven temperatures can vary. You want them to be chewy, not dry.
Step 8: Cool Completely Before Slicing
Once baked, remove the pan from the oven and place it on a wire cooling rack. Let the Peanut Butter Cookie Bars cool completely in the pan before attempting to slice them. This is a crucial step! If you try to cut them while they’re still warm, they’ll likely fall apart. Patience is a virtue here! Once fully cooled (this can take 1-2 hours), use the parchment paper overhangs to lift the entire block of bars out of the pan and onto a cutting board. Slice into squares or rectangles, and enjoy your delicious homemade Peanut Butter Cookie Bars!
Tips for Success
To ensure your Peanut Butter Cookie Bars turn out perfectly every time, keep these simple tips in mind:
- Don’t Overbake: This is the number one culprit for dry cookie bars. Keep an eye on them and pull them out when the edges are just set and lightly golden, and a toothpick shows moist crumbs. They will continue to firm up as they cool.
- Use Softened, Not Melted, Butter: Softened butter creams properly with the sugar, creating air pockets that result in a tender texture. Melted butter will lead to denser, greasier bars. To quickly soften butter, cut it into small cubes and let it sit at room temperature for about 30 minutes.
- Measure Flour Correctly: Spoon the flour into your measuring cup and then level it off with a straight edge. Scooping directly from the bag can pack the flour, resulting in too much flour and dry bars. This is especially important for achieving the perfect texture in your Peanut Butter Cookie Bars.
- Cool Completely: I can’t stress this enough! Warm Peanut Butter Cookie Bars are fragile. Letting them cool completely in the pan allows them to set properly, making them easy to slice and ensuring that desirable chewy texture.
- Embrace the Parchment Paper: Lining your pan with parchment paper is a game-changer. It prevents sticking, makes for easy removal, and simplifies cleanup, allowing you to enjoy your Peanut Butter Cookie Bars with less fuss.
How to Store Peanut Butter Cookie Bars
These Peanut Butter Cookie Bars are so delicious, they might not last long! But if you do have leftovers, here’s how to keep them fresh:
- Room Temperature: Store the completely cooled Peanut Butter Cookie Bars in an airtight container at room temperature. They will stay fresh and chewy for up to 3-4 days. Placing a slice of bread in the container can help maintain their softness.
- In the Refrigerator: If you prefer your bars chilled or if your kitchen is very warm, you can store them in an airtight container in the refrigerator for up to a week. They will be firmer when cold, so you might want to let them sit at room temperature for a few minutes before enjoying.
- Freezing Tips: Yes, these Peanut Butter Cookie Bars freeze beautifully!
- Freezability: They are very freezer-friendly.
- Storage Suggestions: Once completely cooled and sliced, wrap individual bars in plastic wrap, then place them in a freezer-safe ziplock bag or airtight container. This prevents freezer burn and makes it easy to grab one or two at a time. They can be frozen for up to 2-3 months.
- Reheating/Thawing Instructions: Thaw frozen Peanut Butter Cookie Bars at room temperature for about an hour, or in the refrigerator overnight. If you like them slightly warm, you can microwave a single bar for about 10-15 seconds.
Frequently Asked Questions (FAQs)
Here are answers to some common questions you might have about making these tasty Peanut Butter Cookie Bars:
Can I make these Peanut Butter Cookie Bars gluten-free?
Absolutely! You can substitute the self-rising flour with a good quality gluten-free all-purpose baking blend that contains xanthan gum. If your blend doesn’t include xanthan gum, you may need to add about 1/2 teaspoon. Ensure your other ingredients, like chocolate chips, are also certified gluten-free.
What if I don’t have self-rising flour?
No problem! You can easily make your own. For each cup of all-purpose flour, whisk in 1 ½ teaspoons of baking powder and ¼ teaspoon of salt. For this Peanut Butter Cookie Bars recipe, you’d use 1 cup of this homemade mix.
Can I use natural peanut butter in these bars?
You can, but for the best texture, a standard commercial creamy peanut butter (like Jif or Skippy) is recommended. If using natural peanut butter, make sure it’s very well stirred. The bars might be a tad crumblier or oilier, and you might consider adding an extra tablespoon of flour if the dough seems too loose.
How do I know when the Peanut Butter Cookie Bars are perfectly baked?
Look for lightly golden brown edges. A toothpick inserted into the center should come out with a few moist crumbs attached, but no wet batter. It’s better to slightly underbake than overbake these Peanut Butter Cookie Bars to keep them chewy.
Can I double this Peanut Butter Cookie Bars recipe?
Yes, you can easily double the recipe and bake it in a 9×13 inch pan. You may need to adjust the baking time slightly, likely adding a few extra minutes. Start checking for doneness around the 25-minute mark.
What are some fun variations for these Peanut Butter Cookie Bars?
Get creative! Try adding 1/2 cup of Reese’s Pieces, M&Ms, chopped peanuts, or even peanut butter chips. A swirl of extra peanut butter on top before baking, or a layer of chocolate frosting after they’ve cooled, also makes these Peanut Butter Cookie Bars extra special.
Why did my Peanut Butter Cookie Bars turn out dry or crumbly?
The most common reasons are overbaking or using too much flour. Make sure to measure your flour correctly (spoon and level, don’t scoop) and pull the bars from the oven as soon as they are just set. Using melted butter instead of softened butter can also sometimes affect the texture of Peanut Butter Cookie Bars.
Conclusion
When a craving for something sweet, comforting, and utterly satisfying hits, these Peanut Butter Cookie Bars are the answer. They bring together simple ingredients in a way that feels both nostalgic and effortlessly delicious. With their perfectly chewy texture, rich peanut butter flavor, and generous pockets of chocolate, these bars are a go-to treat that never disappoints. Whether you’re baking for family, friends, or just for yourself, this Peanut Butter Cookie Bars recipe is sure to become a cherished favorite.


