
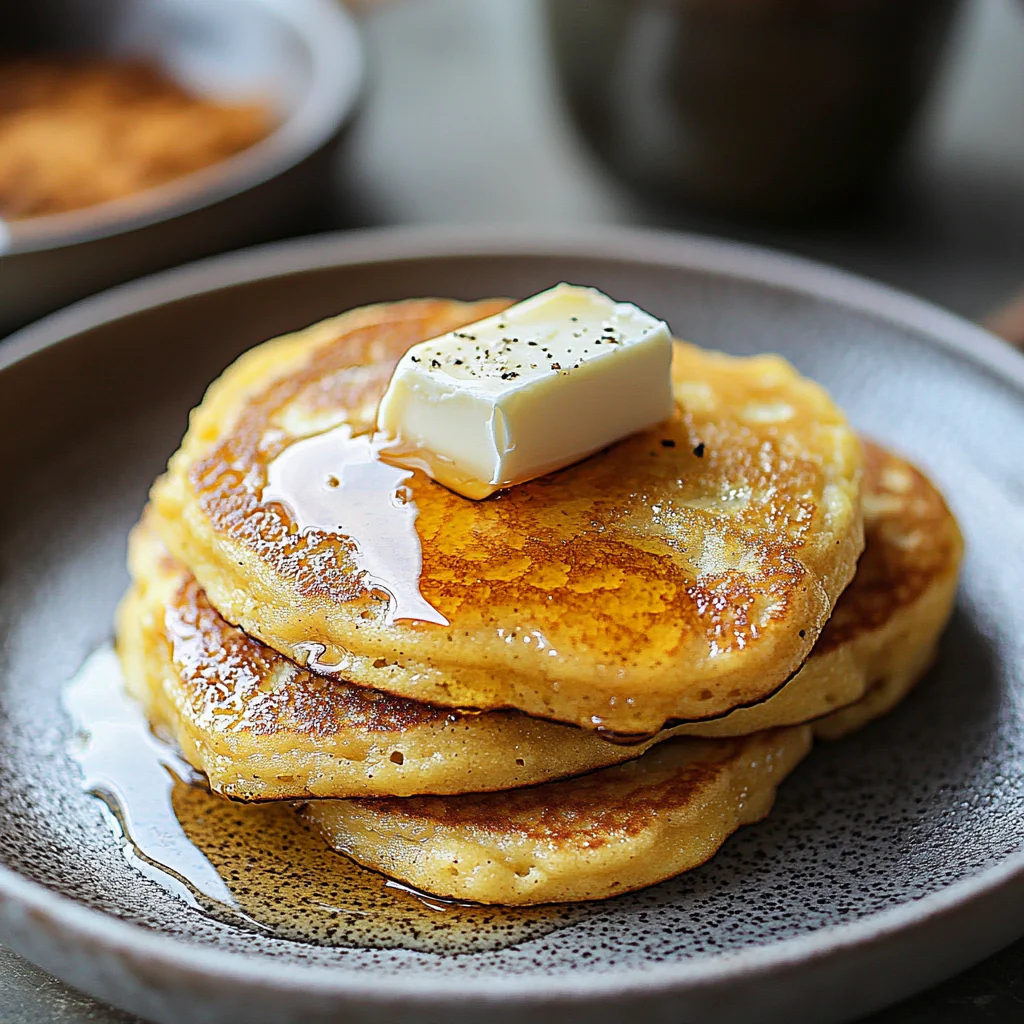
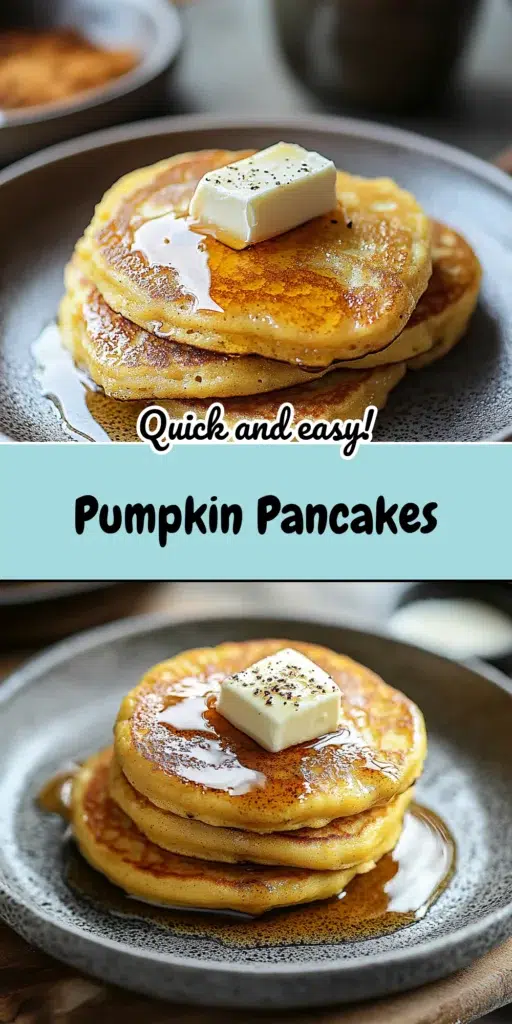
The first whisper of a chill in the air, the scent of fallen leaves, and suddenly, my kitchen transforms. It’s a calling, really, for all things warm, spiced, and comforting, and nothing answers that call quite like a stack of golden, tender Pumpkin Pancakes, especially when drizzled with a homemade cinnamon syrup that’s pure magic.
These aren’t just any pancakes; they are an embodiment of autumn’s best. Perfect for a slow weekend morning when the family gathers, a special holiday breakfast, or even a cozy “breakfast-for-dinner” treat, these Pumpkin Pancakes are a beloved tradition in my home. The warm spices fill the air, promising a delicious start (or end) to the day, making every bite a moment to savor.
Why You’ll Love This Recipe
There are so many reasons to adore these Pumpkin Pancakes, but here are a few that make them a constant request in my household:
- Incredibly Flavorful: The combination of pumpkin puree and classic fall spices like cinnamon and allspice creates a warm, inviting flavor profile that’s simply irresistible. These Pumpkin Pancakes are a taste of autumn in every bite.
- Perfectly Fluffy Texture: Thanks to a careful balance of leavening agents and the magic touch of vinegar reacting with baking soda, these pancakes achieve a light, airy, and wonderfully fluffy texture. No dense or heavy pancakes here!
- Dreamy Homemade Cinnamon Syrup: While the Pumpkin Pancakes are stars on their own, the homemade cinnamon syrup elevates them to a whole new level of deliciousness. It’s buttery, sweet, warmly spiced, and has a delightful, slightly foamy texture that’s utterly addictive.
- Surprisingly Easy to Make: Despite their impressive taste and texture, both the Pumpkin Pancakes and the cinnamon syrup are straightforward to prepare. Even if you’re not a seasoned baker, you can achieve fantastic results with this simple recipe.
- A True Crowd-Pleaser: Who doesn’t love a warm stack of pancakes? These Pumpkin Pancakes are a hit with everyone, from picky toddlers to discerning adults. They’re perfect for family breakfasts, holiday brunches, or whenever you crave a comforting treat.
Ingredients for Pumpkin Pancakes with Cinnamon Syrup
Here’s what you’ll need to gather to create this delightful fall breakfast. Using good quality ingredients will make your Pumpkin Pancakes shine!
Core Ingredients
For the Pumpkin Pancakes:
- 1 cup all-purpose flour: The structural backbone of our pancakes.
- 1½ Tbsp light brown sugar: Adds a hint of molasses flavor and moisture, complementing the pumpkin beautifully.
- 1 tsp baking powder: Our primary leavening agent for lift and fluffiness.
- ½ tsp baking soda: Works in tandem with the vinegar for an extra boost in rise and tender texture.
- ½ tsp ground allspice: Adds that characteristic warm, complex spice note found in many pumpkin treats.
- ½ tsp ground cinnamon: An essential fall spice that pairs perfectly with pumpkin.
- ¼ tsp salt: Balances the sweetness and enhances the overall flavor.
- ¾ cup milk: Provides moisture and richness. Whole milk is great, but any milk will work.
- ½ cup canned pumpkin: Use 100% pure pumpkin puree, not pumpkin pie filling. This is key for true pumpkin flavor.
- 1 large egg: Binds the ingredients together and adds richness.
- 1 Tbsp oil: Contributes to a tender crumb. Vegetable, canola, or melted coconut oil all work.
- 1 Tbsp vinegar: White vinegar or apple cider vinegar work. This reacts with the baking soda for exceptionally fluffy Pumpkin Pancakes.
For the Cinnamon Syrup:
- ½ cup butter (1 stick): Provides richness and a beautiful, silky texture.
- 1 cup granulated sugar: For sweetness and a classic syrup consistency.
- 1 cup buttermilk: Adds a wonderful tang and creaminess that balances the sweetness.
- 1 Tbsp vanilla extract: Enhances all the warm flavors.
- ½ tsp ground cinnamon: Because more cinnamon is always a good idea with this syrup!
- ½ tsp baking soda: This is the magic ingredient that makes the syrup foamy and light.
Substitutions and Tips
- Flour: For a heartier pancake, you can substitute up to half of the all-purpose flour with whole wheat flour. For gluten-free Pumpkin Pancakes, use a good quality 1:1 gluten-free baking blend.
- Sugar (Pancakes): Coconut sugar or even maple syrup (reduce milk slightly if using maple syrup) can be used in place of brown sugar in the pancake batter.
- Milk (Pancakes): Any dairy-free milk like almond, soy, or oat milk will work beautifully as a substitute.
- Pumpkin Puree: If you’re feeling adventurous, homemade pumpkin puree is great! Cooked and pureed butternut squash is also a good alternative. Chef’s Insight: Always use 100% pure pumpkin puree, not pumpkin pie filling, as pie filling is already sweetened and spiced, which will alter the flavor of your Pumpkin Pancakes.
- Oil (Pancakes): Melted butter can be used instead of oil for a richer flavor.
- Vinegar (Pancakes): Lemon juice is a good substitute if you don’t have vinegar.
- Buttermilk (Syrup): Don’t have buttermilk? Make your own by adding 1 tablespoon of white vinegar or lemon juice to 1 cup of regular milk. Let it sit for 5-10 minutes until it slightly curdles.
- Spices: Feel free to adjust the spices to your liking. A pinch of nutmeg or ground ginger would also be lovely in the Pumpkin Pancakes.
Best Type of Pumpkin to Use
For the most delicious and consistently textured Pumpkin Pancakes, the type of pumpkin you use matters.
Canned Pumpkin Puree (100% Pure Pumpkin): This is my top recommendation for ease, consistency, and flavor. Look for cans labeled “100% pure pumpkin” or “pumpkin puree,” not “pumpkin pie filling.” Brands can vary slightly in color and moisture content, but most reputable brands will give you excellent results. It’s smooth, readily available, and saves you the considerable effort of roasting and pureeing a fresh pumpkin. This convenience means you can whip up a batch of Pumpkin Pancakes whenever the craving strikes!
Homemade Pumpkin Puree: If you prefer to make your own, choose smaller “sugar pumpkins” or “pie pumpkins.” These varieties have sweeter, less stringy flesh than the large carving pumpkins. To make puree, halve the pumpkin, scoop out the seeds, and roast it cut-side down until tender. Once cooled, scoop out the flesh and blend until smooth. A crucial tip for homemade puree: if it seems watery, strain it through a cheesecloth-lined sieve for a couple of hours or gently cook it down in a saucepan to evaporate some excess moisture. Too much water can make your Pumpkin Pancakes a bit gummy.
What to Avoid: Steer clear of “pumpkin pie filling” or “pumpkin pie mix.” This product is pre-sweetened and pre-spiced, designed to be poured directly into a pie crust. Using it in this recipe would make your Pumpkin Pancakes overly sweet and throw off the carefully balanced spice blend. We want to control the flavors ourselves!
Kitchen Tools You’ll Need
Having the right tools makes the process of making these Pumpkin Pancakes smooth and enjoyable.
Must-Have Tools
- Large Mixing Bowl: For combining the pancake batter.
- Medium Mixing Bowl: For whisking the wet ingredients separately.
- Whisk: Essential for thoroughly combining both wet and dry ingredients and ensuring a smooth (but still slightly lumpy!) batter.
- Measuring Cups and Spoons: Accurate measurements are key in baking, even for pancakes.
- Griddle or Large Non-Stick Skillet: A griddle allows you to cook multiple Pumpkin Pancakes at once. A good quality non-stick skillet works perfectly too.
- Spatula: A thin, flexible spatula is best for flipping the pancakes.
- Small Saucepan: For making the delicious cinnamon syrup. Choose one with a bit of extra room, as the syrup will foam up.
Nice-to-Have Extras
- Electric Griddle: If you make pancakes often or for a crowd, an electric griddle provides consistent heat and a large cooking surface.
- ¼ Cup Measuring Scoop or Ladle: This helps create uniformly sized Pumpkin Pancakes, ensuring they cook evenly.
- Wire Rack: If you’re not serving the Pumpkin Pancakes immediately, placing them on a wire rack prevents them from getting soggy on the bottom.
- Silicone Basting Brush: Useful for lightly greasing the griddle or skillet between batches.
How to Make Pumpkin Pancakes with Cinnamon Syrup
Let’s walk through making these delightful Pumpkin Pancakes step-by-step. I like to start with the syrup so it can be ready and waiting.
First, Prepare the Cinnamon Syrup:
- Melt and Combine: In your small saucepan, melt the ½ cup of butter over medium heat. Once melted, stir in the 1 cup of granulated sugar and 1 cup of buttermilk.
- Gentle Boil: Bring the mixture to a gentle boil, stirring occasionally. Let it boil gently for about 1 minute.
- Add Flavor & Fizz: Remove the saucepan from the heat. Carefully stir in the 1 tablespoon of vanilla extract, ½ teaspoon of ground cinnamon, and ½ teaspoon of baking soda. Be prepared! The baking soda will react with the warm, acidic mixture and cause it to foam up significantly. This is normal and creates a wonderfully light texture in the syrup. Stir gently until combined, then set aside to cool slightly and thicken while you make the Pumpkin Pancakes. Give it a stir before serving.
Now, Let’s Make the Pumpkin Pancakes:
- Combine Dry Ingredients: In your large mixing bowl, whisk together the 1 cup all-purpose flour, 1½ tablespoons light brown sugar, 1 teaspoon baking powder, ½ teaspoon baking soda, ½ teaspoon ground allspice, ½ teaspoon ground cinnamon, and ¼ teaspoon salt. Whisking helps to evenly distribute the leavening agents and spices, ensuring every Pumpkin Pancake is perfect.
- Combine Wet Ingredients: In the medium mixing bowl, whisk together the ¾ cup milk, ½ cup canned pumpkin puree, 1 large egg, 1 tablespoon oil, and 1 tablespoon vinegar until well combined and smooth. The mixture should be a lovely orange hue.
- Marry Wet and Dry: Pour the wet pumpkin mixture into the bowl of dry ingredients. Using your whisk or a spatula, mix until just combined. It’s very important not to overmix! A few small lumps in the batter are perfectly fine and actually desirable for tender Pumpkin Pancakes. Overmixing develops the gluten in the flour, which can lead to tough pancakes.
- Rest the Batter (Optional but Recommended): Cover the bowl and let the batter rest for 5-10 minutes. This allows the flour to hydrate fully and the gluten to relax, resulting in even fluffier Pumpkin Pancakes.
- Cook the Pancakes: Heat your griddle or large non-stick skillet over medium heat. You’ll know it’s ready when a drop of water sizzles and evaporates quickly. Lightly grease the heated surface with a little oil or butter. Pour or ladle approximately ¼ cup of batter per pancake onto the hot griddle, leaving some space between them for easy flipping.
- Flip and Finish: Cook for about 2-3 minutes on the first side, or until bubbles start to appear on the surface and the edges look set and slightly dry. The underside should be beautifully golden brown. Gently flip the Pumpkin Pancakes with your spatula and cook for another 1-2 minutes on the other side, until golden brown and cooked through.
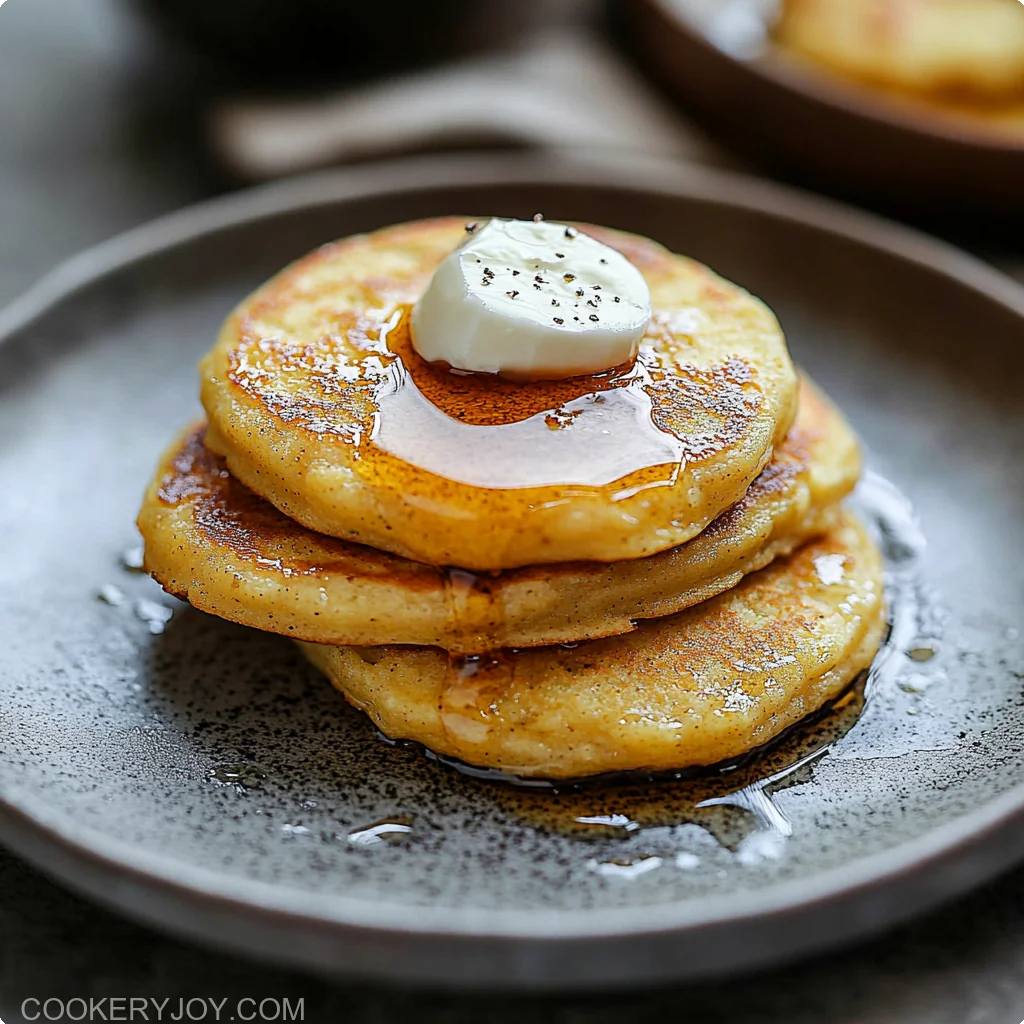
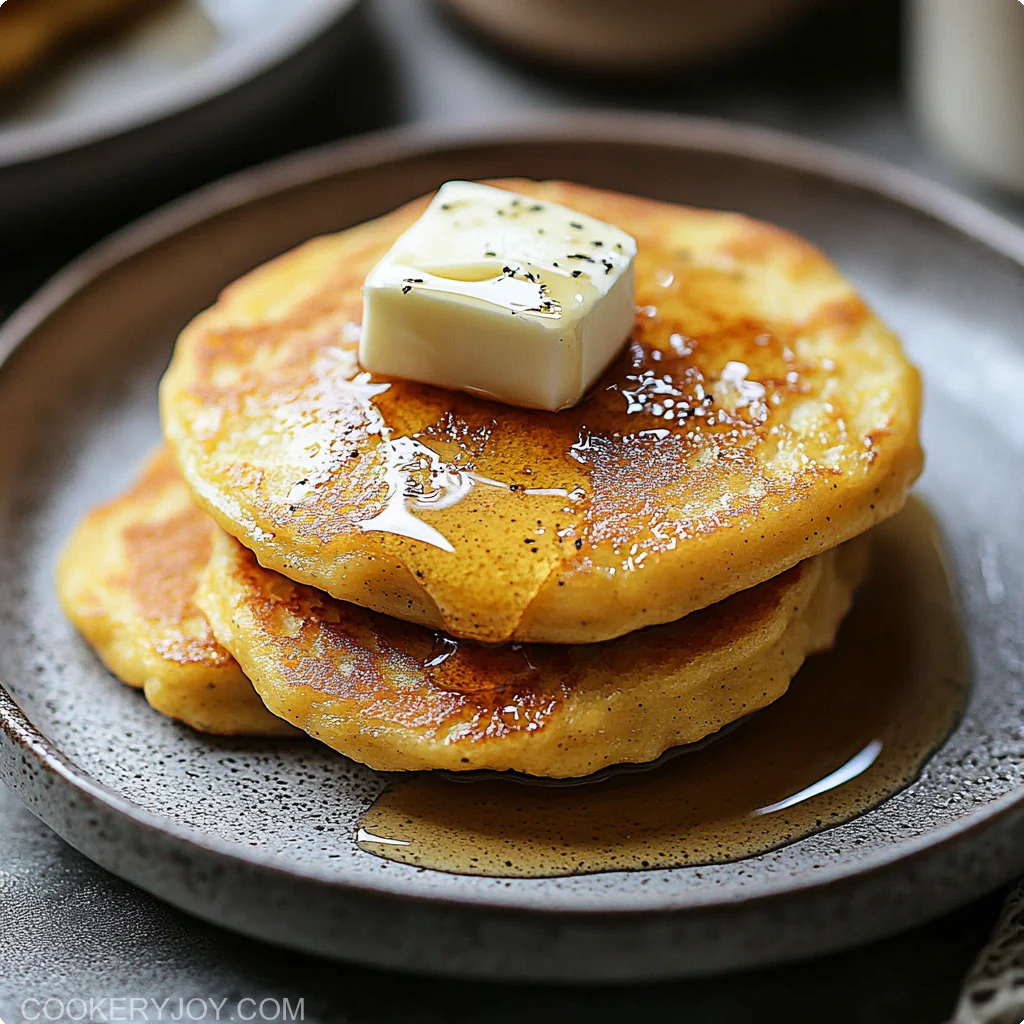
- Serve and Enjoy: Transfer the cooked Pumpkin Pancakes to a plate. You can keep them warm in a low oven (around 200°F or 90°C) on an oven-safe plate while you cook the remaining batter, if desired. Serve your magnificent stack of warm Pumpkin Pancakes generously drizzled with the homemade cinnamon syrup. A pat of butter on top is never a bad idea either!
Tips for Success
Achieving perfect Pumpkin Pancakes every time is easy with these simple tips:
- Do Not Overmix the Batter: This is the golden rule for tender, fluffy pancakes, including these Pumpkin Pancakes. Mix only until the wet and dry ingredients are just combined. A few lumps are your friends!
- Use 100% Pure Pumpkin Puree: Ensure you’re using pure pumpkin puree and not pumpkin pie filling. Pie filling is pre-sweetened and spiced, which will make your Pumpkin Pancakes too sweet and oddly flavored.
- Achieve the Right Griddle Temperature: Medium heat is generally best. If the griddle is too hot, the Pumpkin Pancakes will brown too quickly on the outside before cooking through on the inside. If it’s too cool, they can become flat and tough. Test with a small amount of batter first.
- Syrup Will Foam – Use an Adequately Sized Pan: When you add the baking soda to the cinnamon syrup, it will foam up quite a bit. Make sure your saucepan has enough headspace to prevent it from boiling over. This reaction is what gives the syrup its unique, light texture.
- Make the Syrup First: The cinnamon syrup can be made ahead or while the pancake batter is resting. It holds well and can be gently rewarmed if needed. Having it ready means you can serve your fresh, hot Pumpkin Pancakes immediately with their perfect accompaniment.
- Don’t Press Down on Pancakes While Cooking: Resist the urge to press down on your Pumpkin Pancakes with the spatula as they cook. This deflates them and makes them dense rather than fluffy.
How to Store Pumpkin Pancakes with Cinnamon Syrup
Leftover Pumpkin Pancakes (if you have any!) and cinnamon syrup store wonderfully.
Room Temperature
- Pancakes: Cooked Pumpkin Pancakes can be left at room temperature, loosely covered, for up to 2 hours. After that, it’s best to refrigerate them.
- Cinnamon Syrup: The syrup can be stored at room temperature in an airtight container for up to 24 hours. For longer storage, refrigeration is recommended.
In the Refrigerator
- Pancakes: Cool the Pumpkin Pancakes completely, then store them in an airtight container or a resealable plastic bag in the refrigerator for up to 3-4 days. You can place parchment paper between layers to prevent sticking. To reheat, you can use a microwave (they’ll be softest), a toaster or toaster oven (for a slightly crisper edge), or a low oven.
- Cinnamon Syrup: Store the cooled cinnamon syrup in an airtight container (a glass jar works well) in the refrigerator. It will keep well for up to 2 weeks. The syrup will thicken considerably when chilled. Reheat it gently on the stovetop over low heat or in the microwave in short intervals, stirring until warmed through and pourable.
Freezing Tips
- Pumpkin Pancakes: These Pumpkin Pancakes freeze exceptionally well! Cool them completely on a wire rack. Once cool, stack them with squares of parchment paper or wax paper between each pancake to prevent them from sticking together. Place the stack in a freezer-safe airtight container or a heavy-duty freezer bag. They can be frozen for up to 2-3 months.
- Reheating Frozen Pumpkin Pancakes: You can reheat them directly from frozen. Pop them in a toaster or toaster oven until heated through and slightly crisp. Alternatively, arrange them in a single layer on a baking sheet and warm in a 350°F (175°C) oven for about 5-10 minutes, or microwave them for a softer texture.
- Cinnamon Syrup: The cinnamon syrup can also be frozen. Pour the cooled syrup into a freezer-safe airtight container, leaving a little headspace for expansion. It can be frozen for up to 3 months. Thaw it overnight in the refrigerator, then rewarm gently on the stovetop or in the microwave before serving with your delicious Pumpkin Pancakes.
FAQs
Here are some common questions about making these Pumpkin Pancakes:
Can I use fresh pumpkin instead of canned for these pumpkin pancakes?
Yes, you can certainly use homemade pumpkin puree for your Pumpkin Pancakes. Ensure it’s thick and smooth, with a consistency similar to canned puree. If your homemade puree is watery, strain it or cook it down a bit to remove excess moisture for the best pancake texture.
How do I make my pumpkin pancakes fluffier?
For the fluffiest Pumpkin Pancakes, avoid overmixing the batter – a few lumps are good! Make sure your baking powder and baking soda are fresh (check expiration dates). Letting the batter rest for 5-10 minutes before cooking also helps. The combination of baking soda and vinegar in this recipe is specifically designed to give these Pumpkin Pancakes an extra lift.
Can I make these pumpkin pancakes gluten-free?
Absolutely! To make gluten-free Pumpkin Pancakes, substitute the all-purpose flour with a good quality 1:1 gluten-free baking blend that contains xanthan gum. The texture might be slightly different, but they will still be delicious.
What if I don’t have buttermilk for the cinnamon syrup?
No problem! You can easily make a buttermilk substitute. For 1 cup of buttermilk, add 1 tablespoon of white vinegar or fresh lemon juice to 1 cup of regular milk. Let it stand for 5-10 minutes at room temperature until it looks slightly curdled, then use it as directed in the syrup recipe.
Can I prepare the pumpkin pancake batter ahead of time?
It’s generally best to cook Pumpkin Pancakes shortly after the batter is mixed. The leavening agents (baking powder and baking soda) start working as soon as they are moistened. If you need to prep ahead, you can mix the dry ingredients together in one bowl and the wet ingredients (except the vinegar, add that last) in another. Cover and refrigerate them separately for up to a day. When ready to cook, add the vinegar to the wet ingredients, then combine wet and dry, mix lightly, and cook your Pumpkin Pancakes.
Why did my cinnamon syrup curdle or separate?
This can occasionally happen with butter and sugar-based syrups if they are boiled too vigorously, or if there’s a sudden, drastic temperature change (like adding cold ingredients to a very hot mixture). To prevent this, use medium-low heat, stir gently and constantly while the sugar dissolves, and bring it to a very gentle boil. If it does separate a bit after cooling, gently reheating and whisking vigorously can sometimes help bring it back together.
Conclusion
There’s a special kind of magic that happens when you combine the warm, earthy flavors of pumpkin with familiar, comforting spices. These Pumpkin Pancakes, crowned with their luscious homemade cinnamon syrup, are more than just a breakfast; they are an experience. They’re a celebration of fall, a cozy hug on a chilly morning, and a delicious reason to gather around the table.
Easy enough for a weekday treat yet special enough for a holiday brunch, this recipe for Pumpkin Pancakes is one you’ll turn to again and again. The fluffy texture, the delightful spice, and that unforgettable syrup make these Pumpkin Pancakes a true standout. I hope you and your loved ones enjoy every single bite!
Print
Pumpkin Pancakes with Cinnamon Syrup
- Prep Time: 10 minutes
- Cook Time: 15 minutes
- Total Time: 25 minutes
- Yield: 8 pancakes
- Category: Breakfast
- Method: Stovetop
- Cuisine: American
- Diet: Vegetarian
Description
These pumpkin pancakes are soft, spiced, and perfect for cozy fall mornings—especially when topped with homemade cinnamon syrup.
Ingredients
- 1 cup all-purpose flour
- 1½ Tbsp light brown sugar
- 1 tsp baking powder
- ½ tsp baking soda
- ½ tsp ground allspice
- ½ tsp ground cinnamon
- ¼ tsp salt
- ¾ cup milk
- ½ cup canned pumpkin
- 1 large egg
- 1 Tbsp oil
- 1 Tbsp vinegar
- ½ cup butter
- 1 cup granulated sugar
- 1 cup buttermilk
- 1 Tbsp vanilla extract
- ½ tsp ground cinnamon
- ½ tsp baking soda
Instructions
- 1. Whisk flour, sugar, baking powder, soda, spices, and salt in a bowl.
- 2. In another bowl, whisk milk, pumpkin, egg, oil, and vinegar until smooth.
- 3. Combine wet and dry ingredients just until mixed.
- 4. Heat a greased skillet over medium heat. Pour ¼ cup batter per pancake.
- 5. Cook until bubbles form and edges look set. Flip and cook 1–2 minutes more.
- 6. In a saucepan, bring butter, sugar, and buttermilk to a boil.
- 7. Simmer 2–3 minutes. Remove from heat and stir in vanilla, cinnamon, and baking soda.
- 8. Serve pancakes warm with cinnamon syrup.
Notes
- Don’t overmix your batter—lumps help keep pancakes fluffy.
- Cinnamon syrup foams due to baking soda—use a tall saucepan!
- Store leftover syrup in the fridge and reheat gently.


