
Intro
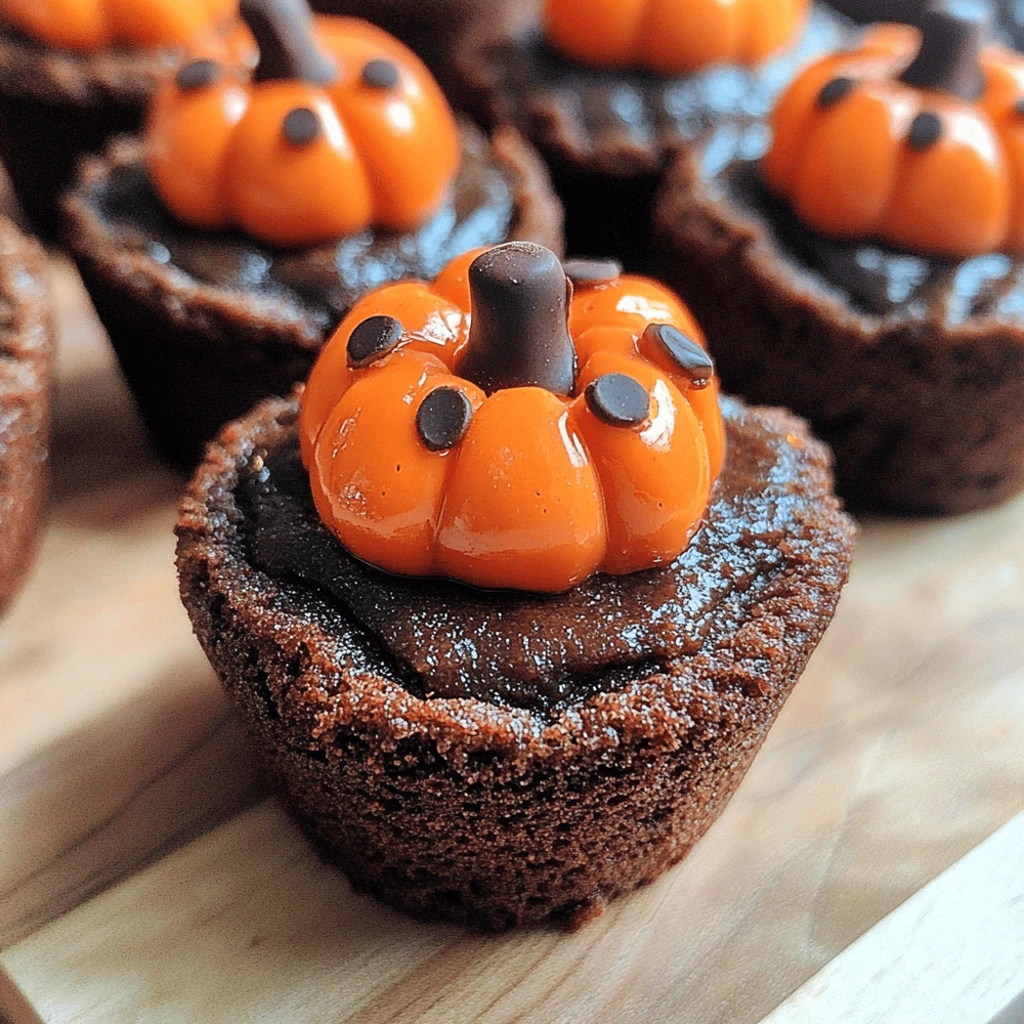
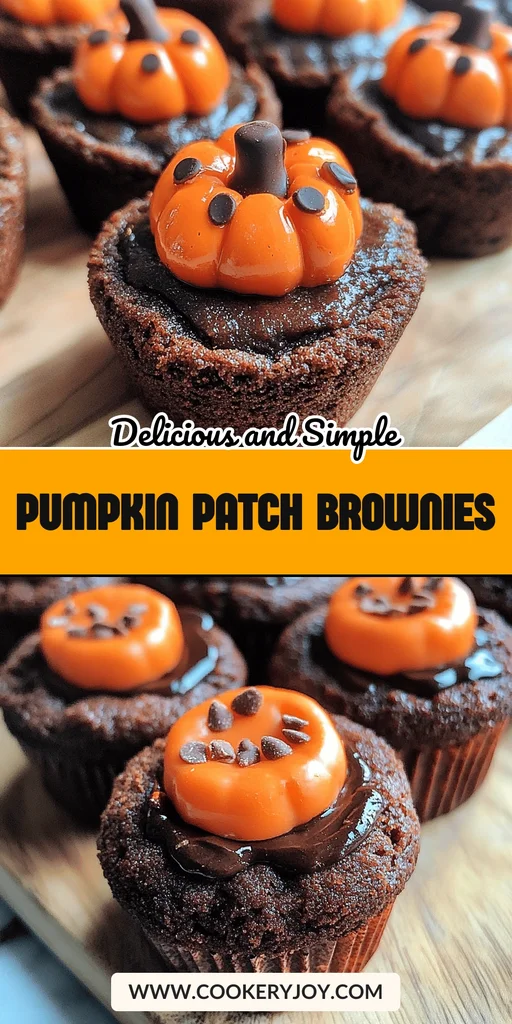
There’s something truly special about bringing a touch of autumn magic to your kitchen, and these Pumpkin Patch Brownies are the perfect way to do just that. Imagine rich, fudgy brownies topped with a vibrant, creamy orange frosting, all transformed into a whimsical pumpkin patch scene. They’re incredibly easy to assemble, making them a delightful treat for busy weeknights or a charming addition to any fall celebration.
These festive brownies are a guaranteed hit with both kids and adults, bringing smiles and a sense of cozy fun. They store beautifully, making them a great make-ahead option for parties, and their playful design is sure to be a conversation starter. You’ll find yourself reaching for this simple yet impressive recipe again and again.
Why I Love This Recipe
There are so many reasons I adore making these Pumpkin Patch Brownies. They transform a simple brownie mix into something truly special.
- Effortlessly Festive: They’re a charming fall dessert.
- Quick & Easy: Perfect for my busy schedule.
- Crowd-Pleaser: Kids and adults both love them!
- Versatile Decor: Customizable for that perfect look.
These make decorating for fall so much fun and fast. They are a guaranteed win for any occasion.
Pumpkin Patch Brownies Ingredients
The magic of these Pumpkin Patch Brownies truly shines with just a few simple ingredients. These come together to create a delightful autumn scene right on your dessert. The rich, chocolatey base is a perfect canvas for the creamy, sweet frosting, making every bite a little piece of fall joy.
- Brownie Mix: This is our fudgy, chocolatey foundation. Pick your favorite brand; it makes getting started super easy.
- Cream Cheese Frosting: It adds a smooth, tangy sweetness. This frosting is our edible landscape for the pumpkin patch design.
- Orange Food Coloring: Essential for that vibrant, classic pumpkin-patch orange.
- Green Food Coloring: This creates the delicate vines and leaves. It really brings our pumpkin patch to life.
- Chocolate Covered Sunflower Seeds or Chocolate Sprinkles: These give a great texture. They look just like the “dirt” or tiny seeds in the patch.
Substitutions and Tips
If you prefer a homemade touch, feel free to use your cherished homemade brownie recipe. Cream cheese frosting is wonderful, but a simple buttercream also works. It may be slightly sweeter. Want more intense chocolate flavor? Add a teaspoon of espresso powder to your brownie batter. For the decorative seeds, chopped chocolate-covered pretzels or mini chocolate chips are great alternatives. You’ll find the precise amounts in the recipe card at the end.
How to Make Pumpkin Patch Brownies

Step 1: Bake the Brownies
First, prepare your favorite brownie mix as the box directs. Pour the batter into a prepared 9×13 inch pan. Bake until a toothpick comes out with moist crumbs. Let the brownies cool completely in the pan. This cooling step is really important.
Step 2: Prepare the Frosting
While the brownies cool, divide your cream cheese frosting. Put half into one bowl and the other half into a second bowl. Add orange food coloring to the first. Stir well to get a bright orange color. Add green food coloring to the second bowl. Mix until it’s a nice green shade.
Step 3: Frost the Brownies
Once the brownies are totally cool, it’s time to frost. Spread the orange frosting evenly over the top. Use a spatula or knife. Make sure it’s a smooth layer. This orange frosting is the base of your pumpkin patch.
Step 4: Create the Pumpkin Patch Design
This is the really fun part of making these decorated brownies. Put the green frosting into a piping bag. Use a small round tip. If you don’t have a piping bag, a zip-top bag works. Snip off a tiny corner. Pipe thin, winding vines over the orange frosting. Add small leaf shapes on the vines. Don’t stress about making them perfect.
Step 5: Add the Finishing Touches
To add more rustic charm, scatter some chocolate-covered sunflower seeds. Or use chocolate sprinkles. Place them on the orange frosting. Put them near the vines or in little groups. This makes them look like dirt or seeds. It adds a lovely texture and visual appeal.
Step 6: Cut and Serve
Now it’s time to cut your delicious creation. Use a sharp knife to make clean cuts. Slice the brownies into squares. Serve your beautiful Pumpkin Patch Brownies right away. These easy brownies are perfect for any fall gathering!
How to Store Pumpkin Patch Brownies
These festive Pumpkin Patch Brownies store quite well. Keep them in an airtight container at room temperature for about 2 days. If you need them to last longer, the refrigerator is your friend, up to 5 days. Just know the frosting gets a bit firmer when chilled. Want to freeze them? It’s easier to freeze them before adding the green vines. Or, wrap individual frosted squares carefully. They last well in the freezer for up to 2 months. Simply thaw them on the counter before enjoying.
Tips for Success
Here are a few extra tips to make your Pumpkin Patch Brownies absolutely perfect:
- Make sure your brownies are totally cool. This stops the frosting from melting.
- Add food coloring slowly. It’s easy to add more if you need a brighter color.
- Don’t have a piping bag? Use a toothpick! It works great for vines.
- Get creative! Candy pumpkins or chocolate chunks are fun additions.
- For neat slices, wipe your knife between cuts. It keeps things tidy.
Kitchen Tools You’ll Need
- A 9×13 inch baking pan is perfect for these brownies.
- You’ll need at least two mixing bowls.
- Have measuring cups and spoons ready.
- An offset spatula or butter knife helps spread frosting smoothly.
- A piping bag with a small round tip is ideal. A zip-top bag works too!
- A whisk or mixer helps if you make frosting from scratch.
Serving Suggestions
These delightful Pumpkin Patch Brownies are perfect for any fall occasion. Here are a few ideas to make them even more special:
- Serve them with a refreshing glass of cold milk. A warm mug of apple cider also tastes wonderful.
- For an extra decadent treat, pair a brownie with a scoop of creamy vanilla ice cream.
- Arrange them on a festive platter. Mix them with other fall desserts for a beautiful dessert table display.
- Add a small candy pumpkin or a cinnamon stick on top. This makes a charming garnish for your brownies.
Frequently Asked Questions
Can I make these Pumpkin Patch Brownies ahead of time?
Yes, you can. Bake the brownies and let them cool completely. Store them in an airtight container for up to two days before frosting. Frost and decorate them the day of serving. Or, frost them one day in advance for convenience.
What if I don’t have food coloring? Can I still make them festive?
Absolutely! While food coloring adds vibrancy, you can still create a lovely fall-themed brownie. Use a simple vanilla frosting. Add autumn-colored sprinkles or chopped nuts on top. A drizzle of chocolate ganache over plain frosting also adds elegance.
How do I get clean cuts when slicing the brownies?
Use a sharp knife for clean cuts. Wipe the knife clean with a damp cloth between each cut. This prevents frosting and crumbs from smearing.
Can I use a different type of frosting for these Halloween brownies?
Yes, you can use a different frosting. Classic buttercream frosting works well. It may be a bit sweeter. Chocolate frosting is a good base too. Pipe green vines on top. Just ensure the frosting holds its shape.
Print
Pumpkin Patch Brownies
- Prep Time: 15 minutes
- Cook Time: 30-35 minutes
- Total Time: 45-50 minutes (plus cooling time)
- Yield: 12-16 servings
- Category: Dessert
- Method: Baking
- Cuisine: American
- Diet: Vegetarian
Description
These festive Pumpkin Patch Brownies are a fun and easy way to celebrate autumn. Using a simple brownie mix and cream cheese frosting, you can create a charming pumpkin patch design that’s perfect for Halloween or any fall gathering.
Ingredients
- 1 (18 ounce) package brownie mix, plus ingredients to prepare
- 1 (16 ounce) container cream cheese frosting
- Orange food coloring
- Green food coloring
- Chocolate covered sunflower seeds or chocolate sprinkles, for decorating
Instructions
- Prepare and bake brownies according to package directions in a 9×13 inch pan. Let cool completely.
- Divide cream cheese frosting into two bowls. Tint one bowl orange with orange food coloring and the other bowl green with green food coloring.
- Spread the orange frosting evenly over the cooled brownies.
- Transfer the green frosting to a piping bag fitted with a small round tip (or a zip-top bag with a corner snipped off).
- Pipe vines and leaves onto the orange frosting to create a pumpkin patch design.
- Arrange chocolate covered sunflower seeds or chocolate sprinkles to resemble ‘dirt’ or ‘seeds’ in the pumpkin patch.
- Cut into squares and serve.
Notes
- Ensure brownies are completely cooled before frosting to prevent the frosting from melting.
- You can use a toothpick to draw vine details if you don’t have a piping bag.
- Get creative with the decorations! Small candy pumpkins or chocolate chunks can also be used.


