
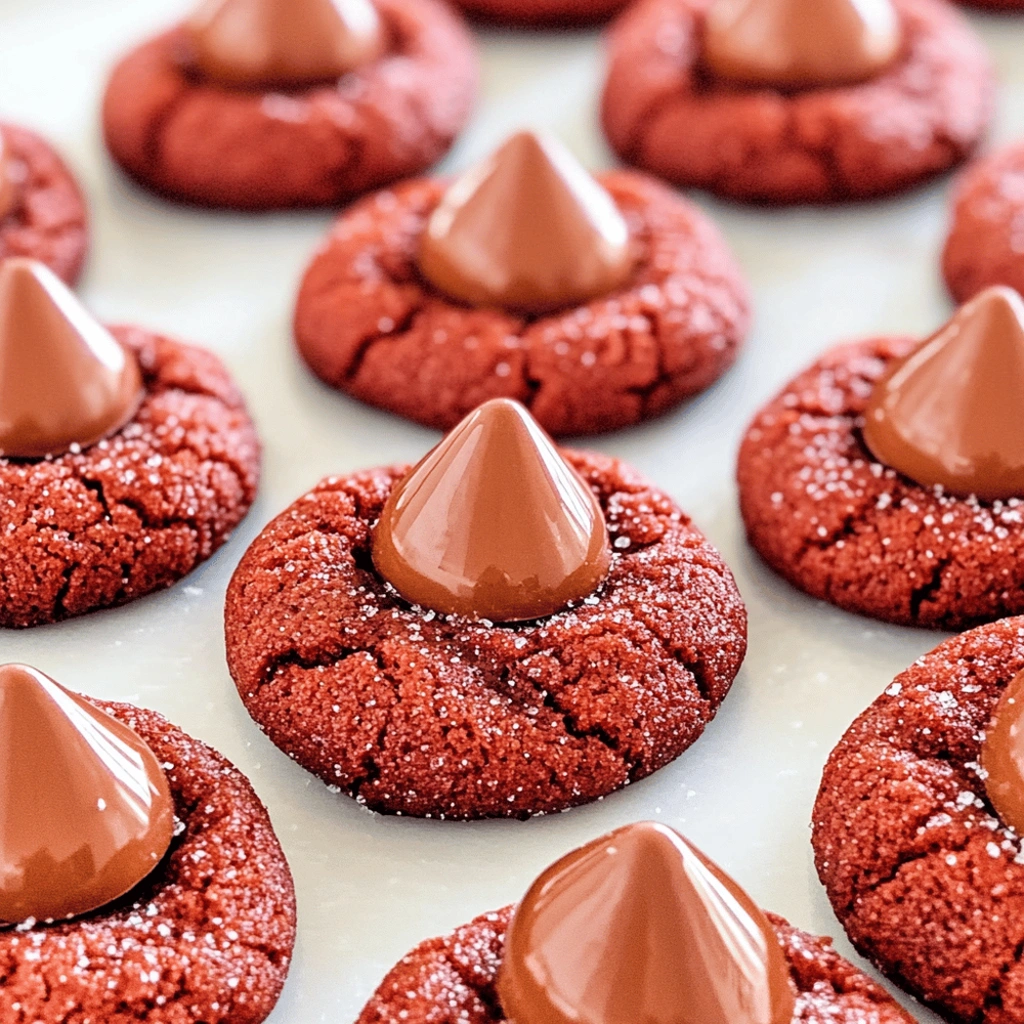
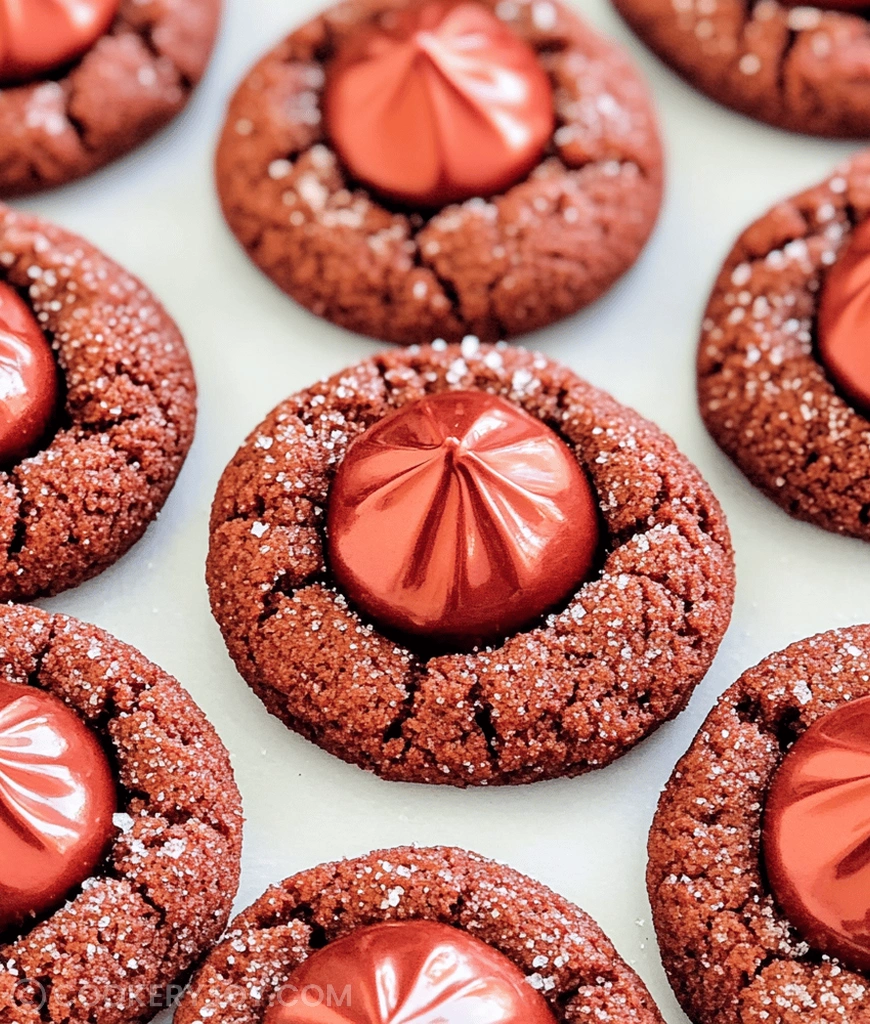
Sometimes a cookie needs to bring a little extra dazzle to the table. These Red velvet blossom cookies certainly deliver that festive punch. I adore how they capture the rich, slightly tangy flavor of classic red velvet cake. Plus, they finish with that wonderful, familiar chocolate melt right in the center. The resulting tender cookie cradles the smooth, creamy kiss beautifully.
I often bake these when company drops by unexpectedly. They look so striking on a platter, truly. And honestly, they disappear faster than any other treat I make. Storing leftovers is never an issue for us, sadly!
Why I Love This Recipe
There are so many reasons I keep reaching for this recipe.
- The Speed: Prep is quick, making it perfect after soccer practice.
- Amazing Look: They look wonderfully professional without the fuss.
- Flavor Combo: That deep cocoa plus the sweet chocolate kiss is unbeatable.
- Crowd Pleaser: Everyone loves a good chocolate kiss cookie variation.
These Red velvet blossom cookies offer maximum impact for minimal effort. They truly are a weeknight hero treat.
Red Velvet Blossom Cookies Ingredients
Gathering these ingredients feels like setting the stage for a festive event. We are mixing the richness of cocoa with that classic tangy red velvet profile. Consequently, this cookie tastes like a tiny little cake you can actually hold!
Let us look at what you need for these gorgeous treats.
- Unsalted Butter: This must be softened for proper creaming action.
- Sugars (Granulated and Brown): They offer both sweetness and necessary chewiness.
- Large Egg and Vanilla: These act as binders, adding richness and aroma.
- Cocoa Powder: Just a touch provides that signature subtle chocolate note.
- Red Food Coloring: Gel versions really make the color pop beautifully.
- All-Purpose Flour: This forms the tender structure of the cookie body.
- Baking Soda and Salt: Leavening power and flavor balance are their jobs.
- Extra Granulated Sugar: We use this for rolling the outside dough balls.
- Hershey’s Kisses: These melt down perfectly for that classic blossom look.
Remember, all the precise measurements reside on the recipe card below. You will find making these Red velvet blossom cookies simple with these familiar pantry staples.
Substitutions and Tips
I always encourage kitchen experimentation, especially when you are short on time. Feel free to try these little adjustments. If you lack brown sugar, just use a bit more granulated sugar. However, the texture will be slightly less moist. For a flavor boost, try adding 1/4 teaspoon of white vinegar to the wet ingredients. This really amplifies the traditional red velvet tang. Furthermore, substituting buttermilk for regular milk in other red velvet recipes works wonders. But here, the sourness comes mostly from the overall flavor profile, not a liquid base. If you ever worry about your dough drying out, chill it briefly. Cold dough rolls easier without sticking everywhere. These little tips help keep your baking journey smooth.
Kitchen Tools You’ll Need
You really do not need a whole bakery setup for these cookies. Mostly, standard gear works fine.
- Large Mixing Bowls: Essential for mixing your wet and dry items.
- Electric Mixer: Handheld or stand mixer makes creaming butter much easier.
- Baking Sheets: You need flat surfaces for dough placement.
- Parchment Paper: This keeps cookies from sticking badly to the pans.
- Cookie Scoop or Spoon: Use this for uniform 1-inch dough balls.
A rolling pin is not necessary here, thankfully. Just use measuring cups and spoons you already own.
How to Make Red Velvet Blossom Cookies

Baking these cookies is wonderfully straightforward once you see the steps laid out. Following these stages carefully ensures you get that perfect, soft, chewy texture. Remember, we are aiming for beautiful red velvet blossom cookies every single time.
Preparing the Dough Base
First things first, fire up that oven now. Set the temperature to 375 degrees Fahrenheit. Line those trusty baking sheets with parchment paper sheets. This step saves you serious scrubbing later on. Next, grab your softened butter and both sugars. Cream them together very well in a big bowl. You are looking for a mixture that looks light and totally fluffy, almost like whipped cream.
Incorporating Wet and Dry Elements
Now, time to introduce the wet flavors. Beat in the egg until it is fully incorporated. Pour in the vanilla extract next. Do not forget the cocoa powder for depth. Then, add your preferred red food coloring slowly. Mix until you see a beautiful, uniform red hue across the dough. In a separate bowl, whisk the flour with soda and salt briefly. Gradually add the dry items to the wet mixture. Mix only until the flour just disappears from view. Stop mixing then; overmixing ruins texture.
Shaping and Baking the Cookies
Pour the remaining half cup of sugar into a flat dish. Roll your dough into nice, even one-inch balls. Then, roll each ball in that prepared sugar coating completely. Place the sugar-coated balls two inches apart on the sheet. Baking time is crucial here for the best red velvet cookies. Bake for only eight to ten minutes total. The edges should look set, though the tops might show small cracks.
Adding the Chocolate Center for Perfect Red Velvet Blossom Cookies
This next part requires speed and accuracy, trust me. As soon as the sheet comes out of the hot oven, work quickly. Press one unwrapped Hershey’s Kiss right into the center of each hot cookie. The residual heat melts the chocolate just right. Let them sit five minutes on that hot pan. After that tiny rest, move them to a wire rack. Cooling lets that melted chocolate set up perfectly.
How to Store Red Velvet Blossom Cookies
Keeping these beautiful Red velvet blossom cookies fresh is simple. Store cooled, completely set cookies in an airtight container at room temperature. They stay delightful for almost a week that way. For longer storage, you can freeze them successfully. Place parchment between layers before sealing tightly in a freezer bag. They last about three months frozen. Always thaw them slowly on the counter for the best texture results.
Tips for Success
A few tricks make these cookies spectacular every time. Pay attention to these small details.
- Color Saturation: Use good gel food coloring sparingly. Too much liquid alters the dough.
- Do Not Overbake: Bake until just set. Soft cookies accept the chocolate kiss better.
- Hot Pressing Power: Press the chocolate into the cookie immediately out of the oven.
- Uniform Balls: Scooping dough ensures they bake evenly across the sheet.
- Room Temp Butter: Ensure your butter is truly softened, not melted or cold.
Following these pointers guarantees great Red velvet blossom cookies.
Serving Suggestions
- Serve these with cold glasses of milk, naturally.
- A hot cup of strong coffee or black tea pairs well.
- Display them on a white platter to highlight their vibrant color.
- They look wonderful dusted lightly with powdered sugar before serving.
- They match perfectly with other frosted holiday cookie varieties.

Red velvet blossom cookies
- Prep Time: 20 minutes
- Cook Time: 8-10 minutes per batch
- Total Time: 30 minutes (approx.)
- Yield: Approx. 40 cookies
- Category: Dessert/Cookie
- Method: Baking
- Cuisine: American
- Diet: Vegetarian
Description
A festive and visually appealing cookie, Red Velvet Blossom Cookies combine the classic flavor of red velvet cake with the beloved peanut butter blossom cookie format, featuring a chocolate kiss center.
Ingredients
- 1/2 cup (1 stick) unsalted butter, softened
- 1/2 cup granulated sugar
- 1/2 cup packed light brown sugar
- 1 large egg
- 1 teaspoon vanilla extract
- 1 tablespoon unsweetened cocoa powder
- 1 teaspoon red food coloring (gel preferred)
- 1 3/4 cups all-purpose flour
- 1 teaspoon baking soda
- 1/4 teaspoon salt
- Approx. 1/2 cup granulated sugar (for rolling)
- Approx. 40 Hershey’s Kisses, unwrapped
Instructions
- Preheat oven to 375°F (190°C). Line baking sheets with parchment paper.
- In a large bowl, cream together the softened butter, granulated sugar, and brown sugar until light and fluffy.
- Beat in the egg, vanilla extract, cocoa powder, and red food coloring until well combined and a uniform red color is achieved.
- In a separate bowl, whisk together the flour, baking soda, and salt.
- Gradually add the dry ingredients to the wet ingredients, mixing until just combined and a soft dough forms.
- Place the remaining 1/2 cup of granulated sugar in a shallow bowl.
- Roll dough into 1-inch balls, then roll each ball in the granulated sugar to coat.
- Place the sugar-coated balls about 2 inches apart on the prepared baking sheets.
- Bake for 8-10 minutes, or until the edges are set and the tops are slightly cracked (do not overbake).
- Immediately upon removing from the oven, press one unwrapped Hershey’s Kiss into the center of each hot cookie.
- Let the cookies cool on the baking sheets for 5 minutes before transferring to a wire rack to cool completely. The chocolate will soften, then set.
Notes
- Using gel food coloring results in a more vibrant red color.
- Do not overbake the cookies, as they will be too firm to easily press the chocolate kiss into.
- The Hershey’s Kiss should be pressed into the cookie immediately after it comes out of the oven while the cookie is still hot and soft.


