
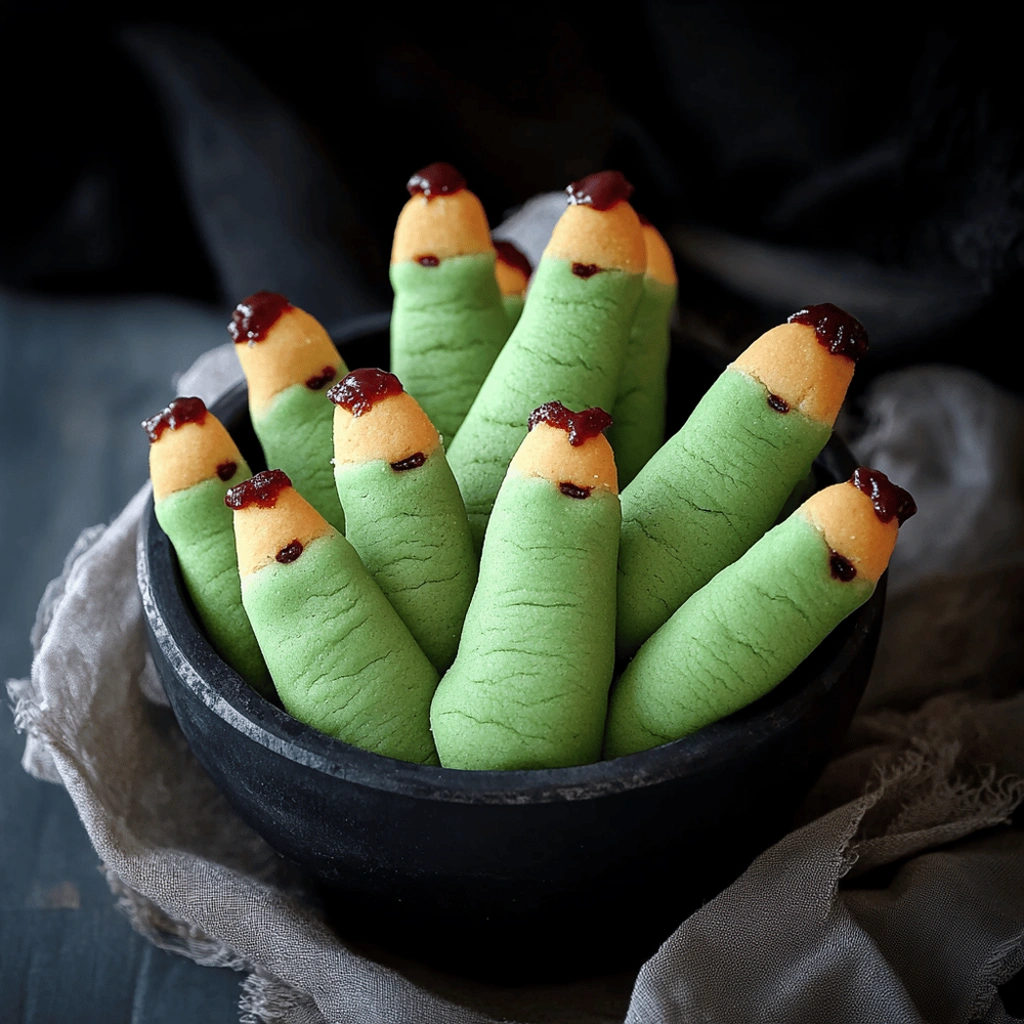
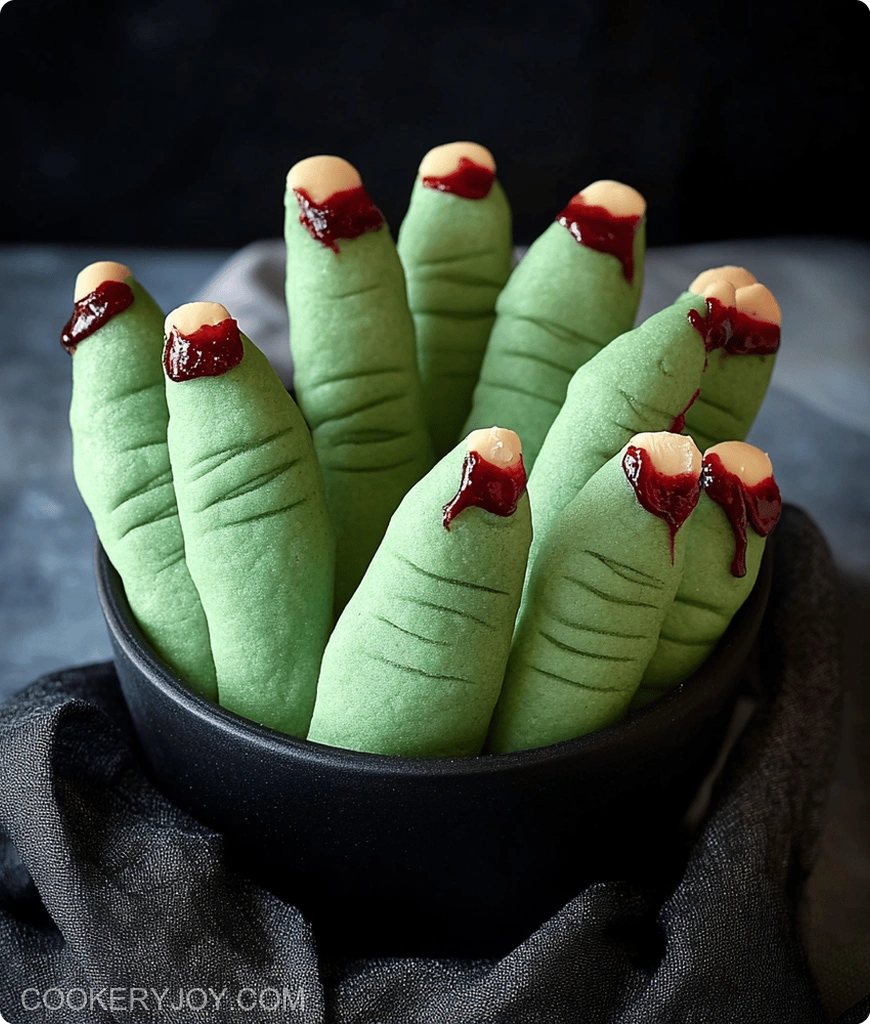
There’s something truly magical about transforming simple ingredients into delightful treats that capture the spirit of the season. These Witch Finger Cookies offer a wonderfully spooky yet incredibly delicious experience, with a tender, slightly crisp texture and a hint of almond that makes them irresistible. They’re perfect for adding a touch of playful fright to any Halloween gathering, bringing smiles and gasps of delight.
I find these cookies are especially fun to make with family, turning a simple baking project into a memorable Halloween tradition. They store beautifully, making them a fantastic make-ahead option for busy weeks, and their unique appearance always makes them a conversation starter at parties.
Why I Love This Recipe
These Witch Finger Cookies are a go-to for me.
- Effortless Spookiness: They are surprisingly simple to assemble.
- Delightful Flavor: The classic butter cookie base with almond extract is a crowd-pleaser.
- Perfect for Halloween: They bring a fun, festive touch to any party.
- Make-Ahead Magic: Bake them ahead for a quick, spooky treat.
Witch Finger Cookies Ingredients
The magic of these Witch Finger Cookies comes from a simple, buttery dough that’s shaped and decorated to create a truly iconic Halloween look. It’s a combination that’s both nostalgic and delightfully eerie.
- Butter: Provides richness and helps create a tender, melt-in-your-mouth texture.
- Confectioners’ Sugar: Sweetens the cookies and contributes to a delicate, smooth crumb.
- Large Egg: Binds the ingredients together and adds a little moisture.
- Almond Extract: Offers a distinct, slightly nutty flavor that complements the cookie’s design.
- Vanilla Extract: Enhances the overall sweetness and aroma.
- All-Purpose Flour: The foundation of the cookie dough, providing structure.
- Baking Powder: A leavening agent that helps the cookies achieve a slight lift.
- Salt: Balances the sweetness and enhances the other flavors.
- Blanched Almonds: These serve as the perfect, natural fingernails for our witch fingers.
- Red Decorating Gel: This is key for creating the signature “bloody” nail effect, adding a pop of color and a touch of spooky realism.
Substitutions and Tips:
For a different flavor, you could try a touch of orange zest or a different extract like maple. If you don’t have blanched almonds, you could try slivered almonds, though they might be more challenging to press in. For a more intense “bloody” look, you can layer the red decorating gel or even mix in a tiny bit of edible black food coloring for a darker effect. Remember, all exact quantities are detailed in the recipe card at the end!
How to Make Witch Finger Cookies
Step 1: Cream the Wet Ingredients
In a large bowl, cream together the softened butter and confectioners’ sugar until light and fluffy. Beat in the large egg, almond extract, and vanilla extract until well combined and smooth. This initial creaming step is crucial for achieving a tender cookie texture.
Step 2: Combine Dry Ingredients and Mix Dough
In a separate bowl, whisk together the all-purpose flour, baking powder, and salt. Gradually add this dry mixture to the wet ingredients. Mix until the dough is just combined. Be careful not to overmix this dough. Overmixing can lead to tough cookies.
Step 3: Chill the Dough
Divide the cookie dough into four equal portions. Wrap each portion tightly in plastic wrap. Refrigerate for about 20 to 30 minutes. This chilling period is essential. It makes the dough firm enough to shape easily into spooky fingers.
Step 4: Preheat Oven and Prepare Baking Sheets
Preheat your oven to 325 degrees Fahrenheit (160 degrees Celsius). Line your baking sheets with parchment paper. This not only prevents sticking. It also makes the post-baking cleanup a breeze.
Step 5: Shape the Witch Fingers
Take a small amount of dough, about a tablespoon. Roll it between your palms into a finger shape. Gently pinch the dough in the middle to create a knuckle. Use a knife to carefully make additional knuckle marks. Do this along the length of the cookie.
Step 6: Add the Fingernails
Press a whole blanched almond onto one end of each shaped cookie. Gently indent the dough around the almond. This helps it adhere better. It also creates a more realistic fingernail appearance.
Step 7: Bake the Cookies
Arrange the shaped Witch Finger Cookies on the prepared baking sheets. Leave a little space between them. Bake for 20 to 25 minutes. Bake until the edges are just lightly golden. You want them to be pale, like a true witch’s finger.
Step 8: Cool and Decorate
Allow the cookies to cool on the baking sheets for a few minutes. Transfer them to a wire rack to cool completely. Once entirely cool, remove the blanched almond from each cookie. Squeeze a small amount of red decorating gel into the indentation. Gently press the almond back into place. This creates the signature “bloody” nail effect.
How to Store Witch Finger Cookies
Once completely cooled and decorated, store your Witch Finger Cookies in an airtight container. Keep them at room temperature. They will stay fresh and delicious for up to 5 days. For longer storage, freeze the un-decorated cookies. Place them in a single layer inside a freezer-safe bag. They can stay frozen for up to 2 months. Thaw them at room temperature before decorating them.
Tips for Success
- Ensure butter is properly softened for easy creaming.
- Do not overmix the dough after adding dry ingredients.
- Chill the dough sufficiently for easier shaping.
- Bake until *lightly* golden for a pale witch finger appearance.
- Cool cookies completely before decorating to prevent gel melting.
- Use a damp paper towel between shaping for smoother cookies.
Kitchen Tools You’ll Need
- Large mixing bowls are essential.
- An electric mixer, handheld or stand, helps cream ingredients.
- A whisk is needed for dry mixtures.
- Measuring cups and spoons ensure accuracy.
- Plastic wrap is key for chilling dough.
- Baking sheets hold the cookies.
- Parchment paper prevents sticking.
- A wire cooling rack lets cookies cool properly.
- A small knife creates knuckle details.
- Alternatively, a fork works for knuckle marks.
Serving Suggestions
- Serve your Witch Finger Cookies alongside a spooky punch or warm apple cider.
- Arrange them on a festive platter with other Halloween-themed treats for a delightful display.
- Package these cookies in clear cellophane bags tied with ribbon for charming party favors.
- They pair wonderfully with a warm cup of tea or coffee for an afternoon delight.
Frequently Asked Questions
Can I make the Witch Finger Cookies dough ahead of time?
Yes, you can absolutely make the dough for these Witch Finger Cookies a day or two in advance. Keep it well-wrapped in the refrigerator until you’re ready to shape and bake them. This is a great way to get a head start on your Halloween baking!
What can I use if I don’t have blanched almonds for the fingernails?
If you can’t find blanched almonds, you can try using slivered almonds, though they might be a bit trickier to press in. Another option is to simply use a knife to score the end of the cookie to mimic a nail shape, or use a small dab of green or purple frosting for a different spooky effect.
How do I get the “bloody” nail effect if I don’t have red decorating gel?
If red decorating gel isn’t available, you can create a similar effect using a small amount of red food coloring mixed with a little corn syrup or melted white chocolate. Alternatively, a thin layer of raspberry jam or strawberry preserves can also give a nice, glossy “bloody” appearance to the fingernails.
Print
Witch Finger Cookies
- Prep Time: 25 minutes
- Cook Time: 20-25 minutes
- Total Time: 45-50 minutes (plus chilling time)
- Yield: Approximately 36 cookies
- Category: Dessert
- Method: Baking
- Cuisine: American
- Diet: Vegetarian
Description
Learn how to make spooky and delicious Witch Finger Cookies with this easy-to-follow recipe, perfect for Halloween parties.
Ingredients
- 1 cup butter, softened
- 1 cup confectioners’ sugar
- 1 large egg
- 1 tsp almond extract
- 1 tsp vanilla extract
- 2 2/3 cups all-purpose flour
- 1 tsp baking powder
- 1/4 tsp salt
- 36 whole blanched almonds
- 1 tube red decorating gel
Instructions
- In a large bowl, cream together butter, confectioners’ sugar, egg, almond extract, and vanilla extract until light and fluffy.
- In a separate bowl, whisk together flour, baking powder, and salt; gradually add to the wet ingredients until just combined.
- Divide dough into four equal parts. Wrap each in plastic wrap and chill for 20-30 minutes.
- Preheat oven to 325 degrees F (160 degrees C). Line a baking sheet with parchment paper.
- Take a small amount of dough, about 1 tablespoon, and roll into a finger shape.
- Pinch in the middle to create a knuckle.
- Press a blanched almond onto one end for the fingernail, slightly indenting the dough.
- Use a knife to make knuckle marks on the cookie.
- Place on the prepared baking sheet.
- Bake for 20-25 minutes, or until lightly golden.
- Let cool completely on a wire rack.
- Once cool, remove the almond and squeeze a small amount of red decorating gel into the indentation before replacing the almond to create a ‘bloody’ nail effect.
Notes
- Ensure butter is properly softened for easy creaming.
- Do not overmix the dough after adding the dry ingredients.
- Chill the dough sufficiently to make it easier to shape.
- Bake until *lightly* golden to maintain a pale witch finger appearance.
- Allow cookies to cool completely before decorating to prevent the gel from melting.


