
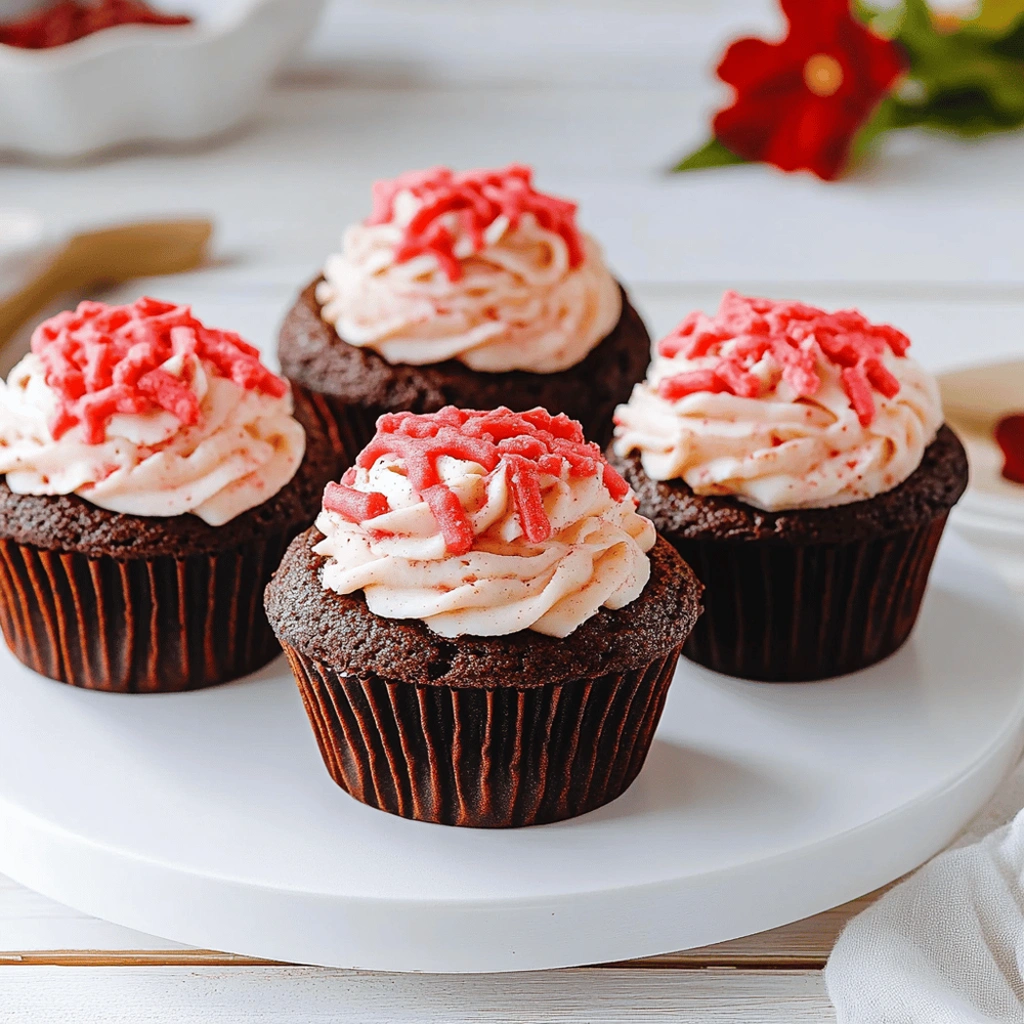
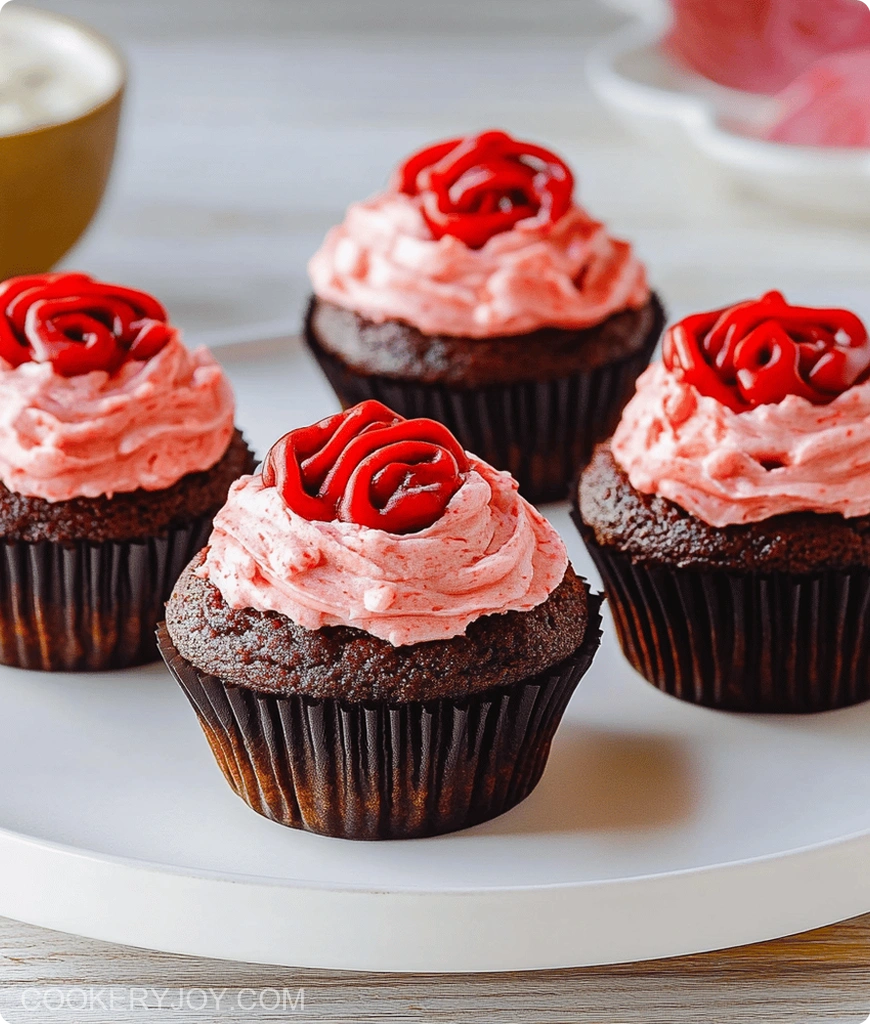
These Zombie Brain Cupcakes offer a delightfully spooky treat. They bring a unique touch to any celebration, especially around Halloween. The rich, moist chocolate cake provides a perfect foundation. It supports the eerily realistic brain-shaped green frosting. A dramatic red drizzle finishes it off. It truly captures the macabre spirit of the season.
They are surprisingly simple to assemble. This makes them a fantastic activity for kids. Busy moms and professionals can enjoy them too. They offer a creative outlet. Plus, they store beautifully. Your ghoulish creations are ready when cravings strike. The party awaits your stunning desserts.
Why I Love This Recipe
I adore this Zombie Brain Cupcakes recipe for so many reasons!
- Effortlessly Spooky: They create a big “wow” factor. It’s with minimal fuss, too.
- Flavorful Foundation: The delicious chocolate cake base is a crowd-pleaser. Everyone loves it.
- Creative Fun: It’s perfect for engaging kids in the kitchen. They love decorating.
- Party Perfect: These are guaranteed to be a memorable hit at any gathering.
- Make-Ahead Magic: You can prepare the frosting and cupcakes in advance. This saves time later.
Zombie Brain Cupcakes Ingredients
The magic of these Zombie Brain Cupcakes really shines. It’s in the rich chocolate cake. It’s also in the vibrant, creamy frosting. Making them is as much fun as eating them. This simple assembly yields a truly impressive, thematic dessert. You can find exact quantities in the recipe card below.
For the Chocolate Cupcakes:
- All-Purpose Flour: This gives our delightful cake its structure.
- Granulated Sugar: It adds sweetness and essential moisture.
- Unsweetened Cocoa Powder: This is key for that deep, rich chocolate flavor.
- Baking Powder & Baking Soda: Our leavening agents ensure a light, airy crumb.
- Kosher Salt: It balances sweetness and boosts the chocolate notes.
- Buttermilk (or Whole Milk): This adds richness and tenderness.
- Neutral Oil: It contributes to a moist, tender texture.
- Large Egg: This binds everything together and adds richness.
- Pure Vanilla Extract: It enhances all the wonderful flavors.
- Boiling Water: This blooms the cocoa powder. It makes the chocolate taste even more intense.
For the Green Brain Frosting:
- Powdered Sugar: This creates the base for our smooth, sweet frosting.
- Unsalted Butter: It provides a creamy, rich texture.
- Pure Vanilla Extract & Kosher Salt: These add depth and balance to the flavor.
- Neon Green Liquid Food Coloring: This is the essential ingredient for that signature zombie look!
For the Bloody Drizzle:
- Red Decorating Gel: This gives us that gruesome, realistic blood effect.
Substitutions and Tips:
- No buttermilk? No worries. Make your own substitute. Add 1 tablespoon of white vinegar or lemon juice to 1 cup of whole milk. Let it sit for 5 minutes.
- Want even richer chocolate flavor? Try using dark cocoa powder.
- Adjust the green food coloring amount. Get your perfect shade of eerie.
- Can’t find red decorating gel? A thick raspberry jam works. Strain it to remove seeds first.
- Make sure your butter is truly at room temperature. This ensures the smoothest frosting.
How to Make Zombie Brain Cupcakes
Let’s get these spooky treats ready! They are easier than they look. We will walk through each step. You will have amazing Zombie Brain Cupcakes in no time. Your guests will be so impressed.
Step 1: Prepare the Chocolate Cupcake Batter
First, preheat your oven. Go for 350°F (175°C). Line a standard 12-cup muffin tin with cupcake liners. Grab a large mixing bowl. Whisk together the flour, granulated sugar, cocoa powder, baking powder, baking soda, and salt. This simple step ensures even distribution. It gives you a consistent chocolate cake.
Step 2: Combine Wet and Dry Ingredients
Now, add the wet ingredients. Put in the buttermilk, neutral oil, beaten egg, and vanilla extract. Whisk everything together properly. Mix until the batter is smooth and combined. It’s important to achieve a good mix here. This avoids lumps for a tender crumb. This is the start of your moist cupcakes.
Step 3: Add Boiling Water and Bake
Carefully pour in the boiling water. Whisk until the batter is fully incorporated. This batter will be thin. That’s perfect for moist cupcakes! Fill each liner about two-thirds full. Use about 1/4 cup of batter per cupcake. Bake for 18 to 20 minutes. A wooden skewer should come out clean.
Step 4: Cool the Cupcakes
Once baked, let cupcakes cool in the tin. Do this for a few minutes. Then, transfer them to a wire rack. They need to cool completely. This cooling process takes about an hour. Ensure they are fully cool before you frost. Otherwise, your beautiful brain frosting will melt!
Step 5: Prepare the Green Brain Frosting
While the cupcakes cool, make the frosting. Use your stand mixer. Ensure the whisk attachment is in place. Add sifted powdered sugar, room temperature unsalted butter, vanilla extract, and kosher salt. Beat on medium-high speed. Beat for 2 to 3 minutes. The frosting should be very smooth and bright white.
Step 6: Tint and Pipe the Brain Frosting
Add the neon green food coloring. Put in a few drops at a time. Beat until you get the perfect eerie green shade. Transfer the frosting to a piping bag. Use a small round tip. To make the brain shape, pipe a small mound. About a quarter inch size is good. Pipe two straight lines down the middle. Then add squiggly lines on the sides. This mimics a real brain.
Step 7: Add the Bloody Drizzle
For the final touch, add the red decorating gel. Drizzle it carefully over the piped brains. This adds a dramatic pop of color. It truly enhances the spooky brain look. Get creative with your drizzle. Make it look unsettling and realistic!
How to Store Zombie Brain Cupcakes
Unfrosted cupcakes keep well. Store them in an airtight container. Leave them at room temperature for up to 2 days. Once frosted, keep your Zombie Brain Cupcakes cool. Refrigerate them to keep the frosting firm. Store in an airtight container for up to 3 days. For longer storage, freeze unfrosted cupcakes. They last for up to 2 months. Thaw them overnight in the fridge. Then, frost before serving them up.
Tips for Success
- Always ensure your cupcakes are completely cooled. This is vital before frosting.
- Use room-temperature butter for your buttercream. It makes for the smoothest results.
- Avoid overmixing the cake batter. Mix just until wet and dry meet.
- Test for doneness with a toothpick. This helps prevent dry cupcakes.
- Practice piping the brain shape. Try it on parchment paper first.
- Add food coloring gradually. Achieve that perfect, eerie green hue.
Kitchen Tools You’ll Need
Gathering the right tools makes baking easier. Here’s what you’ll need for these Zombie Brain Cupcakes:
- Muffin tin and liners are essential.
- You’ll need large mixing bowls.
- A whisk helps combine ingredients.
- An electric mixer (stand or hand) is very useful.
- A piping bag with a small round tip creates the brain shape.
- A wire cooling rack is needed for the cupcakes.
- Measuring cups and spoons ensure accuracy.
- An offset spatula is optional for frosting smooth.
Serving Suggestions
Let’s set the scene for your creepy creations! Here are some ideas:
- Serve these frightful delights with cold milk. A spooky punch also pairs well.
- Arrange them on a tiered stand. This creates a dramatic Halloween dessert table display.
- Pair your Zombie Brain Cupcakes with other themed treats. Think “graveyard pudding cups.”
- Garnish with edible candy eyeballs for an extra creepy, fun touch.
Frequently Asked Questions
Can I make the Zombie Brain Cupcakes ahead of time?
Yes, you can bake the chocolate cupcakes up to two days in advance. Store them in an airtight container at room temperature. The green frosting can be made a day ahead, too. Keep it in the refrigerator. Let it soften slightly and re-whip it before piping onto the cooled cupcakes.
What if I don’t have piping bags and tips?
No problem at all! You can still create the brain design. Use a sturdy zip-top bag. Snip off a small corner. Pipe the frosting directly onto the cupcakes. For the red drizzle, a squeeze bottle works great. Even a spoon can create that spooky effect.
How do I get the frosting to be a good consistency for piping?
Ensure your butter is at room temperature. This makes the creamiest frosting. If the frosting seems too stiff, add a tiny bit more milk. Use about a teaspoon at a time. Do this until it reaches a pipeable consistency. If it’s too soft, try chilling it for about 15-20 minutes.
Can I use a different cake flavor for these brain cupcakes?
Absolutely! While the chocolate cake is a classic pairing, you can use another flavor. Vanilla or even red velvet cake work well. Use these as the base for your Zombie Brain Cupcakes. Just ensure the cupcakes are fully cooled. This is important before decorating with the green frosting.
Print
Zombie Brain Cupcakes
- Prep Time: 25 minutes
- Cook Time: 20 minutes
- Total Time: 1 hour 45 minutes
- Yield: 12 cupcakes
- Category: Desserts
- Method: Baking and Frosting
- Cuisine: American
- Diet: Vegetarian
Description
A spooky and fun recipe for Zombie Brain Cupcakes, perfect for Halloween or any themed party. These cupcakes feature a rich chocolate cake base and are topped with a vibrant green buttercream frosting shaped to resemble a brain, complete with a bloody drizzle.
Ingredients
- 1 1/4 cups (150 g) all-purpose flour
- 1 cup (200 g) granulated sugar
- 1/2 cup (40 g) unsweetened cocoa powder
- 1 tsp. baking powder
- 1/2 tsp. baking soda
- 1/2 tsp. kosher salt
- 1/2 cup (120 ml) buttermilk or whole milk
- 1/4 cup neutral oil
- 1 large egg, beaten
- 1/2 tsp. pure vanilla extract
- 1/4 cup boiling water
- 4 cups (455 g) powdered sugar, sifted
- 1 1/2 cups (3 sticks) unsalted butter, room temperature
- 1 tsp. pure vanilla extract
- 1/4 tsp. kosher salt
- 2 to 3 drops (or more) neon green liquid food coloring
- Red decorating gel, for drizzling
Instructions
- Preheat oven to 350°F. Line a standard 12-cup muffin tin with liners.
- In a large bowl, whisk flour, granulated sugar, cocoa powder, baking powder, baking soda, and salt.
- Add buttermilk, oil, egg, and vanilla and whisk until smooth.
- Pour in boiling water and whisk until fully combined.
- Fill each liner with 1/4 cup (60 ml) batter, coming about two-thirds up the sides.
- Bake cupcakes until risen and a tester inserted into the center comes out clean, 18 to 20 minutes.
- Let cool completely, about 1 hour.
- Make frosting: In the large bowl of a stand mixer fitted with the whisk attachment (or in a large bowl using an electric mixer), beat powdered sugar, butter, vanilla, and salt on medium-high speed until frosting is bright white and very smooth, 2 to 3 minutes.
- Tint frosting with green food coloring and beat until well incorporated, adding more as needed.
- Transfer to a large piping bag fitted with a small round tip.
- Pipe a small mound (about the size of a quarter) on top of cupcakes.
- Pipe 2 straight vertical lines, side by side, down middle of cupcakes.
- Pipe squiggly lines on either side of cupcakes, resembling a brain.
- Drizzle with red decorating gel for a bloody effect.
Notes
- Ensure cupcakes are completely cool before frosting to prevent the frosting from melting.
- Adjust the amount of green food coloring to achieve your desired shade of zombie brain.
- The red decorating gel can be omitted or replaced with raspberry jam for a similar effect.


