Skip to content

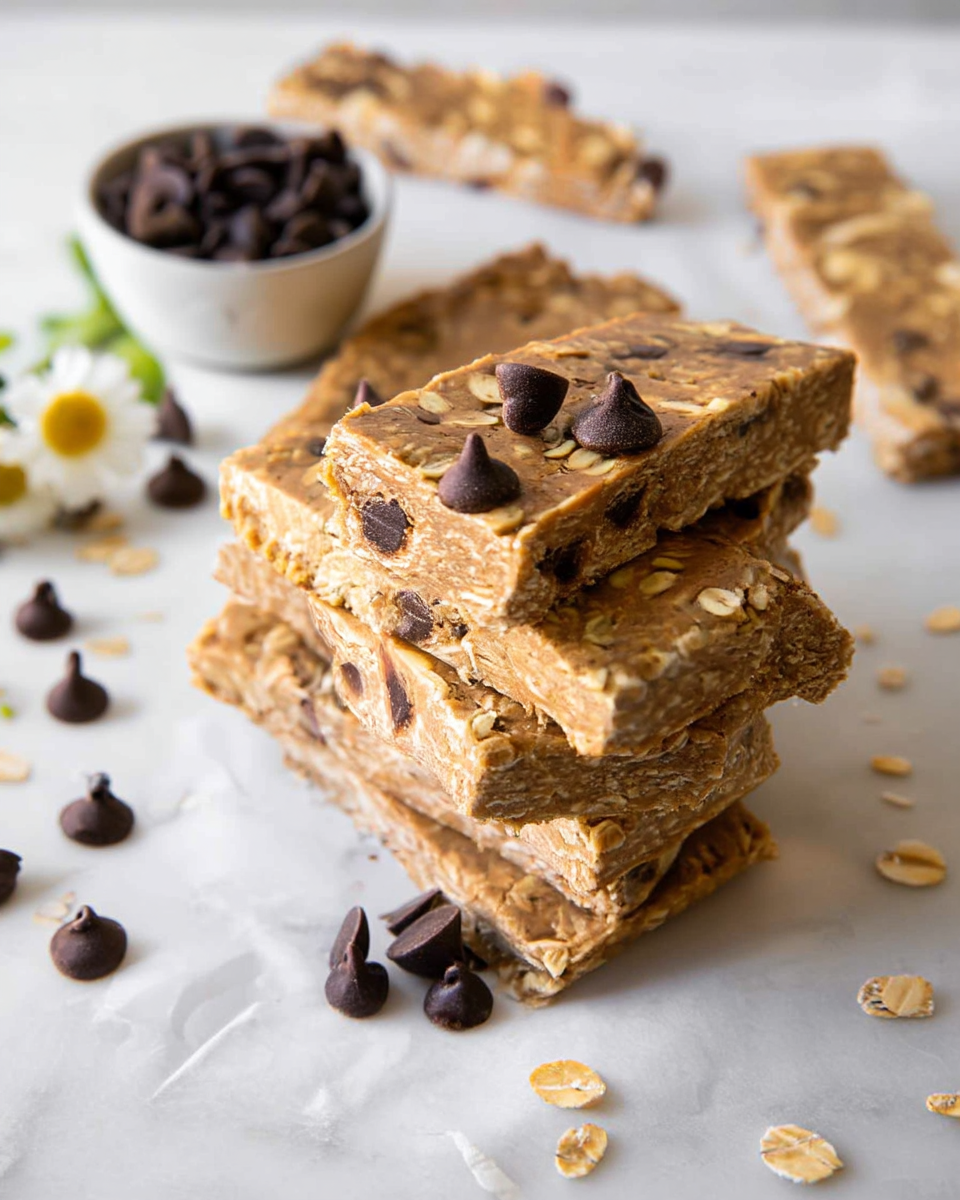
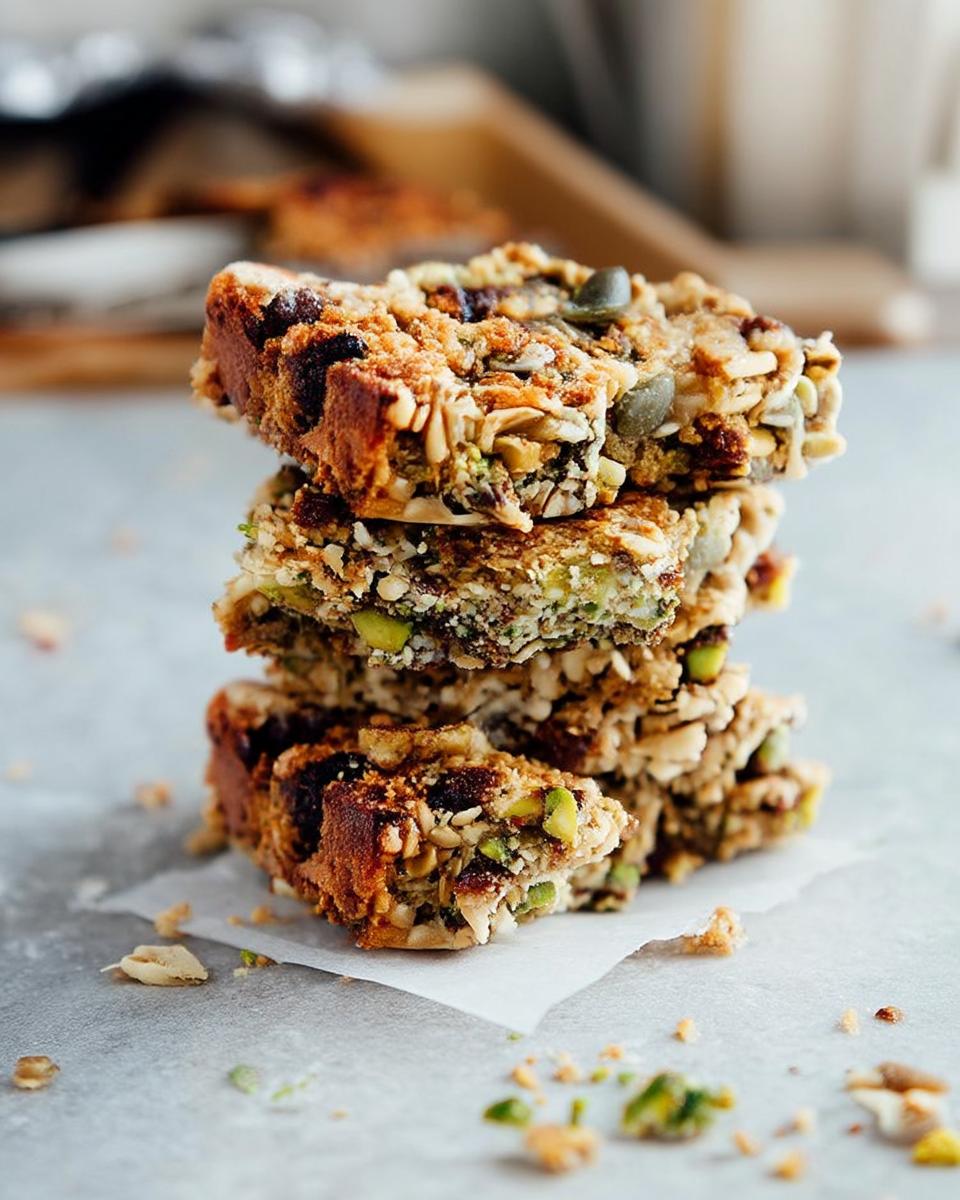
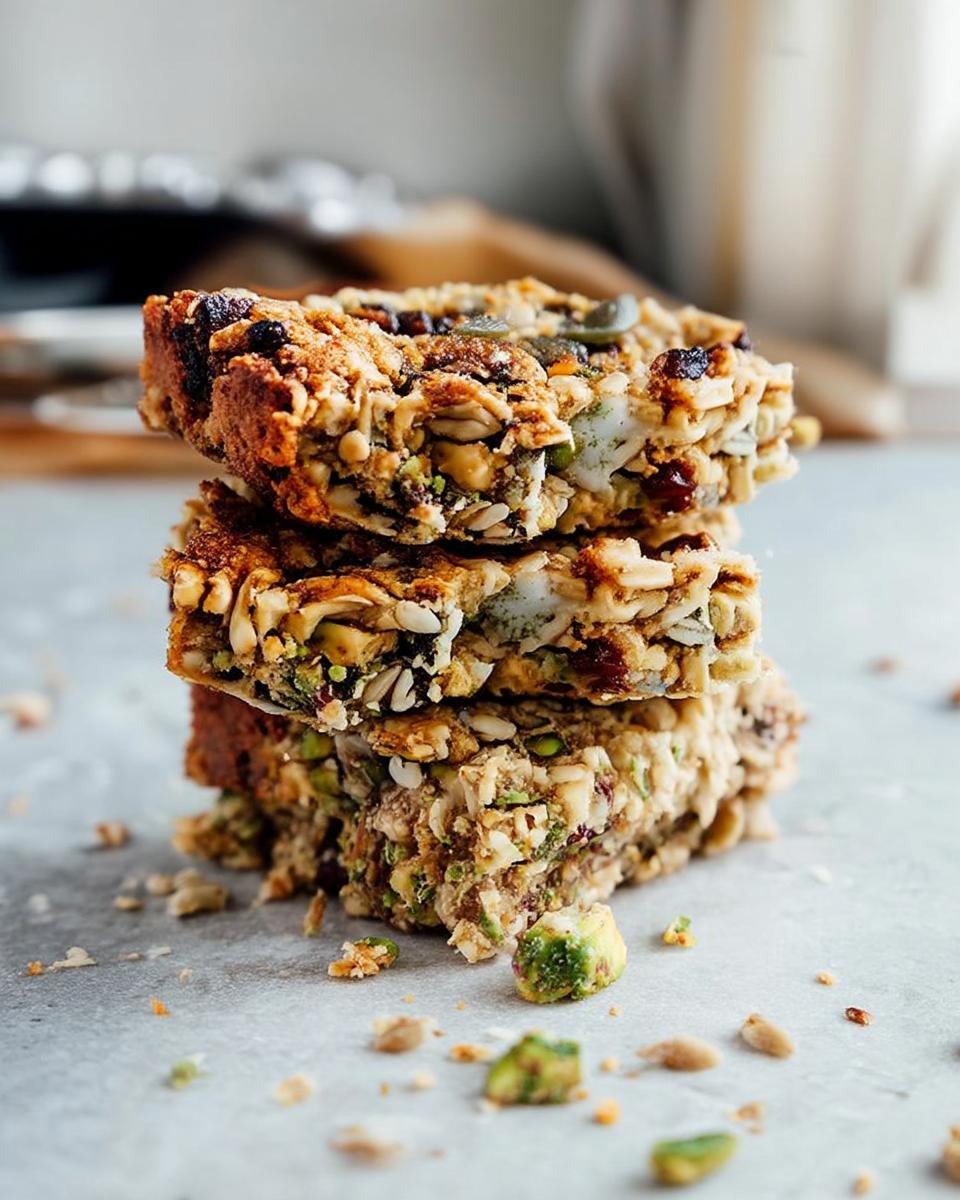
The warm, nutty aroma of peanut butter blending with honey fills my kitchen. I whip up these homemade protein bars without protein powder easily. They create a satisfying snack. It feels like a treat from nature’s pantry. Rolled oats give a hearty base. Chopped nuts and dried fruits add crunch and sweetness. They keep me energized all day. This no-bake method is simple. It lets me prepare a batch quickly. The bars support my active lifestyle with natural wholesomeness.
These bars fit seamlessly into my busy schedule. They offer a portable option for mid-morning boosts. Or try them for post-workout recovery. They reheat gently if needed. That brings back the fresh-from-the-kitchen feel. Their chewy texture draws me in. Customizable flavors appeal to my whole family. Each bar delivers about 6 grams of protein. It comes from oats, nuts, and nut butter. This helps me meet daily goals without supplements.
Why We Love This Recipe
- Simple No-Bake Prep: I assemble these homemade protein bars without protein powder in just 15 minutes. I use basic pantry staples for effortless snacking.
- Customizable Flavors: I swap in my preferred nuts and fruits to tailor the taste. Every batch becomes uniquely appealing to my preferences.
- Natural Energy Boost: Oats and nut butter provide sustained fuel. Each bar offers 6 grams of protein from whole food sources.
- Family-Friendly Appeal: These chewy treats satisfy my picky eaters. They deliver wholesome nutrition in a grab-and-go format.
Ingredients to Make Homemade Protein Bars Without Protein Powder
These ingredients come together effortlessly. They create chewy, nutrient-dense bars. Natural flavors and textures shine through. This elevates a simple snack. It becomes something substantial. High-quality nuts and fruits ensure better taste. They add nutrition too. Each serving delivers roughly 6 grams of protein. It comes mainly from oats, nut butter, and chopped nuts.
- Rolled oats – They form the hearty, fiber-rich base. This gives the bars satisfying chew. Oats contribute natural protein too.
- Peanut butter – It acts as the creamy binder. Peanut butter adds moisture and richness. I swap with almond butter for milder nutty profile.
- Honey – It sweetens naturally. Honey helps everything stick together. I use maple syrup as a vegan alternative for similar results.
- Chopped nuts – They add crunch and extra protein. I choose almonds for subtle toastiness. Or walnuts for omega-3 benefits.
- Dried fruits – They bring chewy sweetness and antioxidants. I opt for raisins to keep it classic. Or cranberries for a tart twist.
- Vanilla extract – It enhances overall warmth and aroma. Vanilla doesn’t overpower the other elements.
- Salt – It balances the sweetness subtly. I include it if my nut butter is unsalted. This creates better flavor harmony.
Each serving of these homemade protein bars without protein powder contains approximately 220 calories. It has 6g protein, 25g carbohydrates, 3g fiber, 12g fat, and 12g sugar.
How to Make Homemade Protein Bars Without Protein Powder
Step 1: Prepare the baking dish
I line an 8×8-inch baking dish with parchment paper. I allow some overhang for easy removal later. This prevents sticking. It also simplifies cleanup after the mixture sets.
Step 2: Mix the dry ingredients
In a large bowl, I combine the rolled oats. I add chopped nuts and dried fruits. I mix them thoroughly. Every piece gets evenly distributed. This creates a balanced base. It’s full of texture and natural goodness. Then, I add the wet components.
Step 3: Warm the wet mixture
Over low heat in a saucepan, I gently warm the peanut butter and honey. I stir constantly until smooth. The mixture blends fully. Then, I remove from heat. I stir in the vanilla extract and salt. This enhances flavor depth.
Step 4: Combine everything
I pour the warm peanut butter mixture over the dry ingredients. It’s in the bowl. Then, I stir vigorously. All the oats, nuts, and fruits get evenly coated. This ensures the bars hold together well. Once pressed, they’re ready.
Step 5: Press and chill
I transfer the combined mixture to the prepared baking dish. Then, I press it down firmly. I use a spatula or my hands. This creates an even layer about one inch thick. Next, I refrigerate for at least two hours. The bars firm up completely. They’re ready for clean slicing.
Step 6: Cut and store
Once chilled, I lift the slab out. I use the parchment overhang. Then, I cut it into 12 equal bars. A sharp knife works best for uniform portions. Finally, I store them in an airtight container. Keep in the fridge to maintain freshness.
Pro Tips for Success
- Room Temperature Start: I bring all ingredients to room temperature first. This ensures the peanut butter and honey blend smoothly. No lumps form in the no-bake process.
- Firm Pressing Technique: I use the back of a measuring cup. It presses the mixture evenly into the dish. This helps achieve compact bars. They won’t crumble when cut.
- Protein Boost Option: I incorporate a handful of seeds. Try chia or hemp in the dry mix. This increases protein beyond the natural 6 grams per bar. It supports fitness better.
- Flavor Customization: I experiment with different nut butters. Or add a pinch of cinnamon to the wet mixture. This varies tastes while keeping the wholesome profile intact.
How to Serve Homemade Protein Bars Without Protein Powder
Garnishes
I like to sprinkle a light dusting of unsweetened coconut flakes. Or add a few extra chopped nuts on top. Do this right after cutting. It adds texture. This complements the bars’ chewiness. It doesn’t overwhelm the natural nutty essence.
Side Dishes
I pair these bars with fresh apple slices. Or a small serving of Greek yogurt. This creates a balanced mid-afternoon snack. It enhances their subtle sweetness. Plus, it provides contrasting crispness. This goes well with the soft interior.
Creative Ways to Present
For a fun twist, I wrap individual bars in parchment paper. I tie with twine. This makes them portable for lunchboxes. Or I layer them in a clear container. I add fresh berries between. This creates a vibrant, shareable treat. It highlights their golden hue.
Make Ahead and Storage
Storing Leftovers
I find it easiest to keep these bars in a single layer. Place inside an airtight container. Store in the refrigerator. They stay fresh and flavorful for up to one week. This maintains their chewy texture. They don’t dry out.
Freezing
To extend their life, I wrap each bar individually. Use plastic wrap. Then place in a freezer-safe bag. This allows storage for up to two months. The method preserves the nuts’ crunch. Enjoy them later as needed.
Reheating
I recommend letting the bars thaw at room temperature. Do this for about 30 minutes before eating. It restores their soft chew. Or warm briefly in the microwave. Try 10-15 seconds if you prefer softer feel. Cover with a damp paper towel. This avoids any edge drying.
Print
Homemade Protein Bars Without Protein Powder
- Prep Time: 15 minutes
- Cook Time: 0 minutes
- Total Time: 2 hours 15 minutes
- Yield: 12 bars
- Category: Snacks
- Method: No-Bake
- Cuisine: American
- Diet: Vegan
Description
Simple and nutritious homemade protein bars made without protein powder, using natural ingredients like oats, nuts, and nut butter for a healthy snack.
Ingredients
- 2 cups rolled oats
- 1 cup peanut butter (or almond butter)
- 1/2 cup honey or maple syrup
- 1/2 cup chopped nuts (almonds or walnuts)
- 1/2 cup dried fruits (raisins or cranberries)
- 1 teaspoon vanilla extract
- 1/4 teaspoon salt (optional)
Instructions
- Line an 8×8 inch baking dish with parchment paper.
- In a large bowl, mix together the oats, chopped nuts, and dried fruits.
- In a saucepan over low heat, warm the peanut butter and honey until smooth, stirring constantly. Remove from heat and add vanilla extract and salt.
- Pour the peanut butter mixture over the dry ingredients and stir until well combined.
- Press the mixture firmly into the prepared baking dish.
- Refrigerate for at least 2 hours until firm.
- Cut into bars and store in an airtight container in the fridge.
Notes
- Customize with your favorite nuts and fruits for variety.
- These bars are best stored in the refrigerator and last up to a week.
- For a no-bake option, ensure all ingredients are at room temperature to mix easily.